The driver seat belt in my 92 EX didn't retract all the way and would tend to lay in the door opening unless I consciously placed it on the seat behind me or on the floor. I hate when the door closes on the buckle and dents and damaged the paint on the door opening. So I decided to see if I could increase the tension on the retracting spring.
Needed:
10 mm socket
12 mm socket
XX mm socket (I forgot to note the size of the bolt head that mounts the bottom of the seat belt retracter)
Phillips screwdriver
Small diameter awl
I was working on a coupe. In order to gain access to the retractor; remove the rear seat upper and lower cushions, then remove the quarter panel lining.
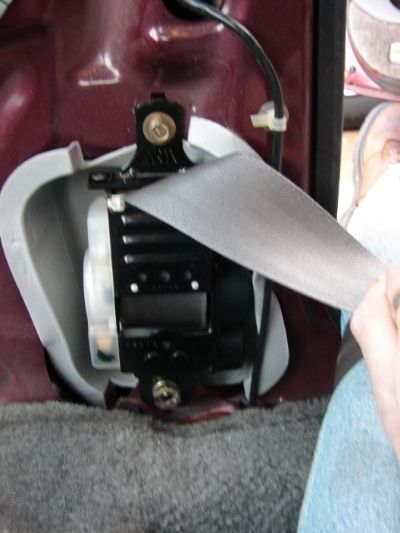
Remove the top bolt (10 mm). Undo the bottom bolt (XX mm), it will remain attached to the retractor.
The spring assembly is located under the black cover (yes, the one that says "Caution Do Not Remove"). The cover is retained by small black clips with a pin in the middle similar to what is used to hold the bumper cover to the beam, the fender liners, and the bottoms of the side skirts. Using the awl, push the pins out (be careful, they let go suddenly and I had one shoot off into the trunk).
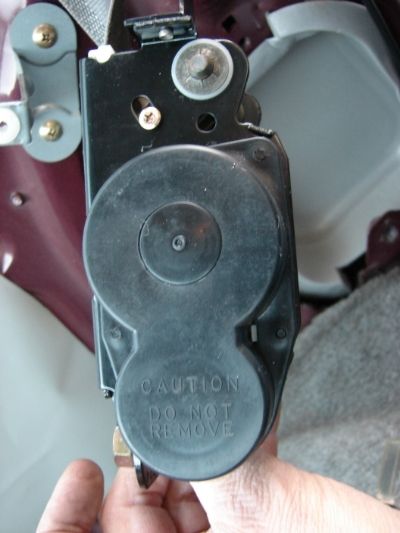
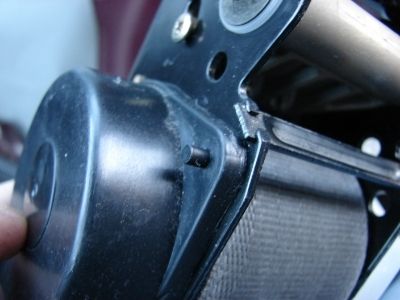
I wound up taking the whole spring assembly off the side of the retracter; the spring completely retracted within the housing. Push in the two little white clips between the two round portions of the black cover to gain access to the spring.
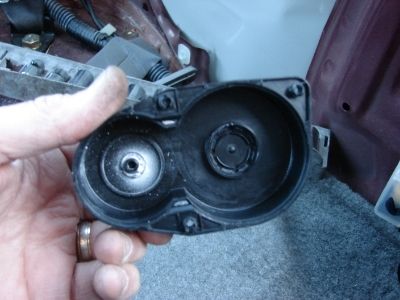
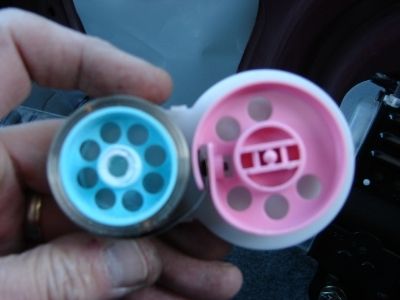
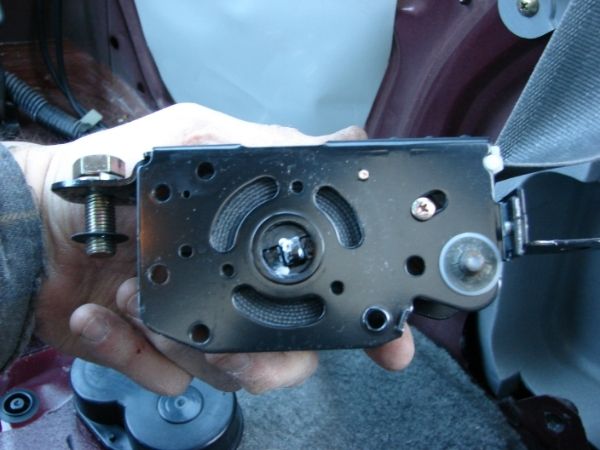
To rewind the spring, I wound as much of the seat belt onto the spool as I could, then installed the spring assembly (there is a rectangular hole in the back of the pink spool) on the retracter. I then pulled the belt out to wind the spring onto the pink spool. When I had all the belt out, there was still a fair amount of spring on the blue spool. Carefully grasp the spring assembly to prevent either spool from moving (an assistant would be helpful), then wind about half of the belt back onto the spool, leaving the rectangular drive in the correct orientation to match the pink spool. Reinstall the spring assembly. With the belt pulled all the way out again, I still had a few turns of the spring on the blue spool. Whatever you do, there should always be at least one turn of the spring still on the blue spool with the belt pulled all the way out.
Assembly is the reverse of disassembly. Hold the spring assembly against the retracter bracket while putting the black cover over it. Push the three small black pins into their holes to retain the spring assembly and cover. Make sure the white barbs of the spring assembly engage slots of the cover.
Re-install the retracter.
Re-install the side panel and seat.
UPDATE: April 27, 2015 Well, after going through all this, I have been driving the coupe the last couple days and it doesn't seem to have made much difference, the belt still doesn't want to retract well. I'll leave the DIY here in case someone needs to take one apart to replace a belt, untwist a belt, etc.
Needed:
10 mm socket
12 mm socket
XX mm socket (I forgot to note the size of the bolt head that mounts the bottom of the seat belt retracter)
Phillips screwdriver
Small diameter awl
I was working on a coupe. In order to gain access to the retractor; remove the rear seat upper and lower cushions, then remove the quarter panel lining.

Remove the top bolt (10 mm). Undo the bottom bolt (XX mm), it will remain attached to the retractor.
The spring assembly is located under the black cover (yes, the one that says "Caution Do Not Remove"). The cover is retained by small black clips with a pin in the middle similar to what is used to hold the bumper cover to the beam, the fender liners, and the bottoms of the side skirts. Using the awl, push the pins out (be careful, they let go suddenly and I had one shoot off into the trunk).


I wound up taking the whole spring assembly off the side of the retracter; the spring completely retracted within the housing. Push in the two little white clips between the two round portions of the black cover to gain access to the spring.


To rewind the spring, I wound as much of the seat belt onto the spool as I could, then installed the spring assembly (there is a rectangular hole in the back of the pink spool) on the retracter. I then pulled the belt out to wind the spring onto the pink spool. When I had all the belt out, there was still a fair amount of spring on the blue spool. Carefully grasp the spring assembly to prevent either spool from moving (an assistant would be helpful), then wind about half of the belt back onto the spool, leaving the rectangular drive in the correct orientation to match the pink spool. Reinstall the spring assembly. With the belt pulled all the way out again, I still had a few turns of the spring on the blue spool. Whatever you do, there should always be at least one turn of the spring still on the blue spool with the belt pulled all the way out.
Assembly is the reverse of disassembly. Hold the spring assembly against the retracter bracket while putting the black cover over it. Push the three small black pins into their holes to retain the spring assembly and cover. Make sure the white barbs of the spring assembly engage slots of the cover.
Re-install the retracter.
Re-install the side panel and seat.
UPDATE: April 27, 2015 Well, after going through all this, I have been driving the coupe the last couple days and it doesn't seem to have made much difference, the belt still doesn't want to retract well. I'll leave the DIY here in case someone needs to take one apart to replace a belt, untwist a belt, etc.


Comment