Not too long ago my condenser rotted away causing all of my r134 gas to leak right out of it. I figured I would replace it and get my A/C working again!
I AM NOT RESPONSIBLE FOR ANY DAMAGE YOU IMPOSE ON YOUR VEHICLE WHILE DOING THIS!
MAKE SURE YOUR VEHICLE HAS COOLED OFF BEFORE PERFORMING THIS!
Tools needed:
Ratchet
6"extension
12mm socket
10mm socket
10mm wrench
Philips head screw driver
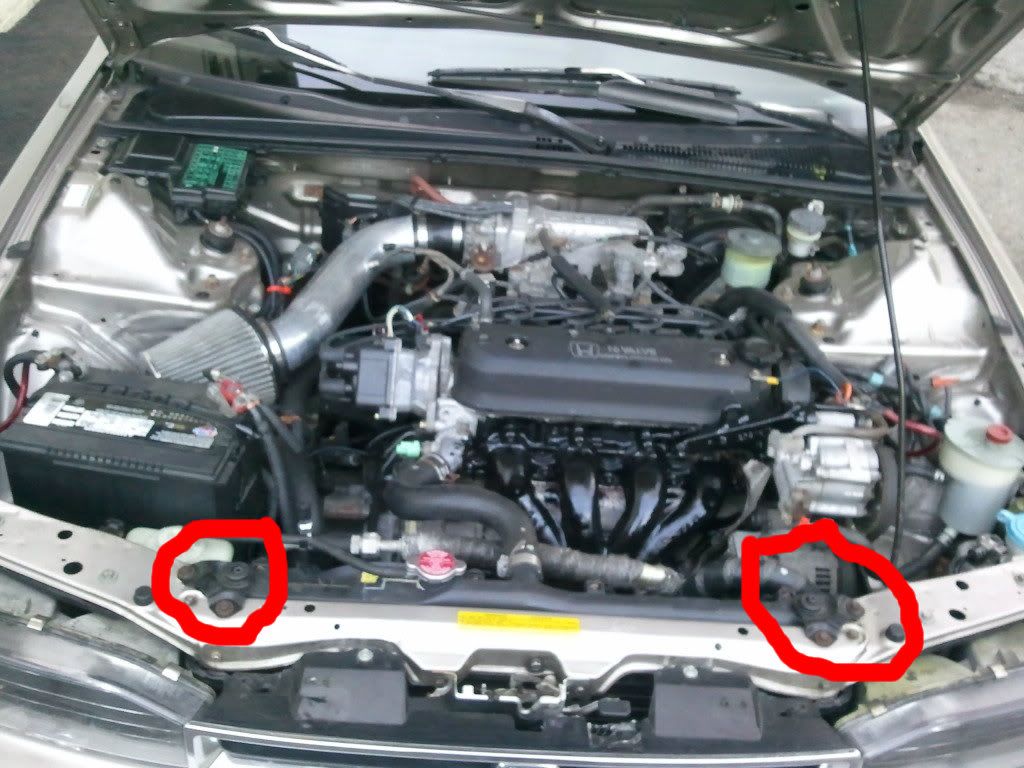
First off, start by taking of the radiator brackets. These are held on by 2 10mm bolts. They are the two brackets circled in red
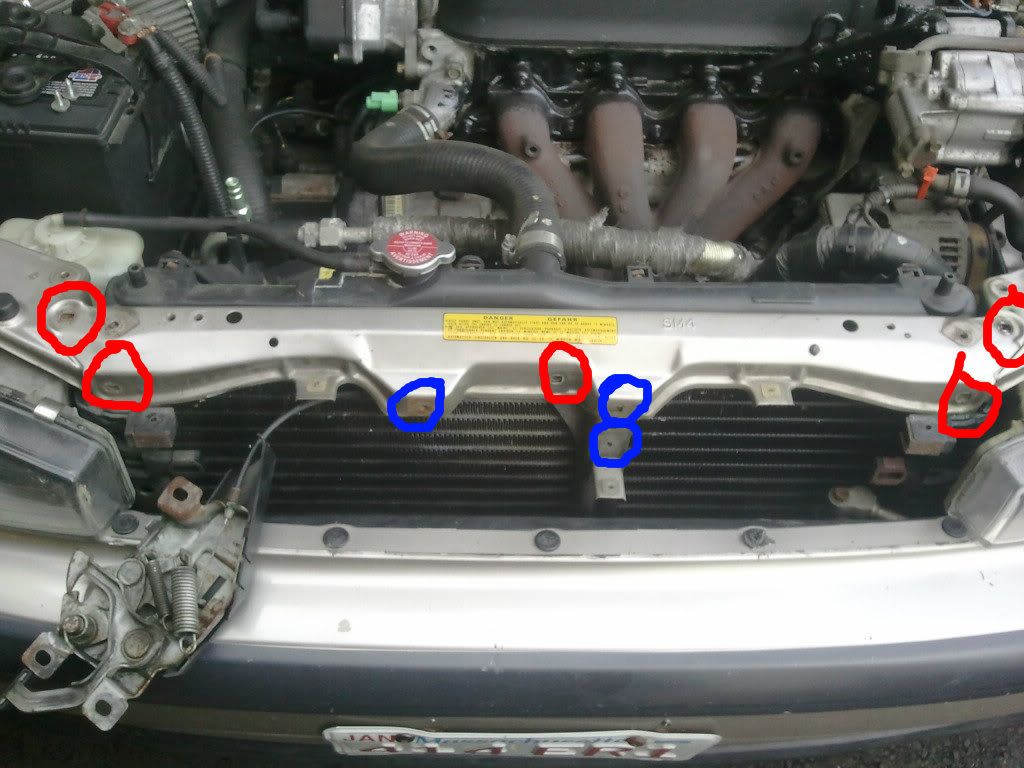
Once these are off, you can start removing the hood latch. It is held in with 3 bolts which are circled in blue. You must remove this before removing the radiator support piece which is held in by 5 bolts circled in red. Once these are both removed, put them to the side. You don't need to remove the latch cable, it should be long enough to just put off where the cruise control is/would be.
Now that the radiator support is out of the way, there is 2 nuts on the condenser that hold it down. to get to these I had to use a wrench because I couldn't get my socket behind the light. The two nuts are the ones circled in red.
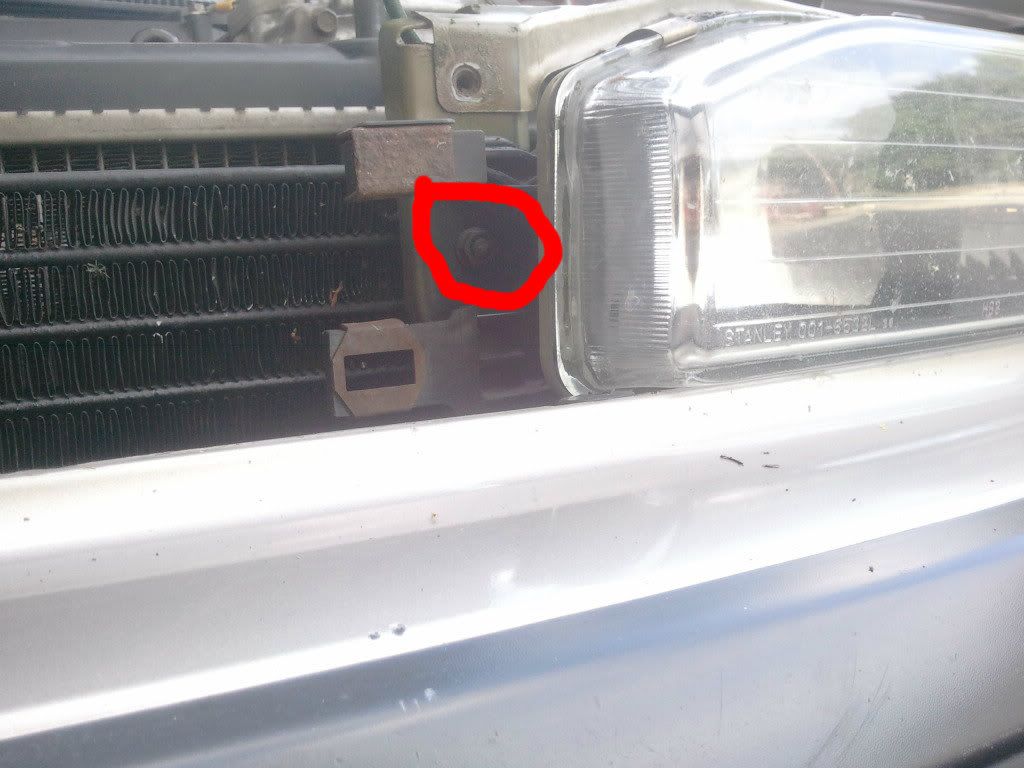
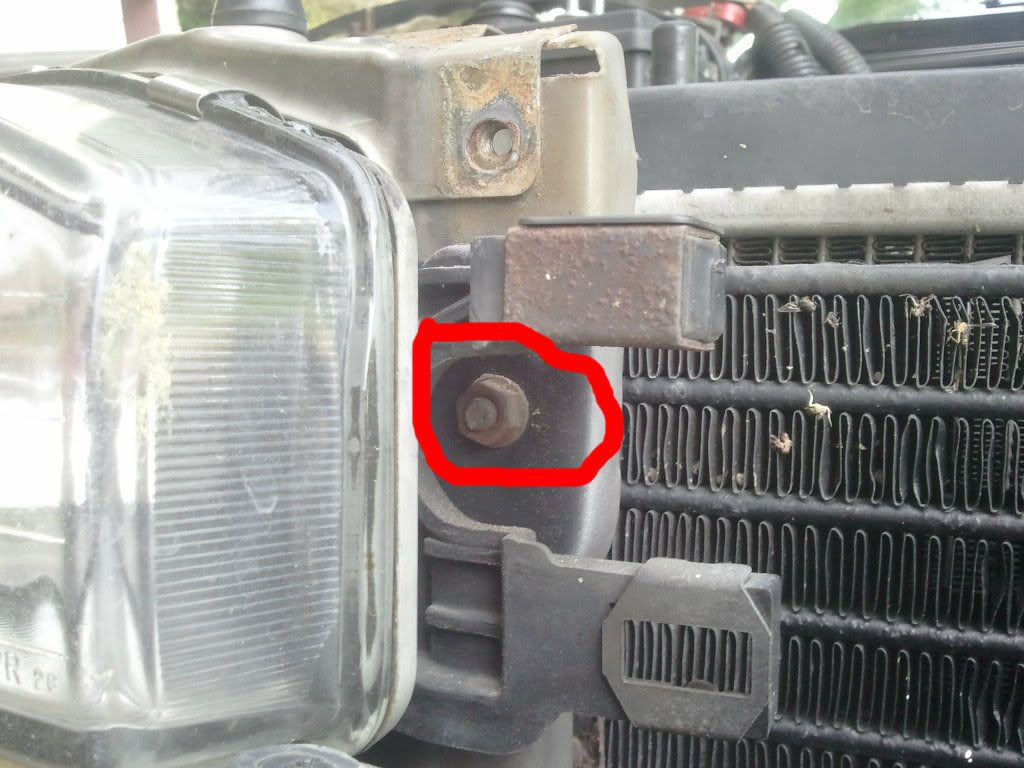
Once those 2 nuts are removed, you will need to remove the 2 lines going into it. The top one is a 12mm bolt, and the bottom one is a 10mm bolt
This is a picture of the top one once I removed the bolt. It is about halfway down the condenser so I used my 6" extension on this one.
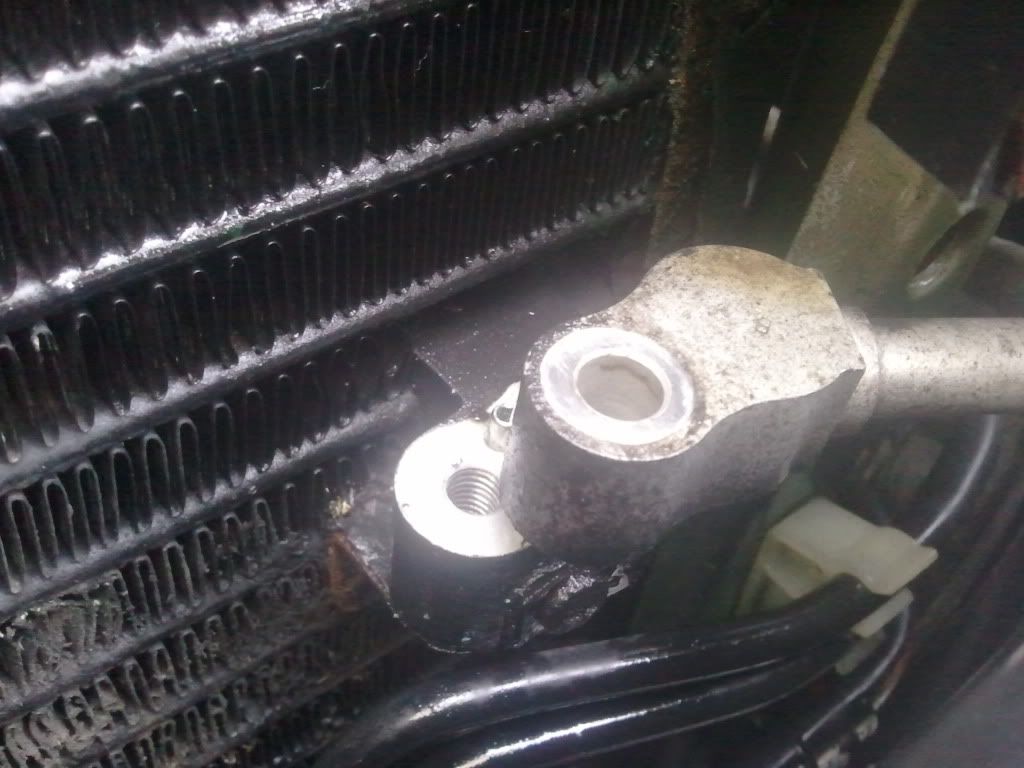
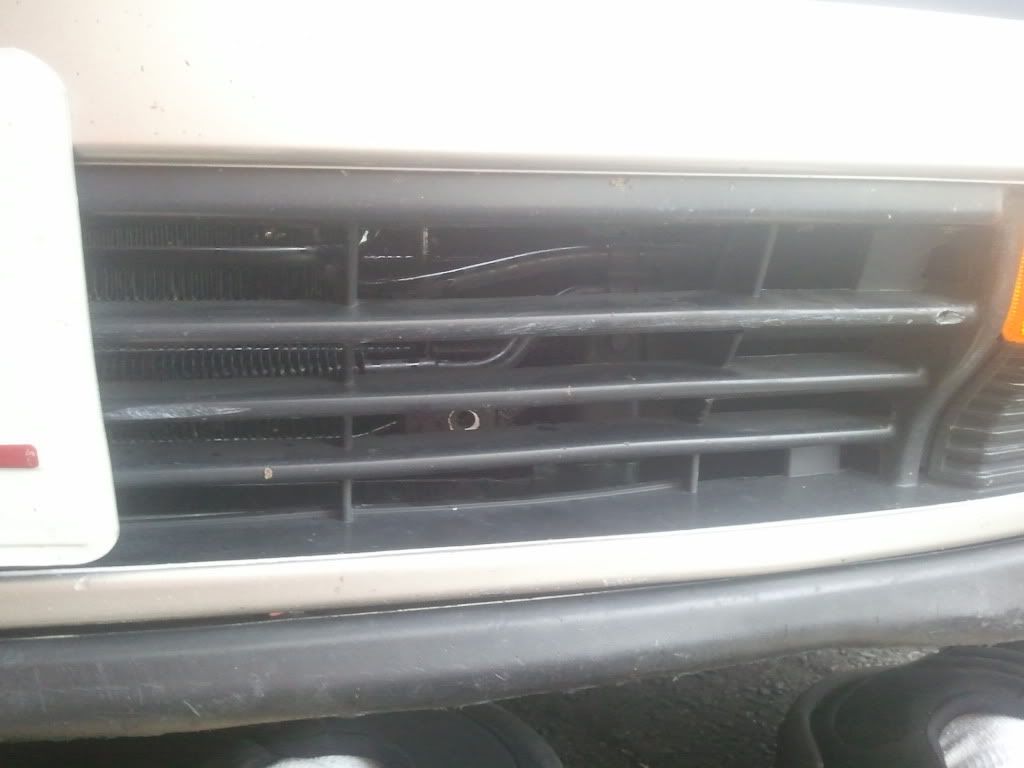
Here is a pic of the bottom one. I had to go through the bumper to be able to take this one out. I also used the 6" extension to remove this bolt as well.
You can sorta see the hole through my bumper
Once these lines are unbolted, move the top on to the side so you can pull up the condenser. Be sure to push the radiator a bit toward the engine so the condenser doesn't get stuck on it. After you get it out, install the new one and put everything back in reverse order. Good luck!
I AM NOT RESPONSIBLE FOR ANY DAMAGE YOU IMPOSE ON YOUR VEHICLE WHILE DOING THIS!
MAKE SURE YOUR VEHICLE HAS COOLED OFF BEFORE PERFORMING THIS!
Tools needed:
Ratchet
6"extension
12mm socket
10mm socket
10mm wrench
Philips head screw driver
First off, start by taking of the radiator brackets. These are held on by 2 10mm bolts. They are the two brackets circled in red

Once these are off, you can start removing the hood latch. It is held in with 3 bolts which are circled in blue. You must remove this before removing the radiator support piece which is held in by 5 bolts circled in red. Once these are both removed, put them to the side. You don't need to remove the latch cable, it should be long enough to just put off where the cruise control is/would be.

Now that the radiator support is out of the way, there is 2 nuts on the condenser that hold it down. to get to these I had to use a wrench because I couldn't get my socket behind the light. The two nuts are the ones circled in red.


Once those 2 nuts are removed, you will need to remove the 2 lines going into it. The top one is a 12mm bolt, and the bottom one is a 10mm bolt
This is a picture of the top one once I removed the bolt. It is about halfway down the condenser so I used my 6" extension on this one.

Here is a pic of the bottom one. I had to go through the bumper to be able to take this one out. I also used the 6" extension to remove this bolt as well.
You can sorta see the hole through my bumper

Once these lines are unbolted, move the top on to the side so you can pull up the condenser. Be sure to push the radiator a bit toward the engine so the condenser doesn't get stuck on it. After you get it out, install the new one and put everything back in reverse order. Good luck!


Comment