I had the very same idea ever since the R8 came out. I think the problem with the LED is the design perhaps, it seems like the LEDs are being run in a series, so they dim towards the end. Maybe a better LED design.
Announcement
Collapse
No announcement yet.
Mini blinds angel eyes
Collapse
X
-
sick those look asomeMy 90 Civic Hatchback.
Check it out and leave a comment.
http://www.cb7tuner.com/vbb/showthread.php?t=194295
Comment
-
Very creative.
I wonder about the legality of having blue/white LEDs a turn signals, however; I'm sure the local law enforcement would have a field day. It'd be a shame to see someone cited with all the hard work put into the project.Former: 90 Accord EX Coupe, 93 10th Anniversary in Frost White
1985 Volvo 245 manual [IPD lowering springs, IPD sway bars, OEM Virgo wheels, 1977 quad round headlights, 1978 grill]
2001 Mazda B3000 SE 4x4 extended cab [stock except for CB radio]
2008 Ford Escape XLT [bone stock]
2015 Toyota Prius Three with solar roof [rear diffuser, Vision Cross wheels... cheaper than steelies!]
Comment
-
Yah, the LEDs run in series. Both LEDs, of course have proper voltage and current, so I'm not sure if there's much to be gained by running a different style circuit. Uhh.. I'll double check the voltage at each LED tho, thanks for the suggestion. Now that I think about it, I only took the voltage for granted before, so yeah, I'll check that.Originally posted by ikayto View PostI had the very same idea ever since the R8 came out. I think the problem with the LED is the design perhaps, it seems like the LEDs are being run in a series, so they dim towards the end. Maybe a better LED design.
Originally posted by 4cc0rdcb3 View PostReminds me of the lights on the new Audi A4, looks really good Originally posted by AcEr View Postsick those look asome
Thanks, hopefully I'll be able to work out the quirks and get them lit properly. And yeah, Audi's lights were the inspiration.
hahaha I hope I do get some requests, I'll keep it in mind. Shoot, if I did sell these, I'd better make them perfect first. I should keep at it.Originally posted by Joshs92ex View PostI can't wait to see these completed.
FYI, you'll probably have a lot of resquests.
So, start thinking about pricing.

Yeah, I probably would stay away from having them flash. Not just for cops, but between the corner and bumper lights, I think the stock lights are sufficient. If anything, I might have the LEDs light up a rod in the corner light housing, but have constant light, rather than flashing light.Originally posted by ACCORDianate View PostVery creative.
I wonder about the legality of having blue/white LEDs a turn signals, however; I'm sure the local law enforcement would have a field day. It'd be a shame to see someone cited with all the hard work put into the project.
Updates, I tried cutting deeper cuts further away from the two LEDs, and it seems like that works.
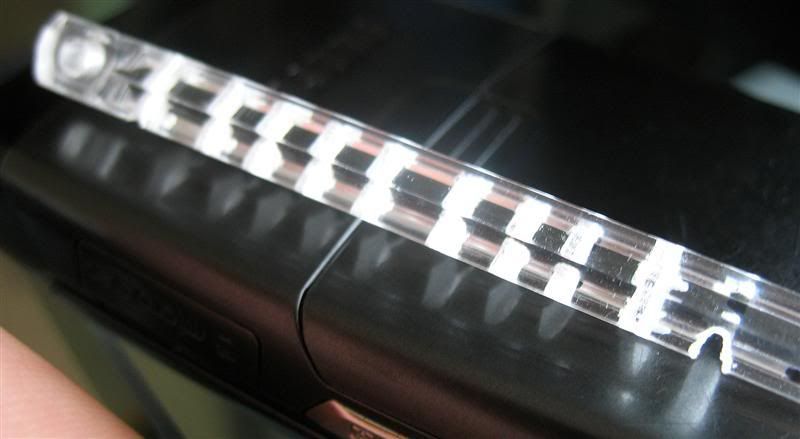
The cuts shown are about 8" away from the LED. Making more cuts would really show if deeper cuts, further away from the LEDs works. I'll try it if I have to, but for now, I've got another idea.
Along the lines of what some people were saying earlier, I think I might have a way of incorporating a third LED. This time, I would cut the rod out of a sheet of acrylic, so that I have more shape options. What I'm thinking of is having a little stub extend out horizontally at the 90 degree bend. I'd stick another LED in it and cover it up with heat shrink. We'll see if it works, hopefully I'll give it a try tomorrow.
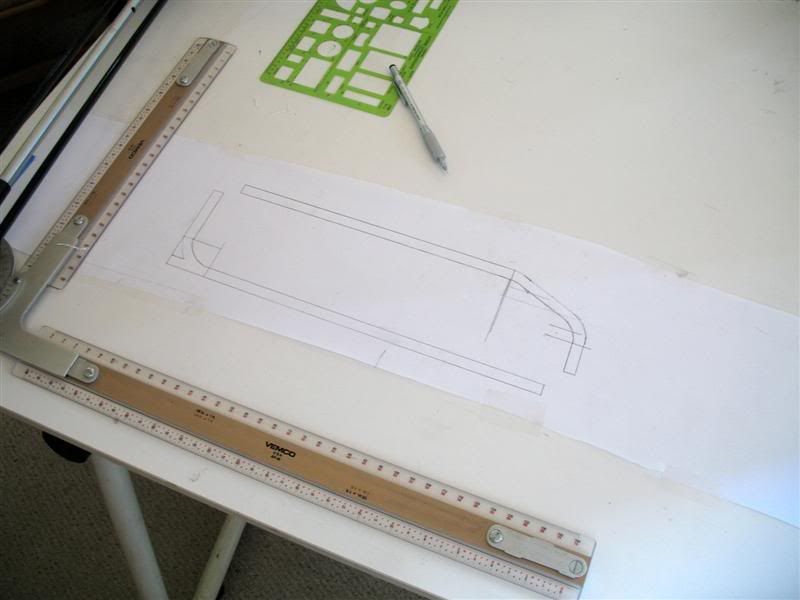
I made a sketch, only to realize that its too big to print out on a 1:1 scale by printer.
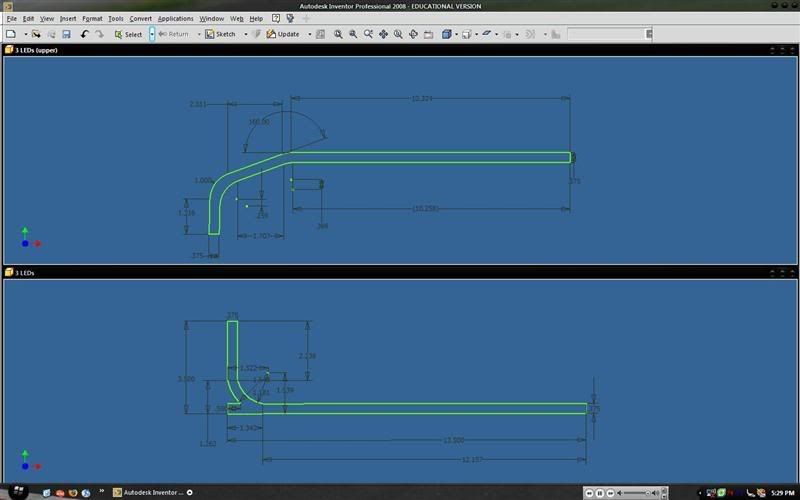
The upper diagram is a sketch of what I want to have along the top of the headlight. I'm assuming I'll run into the same dimness problem, since I'm only planning to use two LEDs right now. I'll deal with that problem when I come to it. The horizontal part is 13.5" long, so my inkjet's not going to be able to handle it. Also, I don't think kinkos can handle .ipt format.
So, I made an actual 1:1 sketch. I'll tape it onto the acrylic and use a jigsaw to cut it out. Figures I'd think of it just after the school quarter ends and I lose access to the design lab's lasercamm. Regadless, you can see the stub that I was referring to. Hopefully it'll house an LED that can get rid of that stupid dimness. We'll find out.
Comments always welcome!
Comment
-
so im guessing youre using 5 LEDs? you could always black-paint over that little extension tab to hide the LED and its hot-spot.
the design looks really cool, so youre planning to highlight around the whole outside of the lense? sorta like one large angle eye around the entire headlight.
i wonder how well the acrylic is going to work, a jigsaw is goign to hack that up pretty good, its not going to leave a polished edge like the curtain rod has.
- 1993 Accord LX - White sedan (sold)
- 1993 Accord EX - White sedan (wrecked)
- 1991 Accord EX - White sedan (sold)
- 1990 Accord EX - Grey sedan (sold)
- 1993 Accord EX - White sedan (sold)
- 1992 Accord EX - White coupe (sold)
- 1993 Accord EX - Grey coupe (stolen)
- 1993 Accord SE - Gold coupe (sold)
Current cars:
- 2005 Subaru Legacy GT Wagon - Daily driver
- 2004 Chevrolet Express AWD - Camper conversion
Comment
-
I apologize for the delay, work + school is taking a lotta time.
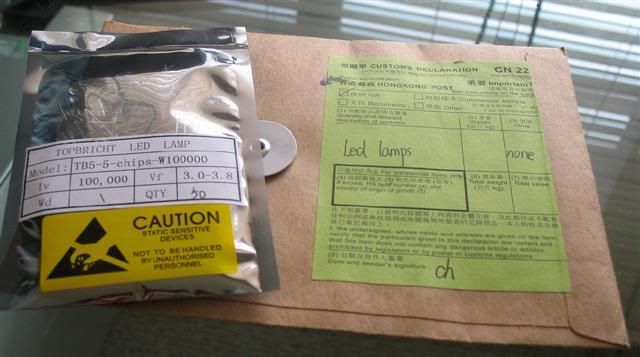
Also, I'm waiting on a 50-count package of LEDs. Supposedly 100k mcd, 60 degree LEDs. I'm excited, but I'm kinda reserved. It seems a little to good to be true, and I just found out their being shipped from Hong Kong. No offense to China, but I've been gypped by chinese internet purchases before.
Whatever though, they're not here yet. No need to pass judgment, I'm definitely looking forward to receiving them!
Comment
-
This is one of the coolest diys in the making. Good job & keep it coming!Originally posted by TheNextEpisode View PostYah, the LEDs run in series. Both LEDs, of course have proper voltage and current, so I'm not sure if there's much to be gained by running a different style circuit. Uhh.. I'll double check the voltage at each LED tho, thanks for the suggestion. Now that I think about it, I only took the voltage for granted before, so yeah, I'll check that.
Thanks, hopefully I'll be able to work out the quirks and get them lit properly. And yeah, Audi's lights were the inspiration.
hahaha I hope I do get some requests, I'll keep it in mind. Shoot, if I did sell these, I'd better make them perfect first. I should keep at it.
Yeah, I probably would stay away from having them flash. Not just for cops, but between the corner and bumper lights, I think the stock lights are sufficient. If anything, I might have the LEDs light up a rod in the corner light housing, but have constant light, rather than flashing light.
Updates, I tried cutting deeper cuts further away from the two LEDs, and it seems like that works.

The cuts shown are about 8" away from the LED. Making more cuts would really show if deeper cuts, further away from the LEDs works. I'll try it if I have to, but for now, I've got another idea.
Along the lines of what some people were saying earlier, I think I might have a way of incorporating a third LED. This time, I would cut the rod out of a sheet of acrylic, so that I have more shape options. What I'm thinking of is having a little stub extend out horizontally at the 90 degree bend. I'd stick another LED in it and cover it up with heat shrink. We'll see if it works, hopefully I'll give it a try tomorrow.
I made a sketch, only to realize that its too big to print out on a 1:1 scale by printer.

The upper diagram is a sketch of what I want to have along the top of the headlight. I'm assuming I'll run into the same dimness problem, since I'm only planning to use two LEDs right now. I'll deal with that problem when I come to it. The horizontal part is 13.5" long, so my inkjet's not going to be able to handle it. Also, I don't think kinkos can handle .ipt format.
So, I made an actual 1:1 sketch. I'll tape it onto the acrylic and use a jigsaw to cut it out. Figures I'd think of it just after the school quarter ends and I lose access to the design lab's lasercamm. Regadless, you can see the stub that I was referring to. Hopefully it'll house an LED that can get rid of that stupid dimness. We'll find out.

Comments always welcome!


Comment
-
Sorry for the delay, time for some updates!
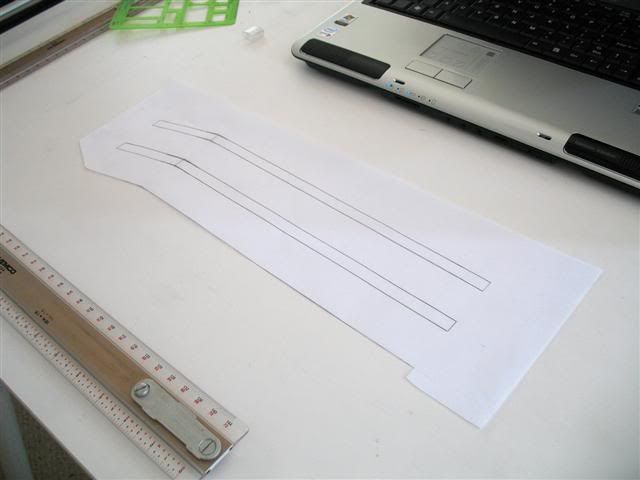
Straying completely from the title of the thread, I wanted to try messing with a sheet of acrylic. Rather than notching the acrylic, like I did with the mini blinds rods, I thought I'd try something more Audi-like.
New brain wave:
And positioned:
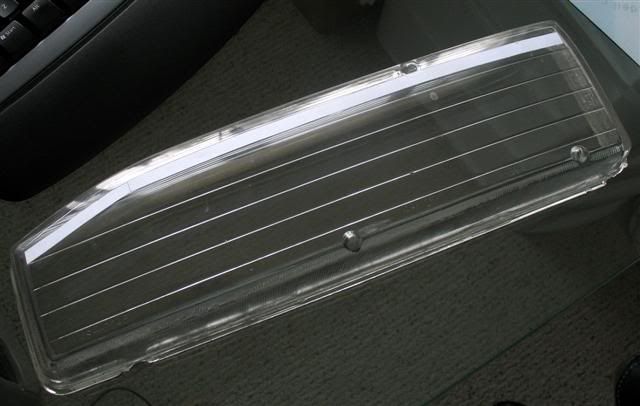
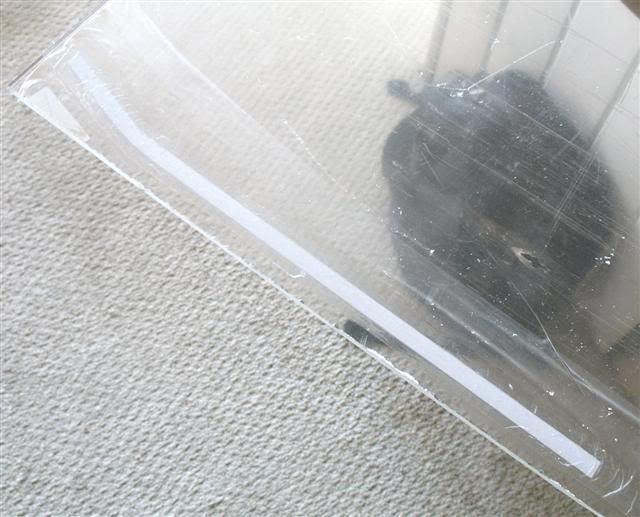
I glued the stencil on a piece of acrylic and then used a jigsaw to cut it out. I thought I would need to sand it to smooth out the cuts, but the jigsaw cut it really cleanly.
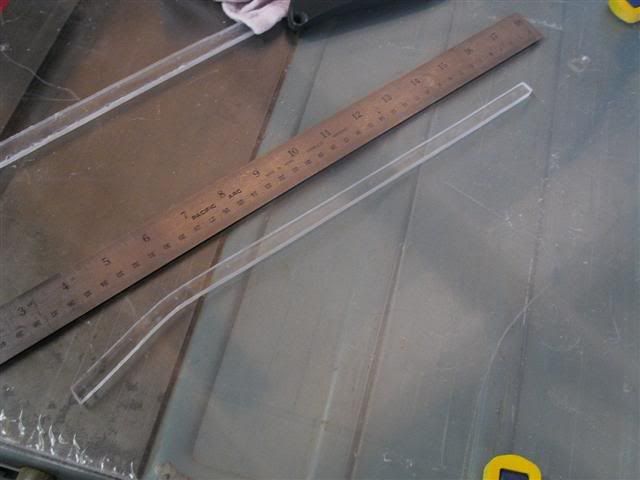
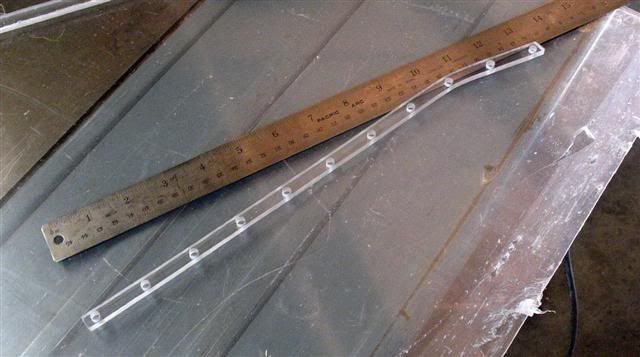
I then drilled eleven holes for outward facing LEDs. Turns out that a 13/64ths drill bit is about .006" larger than a 5 mm LED, so the holes made for a pretty snug fit on the LEDs. A dot of super glue held them in.
I also received new LEDs. They’re rated at 100k mcd @ a 60 degree viewing angle. They’re a hell of a lot brighter than the 18k mcd LEDs that I was using before, and the increased viewing angle is great.
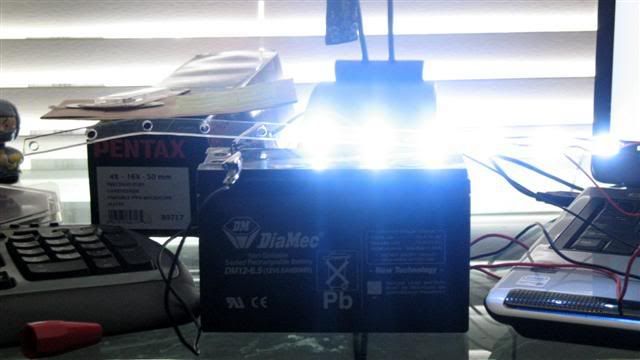
50% of soldering and gluing done
Sometime later that night
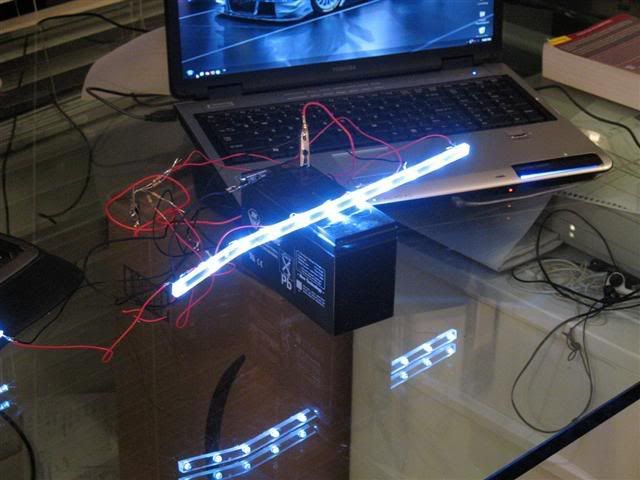
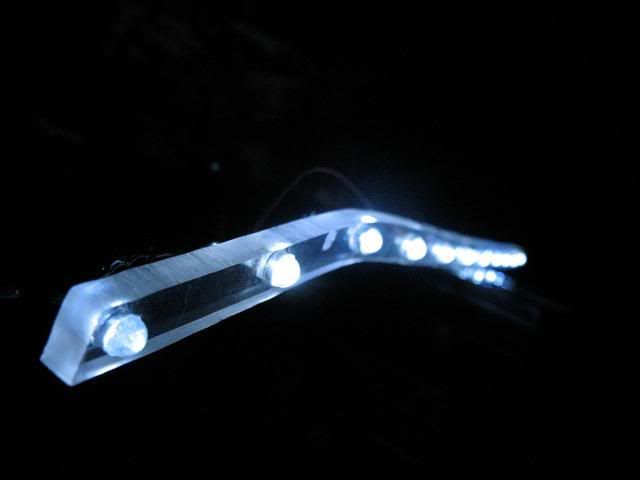
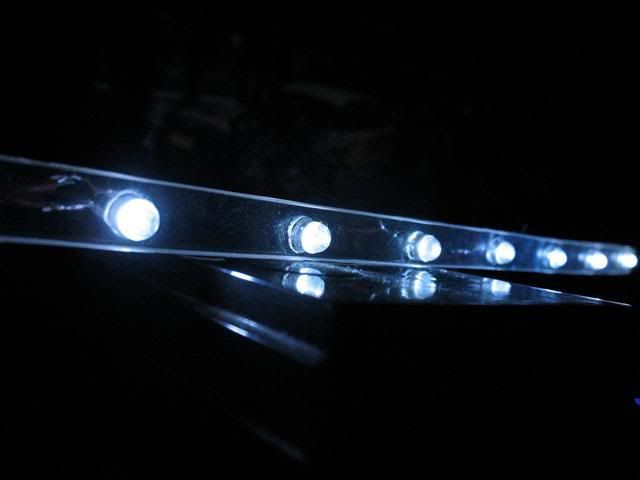
And head on:

I’m very pleased with the brightness, even during the day. I’m looking forward to making two more that will actually go in my headlights. I could use the one pictured above, but I didn't make it quite as clean as I’d like it to be. Also, I’m trying to figure out how I can hide the wiring, so any suggestions are welcomed.
Hell, all suggestions and comments are welcome!
edit: they're a lot whiter than that in person.Last edited by TheNextEpisode; 07-28-2008, 09:03 PM.
Comment
-
f'n sick man. great job so far

Click for my Member's Ride Thread
Eye Level Media - Commercial & Automotive Photography: www.EyeLevelSTL.comOriginally posted by Stephen Fry'It's now very common to hear people say, "I'm rather offended by that", as if that gives them certain rights. It's no more than a whine. It has no meaning, it has no purpose, it has no reason to be respected as a phrase. "I'm offended by that." Well, so fucking what?' Stephen Fry
Comment
-
Great work brightness looks consistent throughout.Originally posted by TheNextEpisode View PostSorry for the delay, time for some updates!
Straying completely from the title of the thread, I wanted to try messing with a sheet of acrylic. Rather than notching the acrylic, like I did with the mini blinds rods, I thought I'd try something more Audi-like.
New brain wave:

And positioned:

I glued the stencil on a piece of acrylic and then used a jigsaw to cut it out. I thought I would need to sand it to smooth out the cuts, but the jigsaw cut it really cleanly.


I then drilled eleven holes for outward facing LEDs. Turns out that a 13/64ths drill bit is about .006" larger than a 5 mm LED, so the holes made for a pretty snug fit on the LEDs. A dot of super glue held them in.

I also received new LEDs. They’re rated at 100k mcd @ a 60 degree viewing angle. They’re a hell of a lot brighter than the 18k mcd LEDs that I was using before, and the increased viewing angle is great.

50% of soldering and gluing done

Sometime later that night


And head on:

I’m very pleased with the brightness, even during the day. I’m looking forward to making two more that will actually go in my headlights. I could use the one pictured above, but I didn't make it quite as clean as I’d like it to be. Also, I’m trying to figure out how I can hide the wiring, so any suggestions are welcomed.
Hell, all suggestions and comments are welcome!
edit: they're a lot whiter than that in person.
Hiding the wires hmm, maybe perhaps paint the clear piece that the led attaches to a silver or chrome to match the housing. Then grab all the wiring and bunch them togetehr to make them parallel to each other going towards the left(if this is your driver side), just like spark plug wires.
edit: Are you placing these inside the housing or outside?Last edited by ikayto; 07-28-2008, 09:46 PM.
Comment
-
Thanks, yeah the brightness is pretty consistent. Unfortunately, some of the LEDs are a hint bluish, so I'll change those out for some whiter ones.
As for the wires, I was thinking something similar to what you mentioned about spark plug wires. I hadn't thought about painting the acrylic piece though, maybe I'll give that a shot on the extra set up pictured.
And the lights will go inside the housing, probably mounted with silicone caulking.
I just cut two more lengths of acrylic. The jigsaw worked great but the operator wasn't too hot this time. I got a couple gouges that I'll try and sand out tomorrow. Hopefully I'll get around to drilling the LED holes.
Comment


Comment