This is a Diy thread to install maplights in your cb7.I found mine off of a '96 accord ex, but Mike found his from an oddysey which are exactly like mine.Good luck and do at your own risk.Btw I have an Ex so I done my work through the opening in the headliner from the sunroof...Lx and Dx people might have to take your whole headliner off... 

Things you'll need:
-Maplights with factory plugin
-Around 7 ft of 20 ga wire
-4 electrical wire splices
-Electrical tape or shrink wrap ( your choice )
-Wire strippers
-Sharp carpenters knife or hobby knife
-black marker and a piece of paper
-Scissors
PHASE I
First off start by taking the trim off around the sunroof.
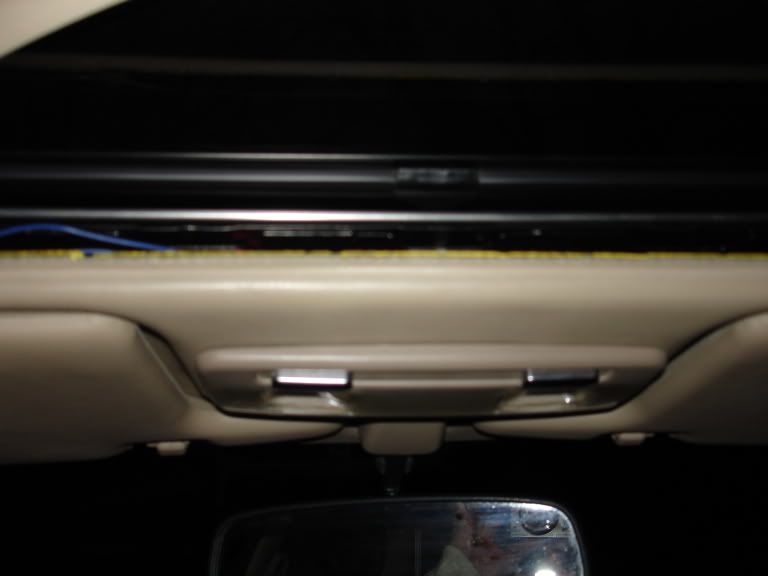
This tab is on the frontside of the sunroof, right behind the position you will be placing your maplights.
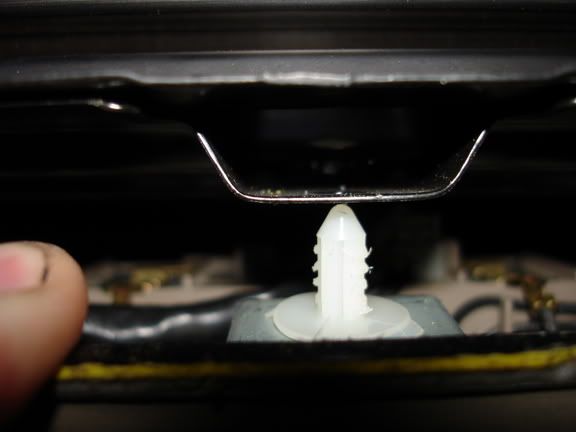
Pull down with some force right where this tab is at.Be careful not to be too forceful because the headliner can crack or break, very brittle.Once you pull the tab all the way out you can remove it by sliding it forward.This opens things up for you so that you may get in there to do any cutting with your hobby knife.
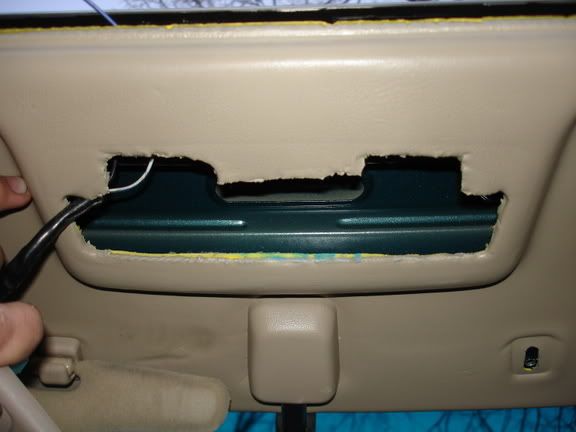
I was kind of amazed to see that there is a slight mold of where maplights could have gone.At least I think thats what it was, but you will see it in there.This is what I used for a guide to start cutting.Sticking my hobby knife between the headliner and the roof of the car.And occasionally rechecking the fitment to see if i need to trim more or not.
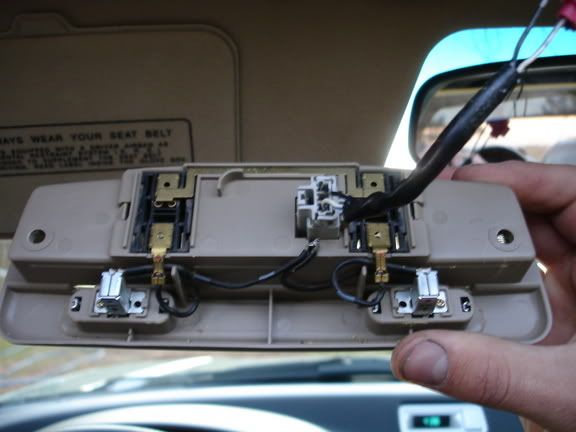
The other way you could do this is by tracing an outline of the map lights on a piece of paper and cutting the inside out.Then hold that outline up on the headliner and take your marker and trace the outline on to the headliner.This way you would be cutting your hole from the bottom apposed to cutting it from the top as I did.
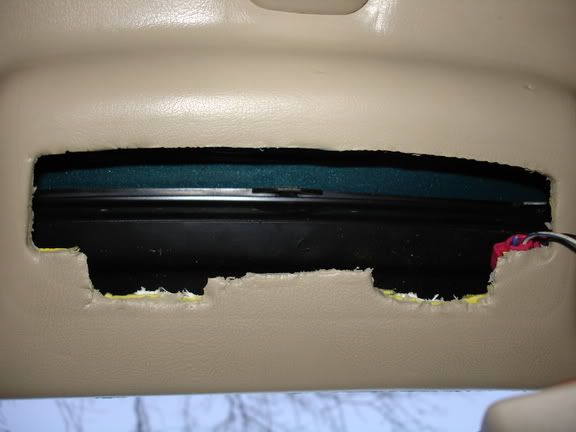
Cutting was very time consuming I thought, trying to get it just right, and being careful not to do a rush and ruin job.My hole looks ragged on the edges but thats all covered up with the map lights.Awful hard to cut the one material...Also I left my hole a smidge smaller than the maplights, that way they are held in there good. Because at the moment this is the only way you'll be able to hold them in until I figure out something better.But they dont fall out or shake at all on me.So I can't stress this enough leave your whole smaller than the map lights but just big enough to squeez them up in there.
PHASE II
Go to your old dome light and pry the clear cover off.You'll see that there are two nuts holding your dome light on.Remove these and your dome light will fall down showing the wires you will soon splice into.
Now that you've got your hole cut out, your maplights fit in there nice and snug, and your existing dome light removed, we can move on to wiring these babies up!
PHASE III
Get your wire and cut it in half.One half will be your ground and the other your positive,positive being WHITE with Blue stripe and your black obviously your ground..lol..I wired both of these directly to the existing dome light for a constant 12v.I did this by running the wires around the sunroof. I then spliced into the positive WHITE and blue wire and took the ground wire and wrapped it around the stud in which the existing dome light mounts to the roof.I made sure I wrapped the ground wire to the stud a good few times to be sure it wouldnt fall off when I began to mount the dome light back in.
Once you have all your wires connected give the map lights a test to make sure you have a good connection.You may have to hold the ground wire by the old dome light to the stud to insure a good ground. Once you stick your dome light in it will tighten that wire right up so no worries there.
Finished product...
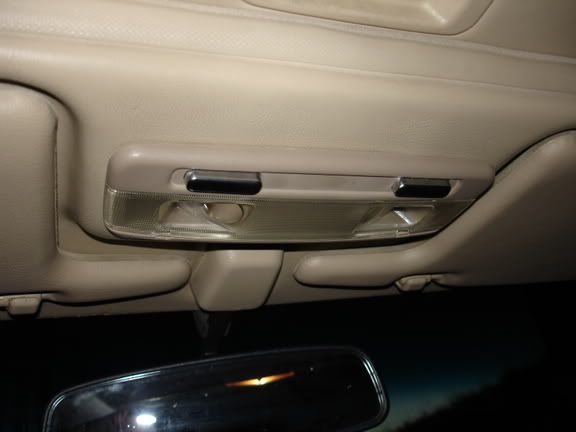
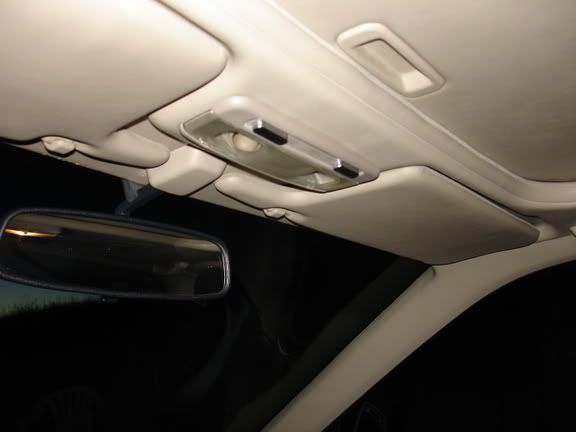
If you guys have any questions just shoot me a pm or post here and I'll be glad to help out with anything I may have missed.
-Josh


Things you'll need:
-Maplights with factory plugin
-Around 7 ft of 20 ga wire
-4 electrical wire splices
-Electrical tape or shrink wrap ( your choice )
-Wire strippers
-Sharp carpenters knife or hobby knife
-black marker and a piece of paper
-Scissors
PHASE I
First off start by taking the trim off around the sunroof.

This tab is on the frontside of the sunroof, right behind the position you will be placing your maplights.

Pull down with some force right where this tab is at.Be careful not to be too forceful because the headliner can crack or break, very brittle.Once you pull the tab all the way out you can remove it by sliding it forward.This opens things up for you so that you may get in there to do any cutting with your hobby knife.
I was kind of amazed to see that there is a slight mold of where maplights could have gone.At least I think thats what it was, but you will see it in there.This is what I used for a guide to start cutting.Sticking my hobby knife between the headliner and the roof of the car.And occasionally rechecking the fitment to see if i need to trim more or not.

The other way you could do this is by tracing an outline of the map lights on a piece of paper and cutting the inside out.Then hold that outline up on the headliner and take your marker and trace the outline on to the headliner.This way you would be cutting your hole from the bottom apposed to cutting it from the top as I did.

Cutting was very time consuming I thought, trying to get it just right, and being careful not to do a rush and ruin job.My hole looks ragged on the edges but thats all covered up with the map lights.Awful hard to cut the one material...Also I left my hole a smidge smaller than the maplights, that way they are held in there good. Because at the moment this is the only way you'll be able to hold them in until I figure out something better.But they dont fall out or shake at all on me.So I can't stress this enough leave your whole smaller than the map lights but just big enough to squeez them up in there.

PHASE II
Go to your old dome light and pry the clear cover off.You'll see that there are two nuts holding your dome light on.Remove these and your dome light will fall down showing the wires you will soon splice into.
Now that you've got your hole cut out, your maplights fit in there nice and snug, and your existing dome light removed, we can move on to wiring these babies up!
PHASE III
Get your wire and cut it in half.One half will be your ground and the other your positive,positive being WHITE with Blue stripe and your black obviously your ground..lol..I wired both of these directly to the existing dome light for a constant 12v.I did this by running the wires around the sunroof. I then spliced into the positive WHITE and blue wire and took the ground wire and wrapped it around the stud in which the existing dome light mounts to the roof.I made sure I wrapped the ground wire to the stud a good few times to be sure it wouldnt fall off when I began to mount the dome light back in.
Once you have all your wires connected give the map lights a test to make sure you have a good connection.You may have to hold the ground wire by the old dome light to the stud to insure a good ground. Once you stick your dome light in it will tighten that wire right up so no worries there.
Finished product...


If you guys have any questions just shoot me a pm or post here and I'll be glad to help out with anything I may have missed.

-Josh


 <<<<<<<<<<<<<<<<<<<<<<<<<<<<<<

 been a while...
 But after you stick it in, theres no turning back..haha..Good luck everyone!


Comment