If your high mileage CB7 driver door sags (like mine), check the play in the lower hinge. Open the door about a foot, then lift the back of the door to check how much play there is in the lower hinge. There was a lot in mine such that the door sagged, didn't hit the latch right, and I had wind noise from the upper rear corner. Note: Sedan front door hinges and coupe door hinges are identical. There are two different hinges per door, A and B; the letter is stamped on the hinge plate. On the left, hinge A is on the top, hinge B on the bottom; on the right side, hinge B is on the top, hinge A on the bottom. So if you need a new lower hinge on the driver side, get one from the passenger upper side - the passenger door is used less often so the hinge should be in better condition. Or buy one from Honda, when I checked they were still available.
I didn't try it (because I didn't need to), but it may be possible to replace the upper hinge as well without removing the fender. The upper bolt on the door looks tricky, but maybe with a 1/4 inch drive and a universal joint.
Tools needed:
Jack (this is easier to do with the wheel removed)
Lug wrench
Phillips screwdriver
3/8 ratchet
Long 3/8 extension
12 mm socket
12 mm box end wrench (a ratcheting box end would be handy)
Loosen the lug nuts, raise the wheel, remove the wheel
Remove the splash guard
Remove the grommets that hold the rear half of the fender liner, tuck the bottom end out of the way to expose the hinge.
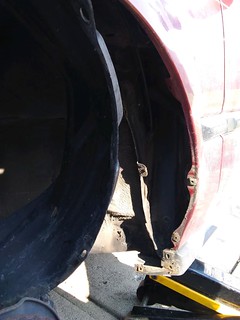 Hinge-Inner Fender by Paul Kemme, on Flickr
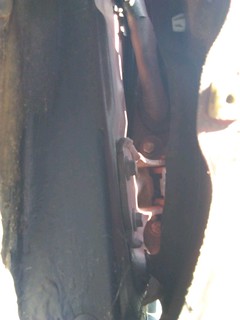 Hinge-Old by Paul Kemme, on Flickr
Use the box end wrench to remove the two hinge bolts to the body. Be careful - the edges of the fender are sharp - I cut myself twice trying to break these bolts free; finally used a cheater pipe on the end of the wrench to get leverage and get my hand away from the fender. Use the 12 mm socket and extension to remove the hinge to door bolts. To get to the bottom bolt, you have to snake the socket and extension at an angle from above. DO NOT OPEN THE DOOR with the hinge removed! You have to rotate the portion of the hinge that attaches to the door in order to maneuver the hinge out.
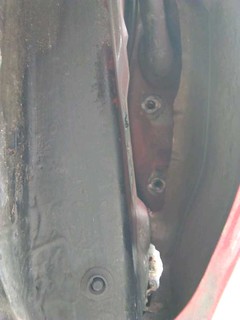 Hinge-Removed by Paul Kemme, on Flickr
Install the new hinge in reverse order. Once I had the hinge bolts in place, but not tightened yet, I opened the door and used some folded cardboard under the rear edge of the door to raise it to the proper height. With the body bolts no quite snug, push in on the lower portion of the door to get it aligned with the surface of the fender, then tighten the door bolts. For good measure, I placed a piece of 2x4 against the forward edge of the hinge plate and rapped it with a hammer to take up any slack, then tightened the body bolts.
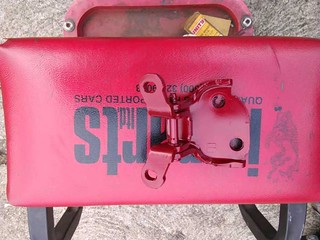 Hinge-Painted by Paul Kemme, on Flickr
(Stupid me, I first tried using the hinge from Rose - it looked like it was still straight, so I cleaned it up and painted it, but it didn't line up when I installed it. I wound up using another hinge I had on hand)
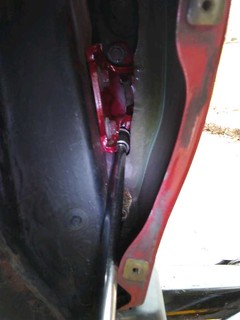 Hinge-New by Paul Kemme, on Flickr
Install the fender liner, splash guard, and wheel.
I didn't try it (because I didn't need to), but it may be possible to replace the upper hinge as well without removing the fender. The upper bolt on the door looks tricky, but maybe with a 1/4 inch drive and a universal joint.
Tools needed:
Jack (this is easier to do with the wheel removed)
Lug wrench
Phillips screwdriver
3/8 ratchet
Long 3/8 extension
12 mm socket
12 mm box end wrench (a ratcheting box end would be handy)
Loosen the lug nuts, raise the wheel, remove the wheel
Remove the splash guard
Remove the grommets that hold the rear half of the fender liner, tuck the bottom end out of the way to expose the hinge.
 Hinge-Inner Fender by Paul Kemme, on Flickr
 Hinge-Old by Paul Kemme, on Flickr
Use the box end wrench to remove the two hinge bolts to the body. Be careful - the edges of the fender are sharp - I cut myself twice trying to break these bolts free; finally used a cheater pipe on the end of the wrench to get leverage and get my hand away from the fender. Use the 12 mm socket and extension to remove the hinge to door bolts. To get to the bottom bolt, you have to snake the socket and extension at an angle from above. DO NOT OPEN THE DOOR with the hinge removed! You have to rotate the portion of the hinge that attaches to the door in order to maneuver the hinge out.
 Hinge-Removed by Paul Kemme, on Flickr
Install the new hinge in reverse order. Once I had the hinge bolts in place, but not tightened yet, I opened the door and used some folded cardboard under the rear edge of the door to raise it to the proper height. With the body bolts no quite snug, push in on the lower portion of the door to get it aligned with the surface of the fender, then tighten the door bolts. For good measure, I placed a piece of 2x4 against the forward edge of the hinge plate and rapped it with a hammer to take up any slack, then tightened the body bolts.
 Hinge-Painted by Paul Kemme, on Flickr
(Stupid me, I first tried using the hinge from Rose - it looked like it was still straight, so I cleaned it up and painted it, but it didn't line up when I installed it. I wound up using another hinge I had on hand)
 Hinge-New by Paul Kemme, on Flickr
Install the fender liner, splash guard, and wheel.
