What you need...er what I used.
-Ratchet (3/8 drive)
-8mm deep socket
-yoga mat (yes a yoga mat)
-razor blades (or other preferred cutting tool)
-some kind of marker
Well my tails were letting some water in to the trunk so I was thinking of replacing the old, hardened, worn out gaskets to hopefully solve the seeping problem.
While walking through target I spotted a yoga mat ant the material seemed to be very similar to that of the tail light gaskets. So I though "why not make my own out of this stuff?"
what you need to do first is open your trunk.
you can achieve this by opening your driver side door

then look at the bottom left corner of your driver seat and pull the long hadle with the picture of a car with a tail.

lift up your trunk lid and you may find some carpeted plastic panels are in the way of your beloved tail light assembly.
Not to worry simply remove the little plastic directly behind the tail light or take the whole thing off for easier access.
(*I would show you how to do all this but my trunk had been bare for quite some time now.)
this is what you will see
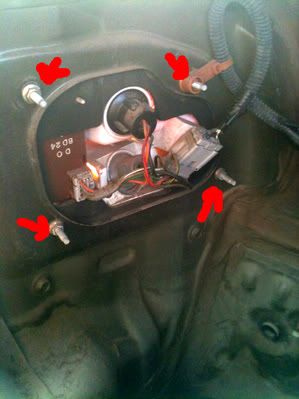
all the nuts you need to remove have been marked. Outer taillights have four^ and inners have five\/ \/
remove them nuts! The plastic wire fastener can be easily taken of simply twist wiggle and pull till it comes out.
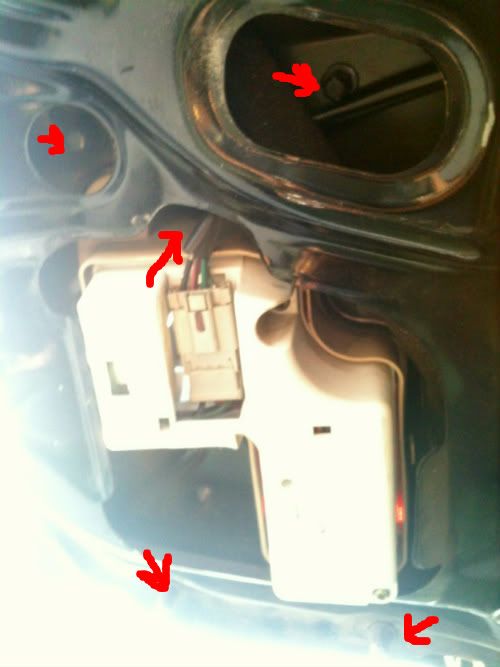
this is the tail light off the car for a better idea of what it looks like.
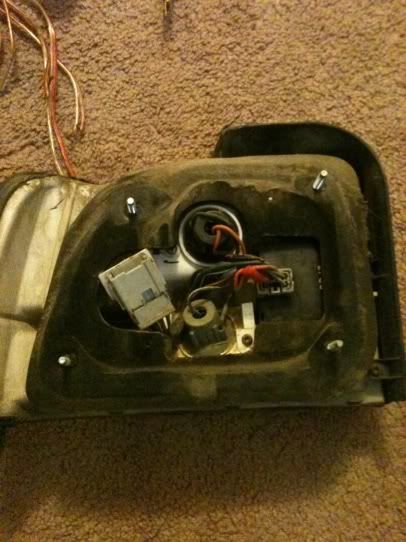
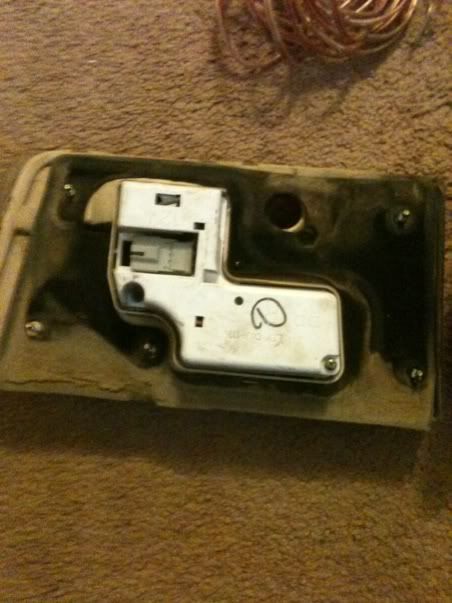
now remove the gaskets (didn't bother to clean them since they will be replaced but it's a good idea) place them on top of the mat, and outline them like so:
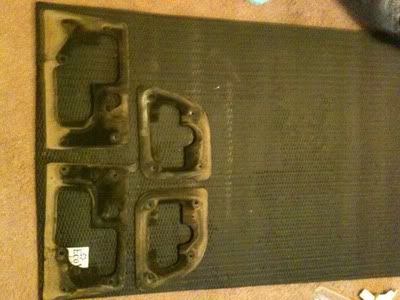
Once outlined simply cut following the lines. For the bolt holes you can just stick a screwdriver through it.

You're done!! Here's what the finished product looks like:
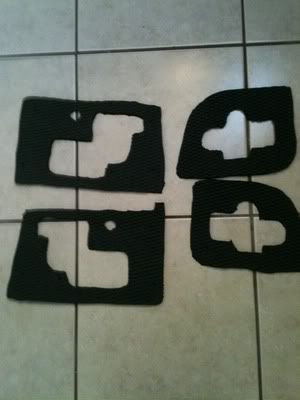
A little side by side.

Now put everything back together and enjoy! My total cost was $15 for the mat which I can still use for other padding projects or yoga!
-Ratchet (3/8 drive)
-8mm deep socket
-yoga mat (yes a yoga mat)
-razor blades (or other preferred cutting tool)
-some kind of marker
Well my tails were letting some water in to the trunk so I was thinking of replacing the old, hardened, worn out gaskets to hopefully solve the seeping problem.
While walking through target I spotted a yoga mat ant the material seemed to be very similar to that of the tail light gaskets. So I though "why not make my own out of this stuff?"
what you need to do first is open your trunk.
you can achieve this by opening your driver side door

then look at the bottom left corner of your driver seat and pull the long hadle with the picture of a car with a tail.

lift up your trunk lid and you may find some carpeted plastic panels are in the way of your beloved tail light assembly.
Not to worry simply remove the little plastic directly behind the tail light or take the whole thing off for easier access.
(*I would show you how to do all this but my trunk had been bare for quite some time now.)
this is what you will see

all the nuts you need to remove have been marked. Outer taillights have four^ and inners have five\/ \/
remove them nuts! The plastic wire fastener can be easily taken of simply twist wiggle and pull till it comes out.

this is the tail light off the car for a better idea of what it looks like.


now remove the gaskets (didn't bother to clean them since they will be replaced but it's a good idea) place them on top of the mat, and outline them like so:

Once outlined simply cut following the lines. For the bolt holes you can just stick a screwdriver through it.

You're done!! Here's what the finished product looks like:

A little side by side.

Now put everything back together and enjoy! My total cost was $15 for the mat which I can still use for other padding projects or yoga!





 **Don't b scared be prepared for the worst**
 will do)
Comment