I have used this to clean up a windshield (93 EX) that was I was considering replacing because it was very difficult to see when driving directly into the sun. It significantly improved visibility on both front (photos) and rear windshields on the wagon. I’ve also used it to polish headlight lenses, remove light scratches from taillights (by hand only), and it did wonders for a set of 90-91 bumper lights (were “fogged” from road debris, came out clear as glass). Works very quickly on plastic.
Tools Needed:
Eastwood glass polishing kit (that’s where I got mine)
Electric drill or buffer
Flat bottom bowl
Water spray bottle
Rags
Note: This kit will remove windshield scratches that can’t be felt with your fingertip. I believe Eastwood now makes a heavy duty kit for deep scratches.
1. Clean the windshield. Identify scratched areas to be polished.
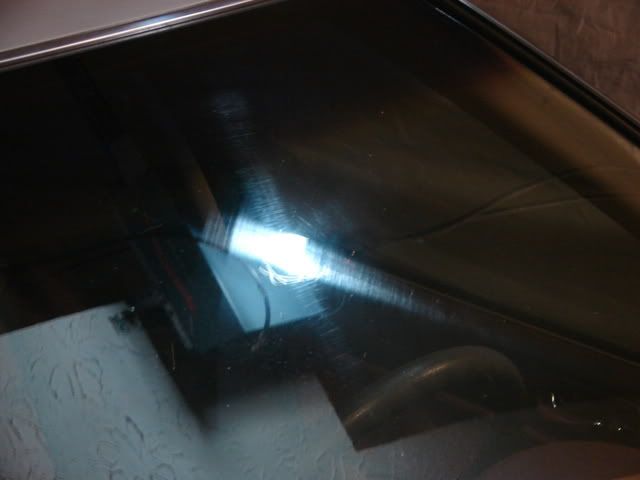
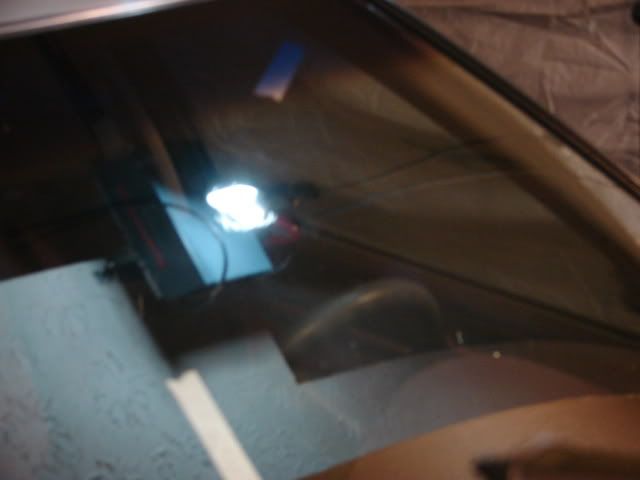
You can see the wiper marks in the reflections from the trouble light hanging on the garage door opener. Marks were similar on both sides of the windshield.
2. Mark the inside of the windshield with tape where the marks are the worst, typically along the inner and outer arcs of where the wipers run. This shows you the area you’ll have to concentrate on.
3. Follow the instructions with the polishing kit. Fill the bowl with enough water so that it will come up about 1/2 inch on the buffer.
4. Let the buffing wheel soak for about 5 minutes.
5. Use some rags or old sheets to cover the hood and roof (if doing the front windshield, you don’t want the polishing compound on the paint if you can help it).
6. Take the buffing wheel out of the water. Remove some of the water from the bowl, then add enough polishing compound to make a thin paste the consistency of gravy (it doesn’t take a lot).
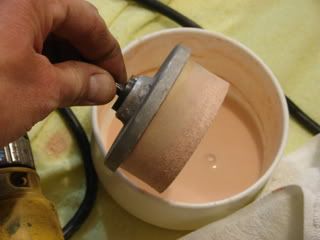
7. Install the buffing wheel in the drill, then dip into the polishing paste.
8. Hold the buffing wheel perpendicular to the windshield and turn on the drill. Try to keep the speed down so that it doesn’t sling the compound all over the place. Slowly move the buffing wheel over the windshield using a fair amount of pressure. I varied the pattern each time I went over an area: side to side, then up and down, following the arc of the scratches, sometimes perpendicular to the scratches. Try not to let the it run on the edge, it can create spiral scratches that you’ll have to buff out as well. This can take a while depending on how bad the windshield is. I probably spent 3 hours on the first one I did.
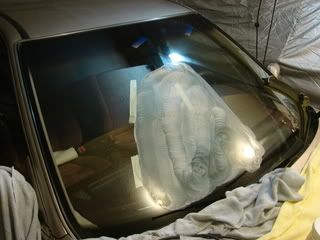
9. Use the spray bottle to keep the compound wet on the windshield. Doing it on a cloudy day or in the garage is recommended, the sun will dry the compound quickly.
10. Occasionally use a clean very wet rag to wipe the compound off the glass in a small area, then dry, to check your progress.
11. When you think you’re finished, take the buffer out of the drill and go over the windshield with it by hand.
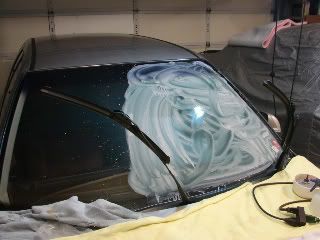
12. When you’re happy with the results, clean the windshield with plenty of water to wash all the compound away.
I recommend that you then apply RainX. Apply two coats, let dry, polish with a clean cloth, then sprinkle a little water on the windshield and buff with a good quality paper towel like Bounty.
Tools Needed:
Eastwood glass polishing kit (that’s where I got mine)
Electric drill or buffer
Flat bottom bowl
Water spray bottle
Rags
Note: This kit will remove windshield scratches that can’t be felt with your fingertip. I believe Eastwood now makes a heavy duty kit for deep scratches.
1. Clean the windshield. Identify scratched areas to be polished.

You can see the wiper marks in the reflections from the trouble light hanging on the garage door opener. Marks were similar on both sides of the windshield.
2. Mark the inside of the windshield with tape where the marks are the worst, typically along the inner and outer arcs of where the wipers run. This shows you the area you’ll have to concentrate on.
3. Follow the instructions with the polishing kit. Fill the bowl with enough water so that it will come up about 1/2 inch on the buffer.
4. Let the buffing wheel soak for about 5 minutes.
5. Use some rags or old sheets to cover the hood and roof (if doing the front windshield, you don’t want the polishing compound on the paint if you can help it).
6. Take the buffing wheel out of the water. Remove some of the water from the bowl, then add enough polishing compound to make a thin paste the consistency of gravy (it doesn’t take a lot).

7. Install the buffing wheel in the drill, then dip into the polishing paste.
8. Hold the buffing wheel perpendicular to the windshield and turn on the drill. Try to keep the speed down so that it doesn’t sling the compound all over the place. Slowly move the buffing wheel over the windshield using a fair amount of pressure. I varied the pattern each time I went over an area: side to side, then up and down, following the arc of the scratches, sometimes perpendicular to the scratches. Try not to let the it run on the edge, it can create spiral scratches that you’ll have to buff out as well. This can take a while depending on how bad the windshield is. I probably spent 3 hours on the first one I did.

9. Use the spray bottle to keep the compound wet on the windshield. Doing it on a cloudy day or in the garage is recommended, the sun will dry the compound quickly.
10. Occasionally use a clean very wet rag to wipe the compound off the glass in a small area, then dry, to check your progress.
11. When you think you’re finished, take the buffer out of the drill and go over the windshield with it by hand.

12. When you’re happy with the results, clean the windshield with plenty of water to wash all the compound away.

I recommend that you then apply RainX. Apply two coats, let dry, polish with a clean cloth, then sprinkle a little water on the windshield and buff with a good quality paper towel like Bounty.


 my rear window is in dire need of a good polishing



Comment