Announcement

Collapse
No announcement yet.

EXT : Gummiegorillas Do it Nice or Do it Twice A/C Retrofit !!

Collapse
X
 
  • Filter
  • Time
  • Show
Clear All
new posts

    EXT : Gummiegorillas Do it Nice or Do it Twice A/C Retrofit !!

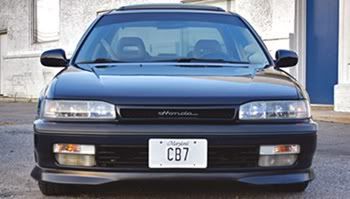
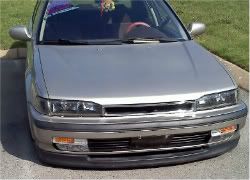
    (Updated !!! ie: manifold gauge reading info )This is my very first DIY so I hope you guys like it and any opinions and suggestions are welcome. So I recently I decided to do the retrofit for my CB7 and found a few kits at Wal-Mart and a few local parts stores like Auto Zone and Checker that claim to convert the cars A/C system from R12 to R134a. Only to find out that if the two mix it turns into a little something the pros in the A/C biz call the “Black Death” which sort of looks like engine oil crud on the inside of the compressor and all the components associated with the air conditioning and is sticky as hell and is pretty much impossible to remove. The only way to do properly is to replace all the old R12 O-rings with R134a O-rings, replace the receiver/drier, and flush the whole system and fill it. This DIY is going to made using a Denso Compressor and on the assumption that all the components in your system are still functioning . I’m including a tools list and a parts list along with the price that I ended up paying for everything so as to give everyone a good ballpark figure what this retrofit is gonna cost you.

    Let me also remind everyone that I’m NOT a professional , just a weekend warrior garage mechanic. So I will not be responsible for anyone messing up your ride attempting this. Also its illegal to open your air conditioning system without having it properly evacuated first and if you get caught doing this by the EPA its like a $4K fine or something. I didn’t have to worry bout this because the valve on the low side port was missing , so there wasn’t anything to evacuate out the system anyway. Also, when was the last time you had someone from the EPA hanging out over your shoulder when you were wrenching in your own garage ? (wink, wink). So here we go !

    Here’s the parts list: (all prices listed include 8.1% sales tax)

    -R134a Valve kit (Auto Zone) $4.31

    -R134a Quick Connect Valves (Auto Zone) $14.04
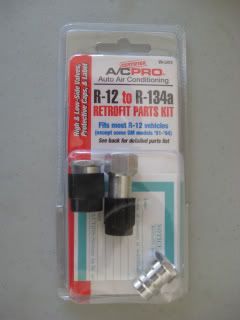
    -Valve Core Removal Tool (Auto Zone) $6.47

    -Permatex Thread Sealer (Auto Zone) $5.39
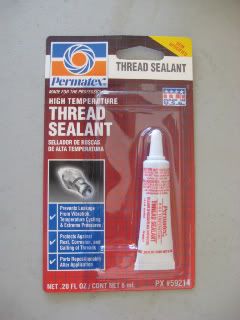
    -R134a O-Ring kit (Auto Zone) $11.88

    -PAG 45 Oil (Auto Zone) $9.72

    -R134a (Wal-Mart) $7.86 per can 4 cans $31.44
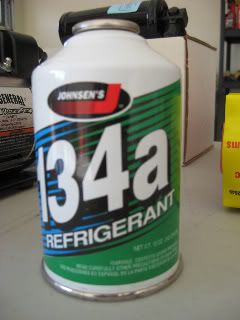
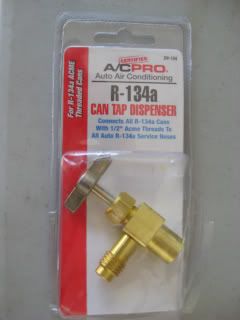
    -R134a Can Top Dispenser (Auto Zone) $7.55
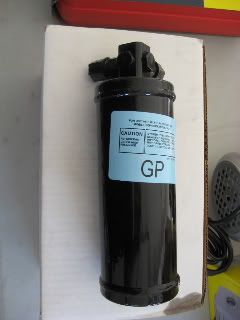
    -Receiver/Drier for 1990-1993 Accord EX (Charleston Auto Parts/NAPA) $30.99
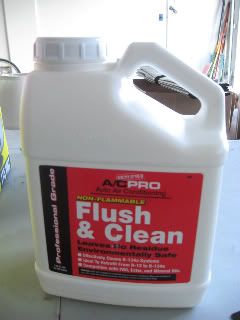
    -A/C Flush , Ester Oil Remover for R134a Conversion (Auto Zone) $27.01
    -U.S General A/C Manifold Gauge Set (Harbor Freight) $32.41

    -U.S. General 2.5 CFM Vacuum Pump (Harbor Freight) $69.17 -After 20% off Coupon

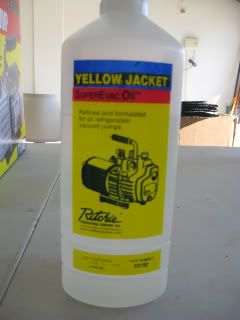
    -Yellow Jacket Vacuum Oil for Vacuum Pump (because the oil that comes with HF pump sucks and to extend the life of your pump you want to put a good quality oil in it) $16.71
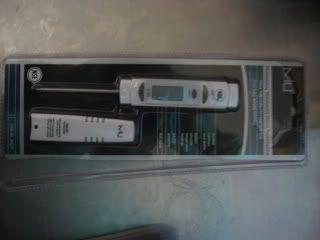
    -Digital Kitchen Thermometer (Costco) $7.56
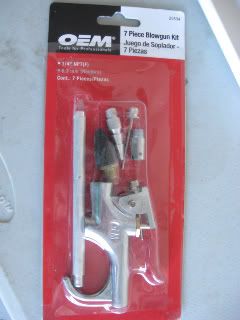
    -Blowgun Kit w/Rubber Tip (Auto Zone) $5.39

    Some people may already have air compressors in their garages , but I unfortunately didn’t so this part is optional , but recommended.
    -Craftsman 15GAL Air Compressor Brand New (ASAP Pawn Shop) $94.47


    So the total for everything without the air compressor plus tax is $280.04 and with the compressor is $374.51 Not bad considering the Honda Dealership wanted to charge me way more than that , and now I already have all the tools that I need to charge it if a leak ever opens up in the system in the future in my CB or any other car.

    Tools that you will need to complete this project:

    -Socket Wrench (I prefer Craftsman because they can handle some serious abuse :P)
    -10mm, 12mm, 14mm and 1” sockets
    -3in and 8in socket extensions
    -Set of Allen Keys
    -Needle Nose Pliers, Adjustable Pliers and (Optional , but will definitely make life easier ) Snap Ring Pliers
    -Rubber Hammer or Mallet
    -Two Jack stands
    -Glass Bowl (for cleaning compressor components, I used glass because I wasn’t to sure if the A/C cleaner would eat through a plastic bowl or not.)
    -Two Large Crescent Wrenches
    -Drill w/4in Bit Extension
    -Squeeze Bottle (like for mustard and ketchup)
    -Extension Cord (Optional depending how close you are to an electrical outlet)
    -Flashlight (optional depending how well you can see under your dash without one)
    -Box cutter or Razor
    -Shopvac (optional , but recommended)
    -A long Phillips Head Screwdriver
    -Two Long Flat Head Screw Drivers
    -White Paint Marker
    -Oil Filter Wrench
    -Measuring Cup
    -Wire Bristle Brush
    -Medium Bowl or Pot (to put warm water in)
    -Plenty of clean shop rags
    -A Good day or Weekend to complete this project
    -A Shit Ton of Patience !! LOL…. But seriously , a lot ……really.


    Step 1 : Evacuation

    - Have a shop evacuate and recover any R12 that’s in your system. (also see second paragraph of this How-To )

    Step 2 : Disconnect and Remove the Battery

    - I also removed the three bolts that were holding in the battery tray and removed the battery tray.

    Step 3 : Removal of the Front Bumper

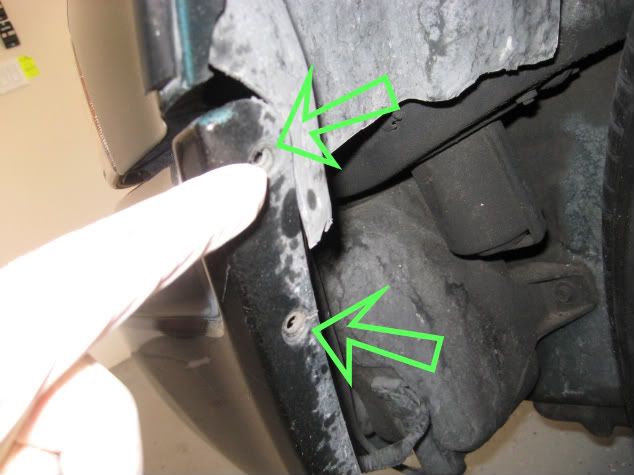
    -Start by removing the four retaining screws from the bumper under the fender wells, two on each side. Then unscrew the Phillips head screw that’s holding on the turn signal. Remove the turn signal and set it aside. Now you should be able to see the four bolts ,two on each side, behind where the turn signals were. Also you’ll want to remove the two bumper retaining nuts , one is behind the battery and the other is next the windshield wiper reservoir, remove these and then carefully pull the bumper straight out.


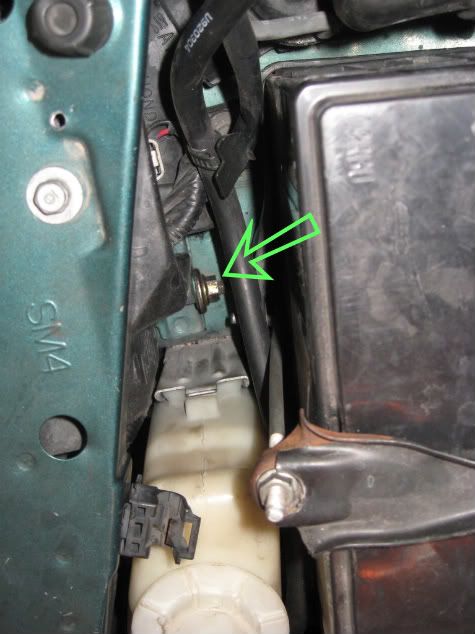
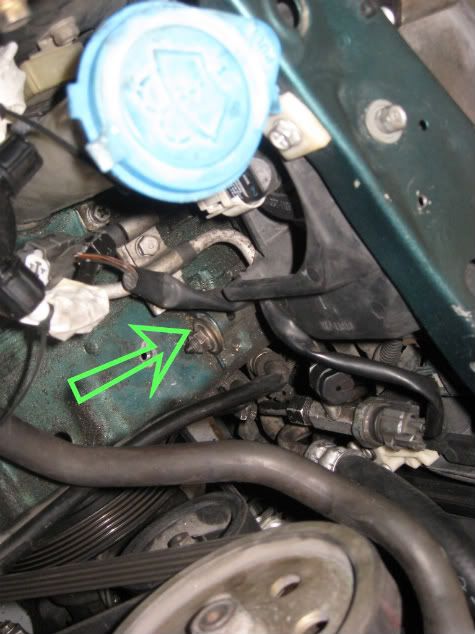
    Step 4 : Marking the position of the belts and removing the alternator, power steering pump and if equipped setting aside cruise control.

    -With the paint marker mark the rotation of the belts so you can put them on the same way you removed them. In the picture I have the arrows pointing upwards to remind me that the arrows were pointed towards the windshield when I put them back on , even though the rotation of the belts is the opposite direction that the arrows are pointing. Loosen then remove the adjusting bolts for the power steering pump and remove it , but don’t remove the hoses connected to the pump just set the pump aside for now. Loosen then remove the adjusting bolts for the alternator , then remove the electrical plug and pull the alternator out. Remove the bolt closest to the headlight on the cruise control and loosen the other without removing, it should just slide to the right and lift out . Set the cruise control to the side.
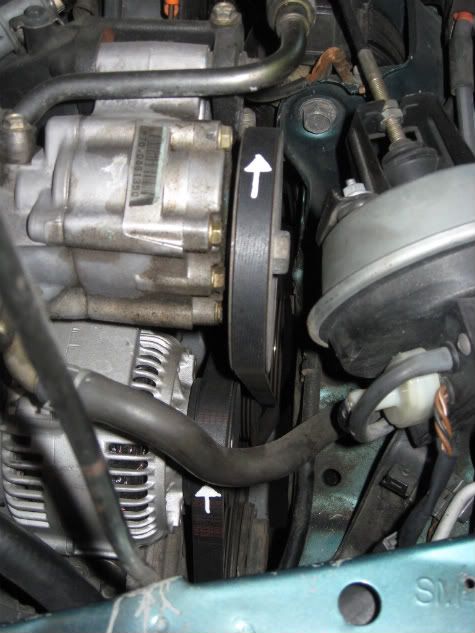

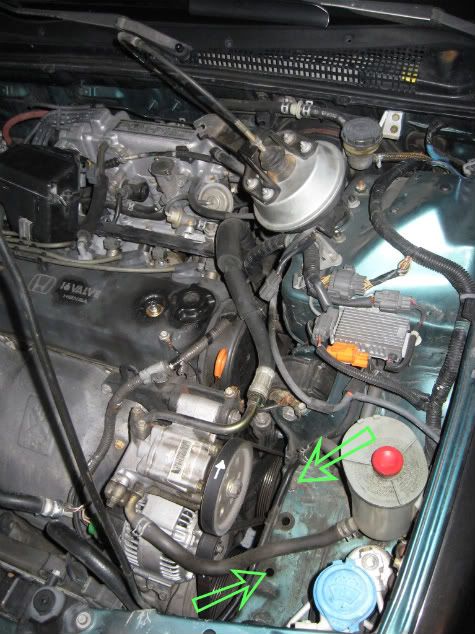
    Step 5 : Compressor removal

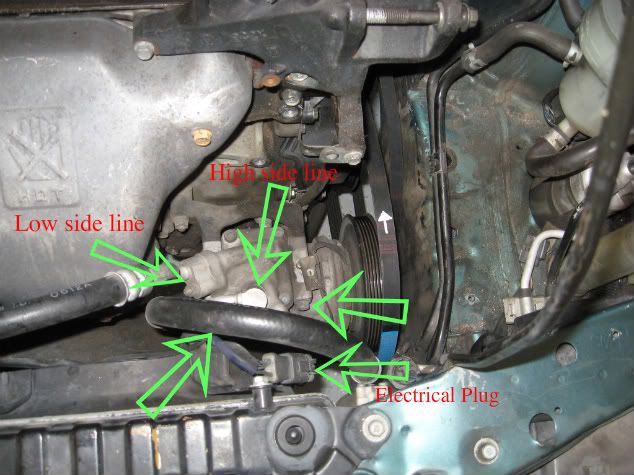
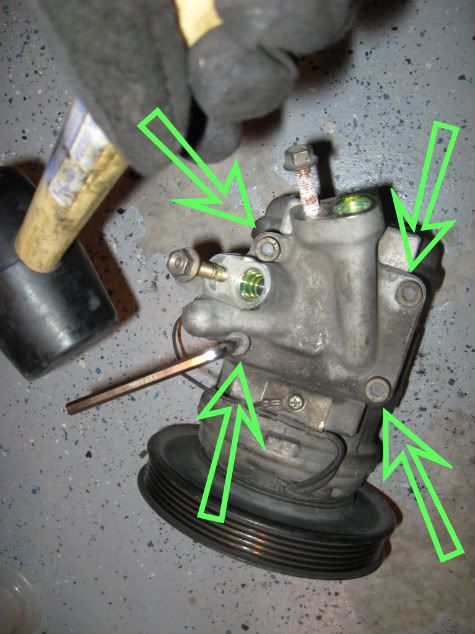
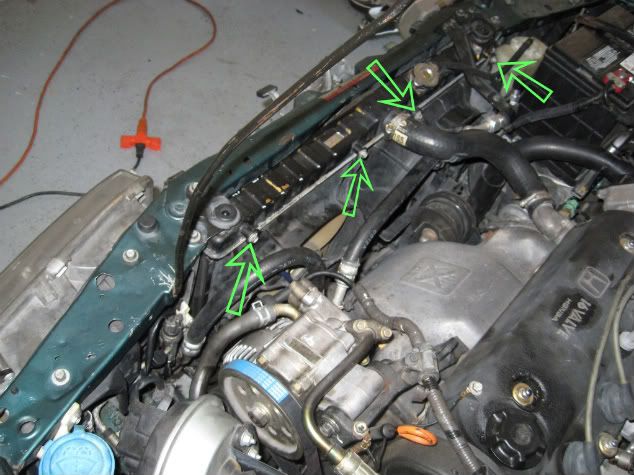
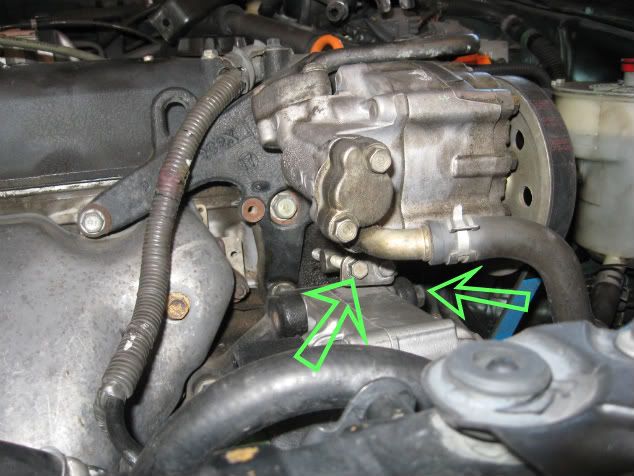
    -Now you should have a clear view to the A/C Compressor. Unplug the electrical connection from the compressor. Remove the nut to the low compression side line and pull the line out. Remove the nut from the high compression side and pull that line out as well. You should see black worn O-rings on each one of those lines that you just pulled out. Now that the lines are disconnected you can remove the compressor. Start with the top two bolts (in the picture you can only see two arrows , but the other two bolts are in the same location on the bottom of the compressor) then the bottom two bolts. Now you should be able to slide the compressor straight out.
    Last edited by Gummiegorilla; 06-02-2012, 09:15 AM.

    #2


    Step 6 : Retrofitting and Cleaning Compressor

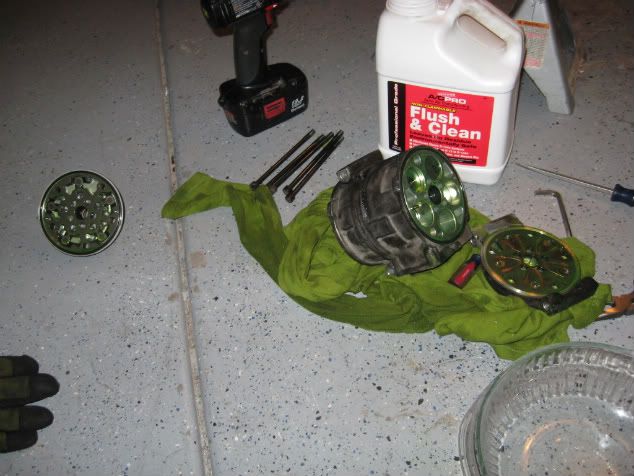
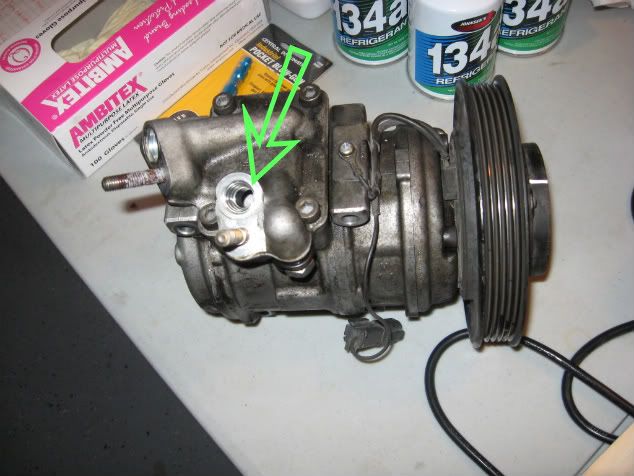
    -So this part is probably where your gonna need that patience. Remove the four hex bolts that hold on the top of the compressor line mounting plate. My bolts were in there pretty good , so I had to step on the compressor and hit the Allen key with a rubber hammer to get them out (careful when you do this because sometimes you wont always hit the allen key in the right spot and that thing will fly ). After you get all the bolts out pull the plate off and set it aside. Also in this picture you can see that the previous owner of my car put that UV green dye that helps find leaks in the system.


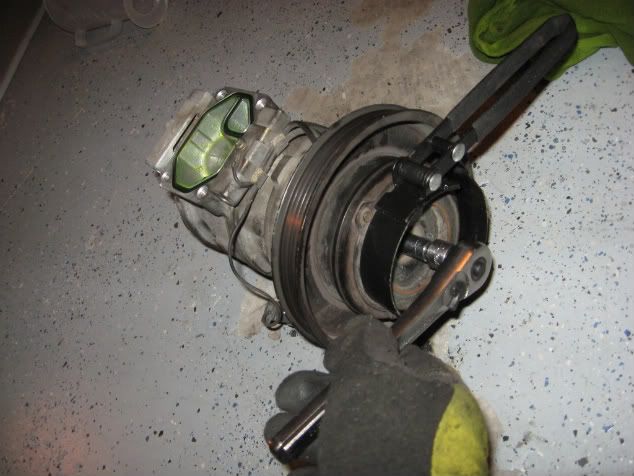
    -Next remove the bolt in the center of the pulley. The pulley moves when you try to do this so I held it with an oil filter wrench. After you get the bolt out pull that clutch piece off.


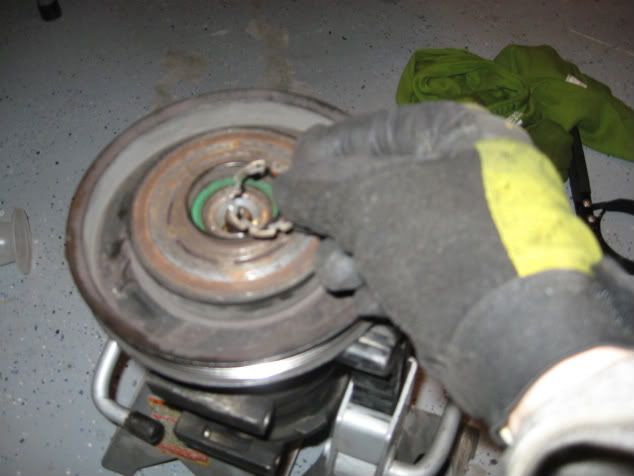
    -Now is when your gonna need those snap ring pliers to get the ring off. I didn’t have a pair of these when I did this , I just had a pair of needle nose pliers , but crap it’s a pain in the ass getting the snap ring off because you have to pull out on the pliers instead of just squeezing the snap ring pliers.


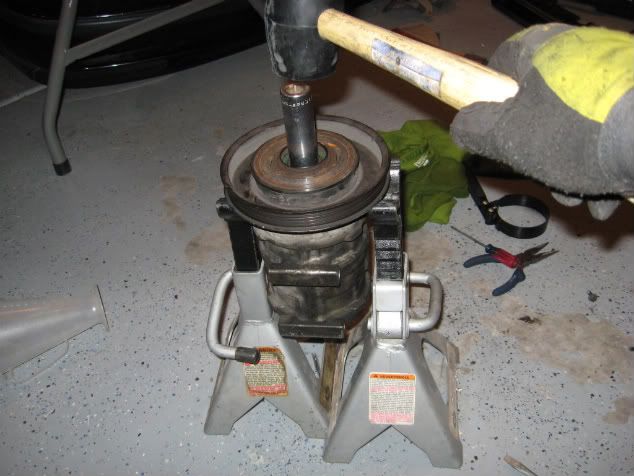
    -Now you’ll need that 1” socket , the jack stands and the rubber hammer. Raise the jack stands just enough to put the pulley of the compressor on top of them without the compressor touching the ground. Then take the socket, put it on top of the bearing in the middle of the compressor and gently tap out the pulley with the rubber hammer, just as it gets close to falling out , hammer with one hand and catch it with the other.


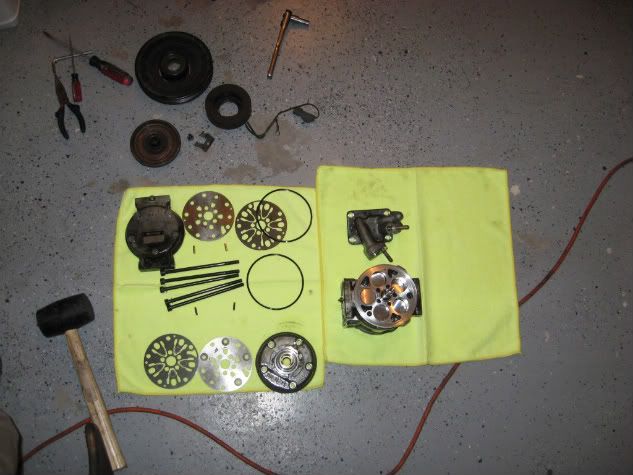
    -Now that you have the pulley off you’ll see five bolts behind it. (I didn’t get a chance to take a pic of this) To get these out your gonna have to do the same method as removing the plate on top of the compressor. Allen key , step on it (the compressor) , and rubber hammer that allen key until you loosen all five of those bolts. DON’T remove the bolts until you have a station set up to clean all the compressor components. Once you have a few shop towels laid out on a table or floor , and you have a little A/C Flush poured into the glass bowl you can start taking the compressor apart. Remove the five bolts now. The back , front and middle of the compressor will fall off if you just pull them all out so support it with your hand or do this on the floor or table. (Note : if you pull your compressor apart and it doesn’t look clean and shinny on the inside , or the pistons don’t move freely or are covered in what appears to be black crud, there’s no saving it and you will need a new compressor. Sorry)


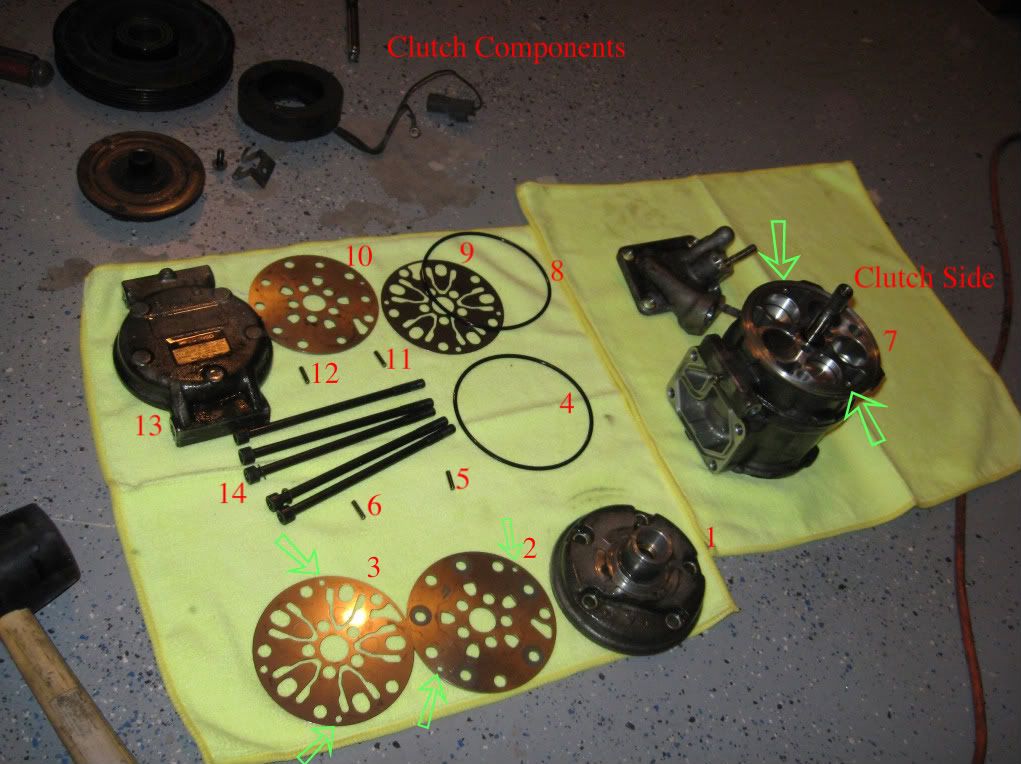
    -Now take note of where all the components inside the compressor go because its crucial to get it all together the same way that it came apart. Here’s a little diagram.


    -The green arrows are pointing to the holes that align the plates to the middle piece of the compressor. With pins 5 and 6. The same goes for the rear of the assembly only with pins 11 and 12. Take note on which way the plates are facing when you take them off because they will need to be reassembled the same exact way. Now that you have the compressor apart its time to clean it. Get out that glass bowl (or similar container) that you have and pour a small amount of A/C cleaner into it. Rinse all the parts and set them on shop towels to dry. The middle segment of the compressor your going to want to pour cleaner directly into the pistons and rotate them through a few times. As long as you can get all traces of the old ester oil out of there you should be ok. When reassembling the compressor make sure to do so in the following order. And when putting the seals back on coat them really good with he new PAG Oil (like you would an oil filter seal when doing an oil change)

    1- Front segment of the compressor housing
    2- First plate of the front of the compressor
    3- Second plate of the front of the compressor
    4- Seal for front segment of the compressor to the middle segment of the compressor
    5- Front of compressor guide pin
    6- Front of compressor guide pin
    7- Middle (Heart) of compressor
    8- Seal for the rear segment of the compressor to the middle segment of the compressor
    9- Third plate of the rear of the compressor
    10- Fourth plate of the rear of the compressor
    11- Rear of compressor guide pin
    12- Rear of compressor guide pin
    13- Rear segment of compressor the compressor
    14- Bolts that hold the compressor together

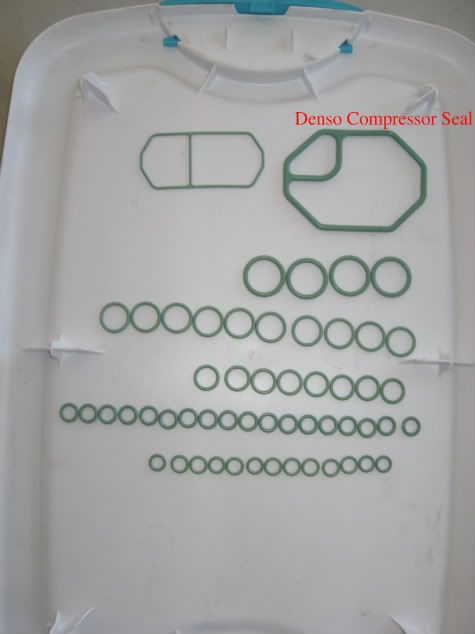
    - After you reassemble the compressor , its time to open your new O-ring kit . Depending on which brand of compressor you have , will decide which seal in the kit to use. I had a Denso compressor so I used this seal. Make sure that you coat this seal really well in PAG oil too. If you have a Hadsys style compressor I would assume the other seal will do the trick.


    -It should look exactly the same once you put it back together as it did when you pulled it out , only cleaner. Now its time to put the PAG 45 oil in your newly cleaned compressor. Since we’re going to removing all the main components of the system you have to add all the capacities of each component and add that extra oil to your compressor. The amount of oil varies depending on what compressor you have. Here’ a chart

    -Oil Capacities :
    Receiver/Drier = 1/3 oz. of oil
    Compressor = 3 1/3 oz. of oil (Denso) 4 1/3 oz. of oil (Hadsys)
    Condenser = 1/3 oz. of oil (Denso) ½ oz. oil (Hadsys)
    Evaporator = 5/6 oz. of oil (Denso) 1 oz. of oil (Hadsys)

    Total = 4.82 oz (Denso) or 6.83 oz. (Hadsys)

    - Now when I was adding the oil I put a little more than the 4.82 oz. that all the components require. I put about 6oz. of PAG oil in the compressors high side (I figured I would rather loose a few degrees of coolness in the inside of my car than have an under lubricated compressor). So after you pour the oil in the compressor you want to turn the pulley at least 30 times by hand in each direction so the first time that the compressor starts up the pistons aren’t dry. So there ya go , just set it aside upright (so you don’t loose the oil that you just out into it) for now until we install it again .


    Step 7 : Removing and Cleaning the Condenser , Receiver Dryer and Removing the A/C Lines

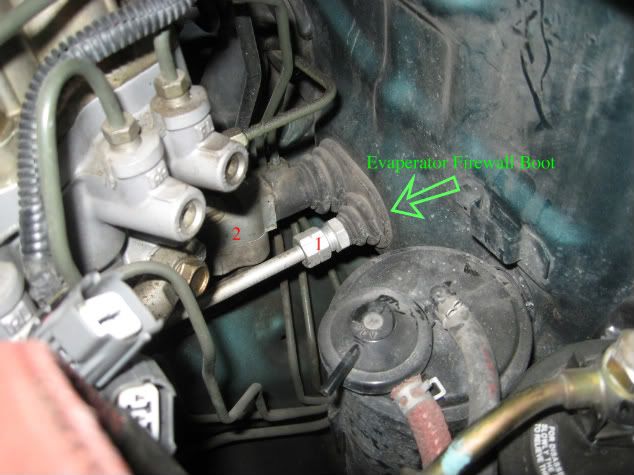
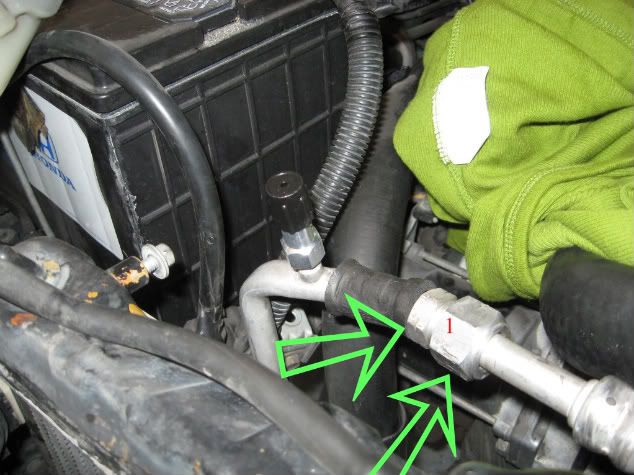
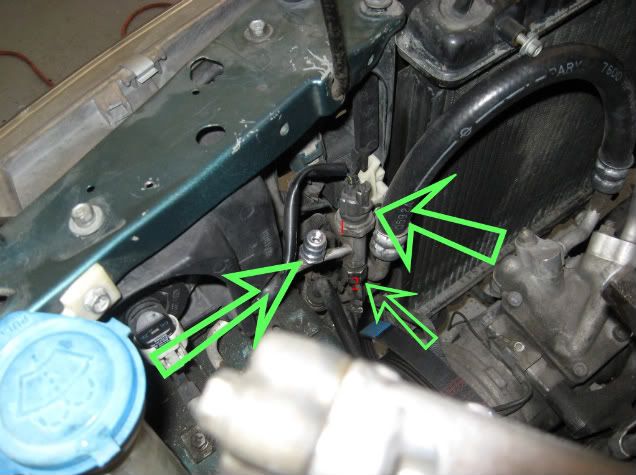
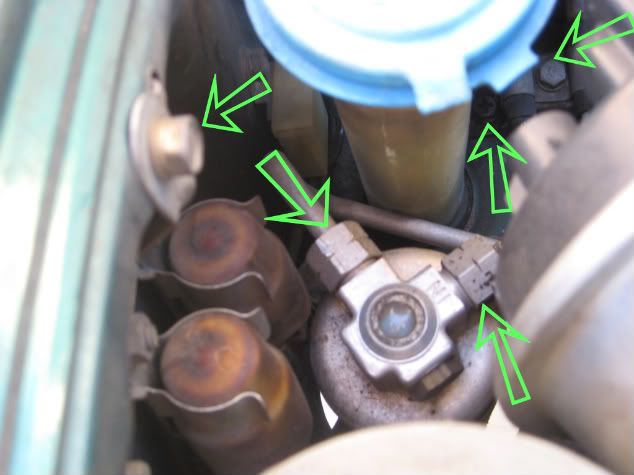
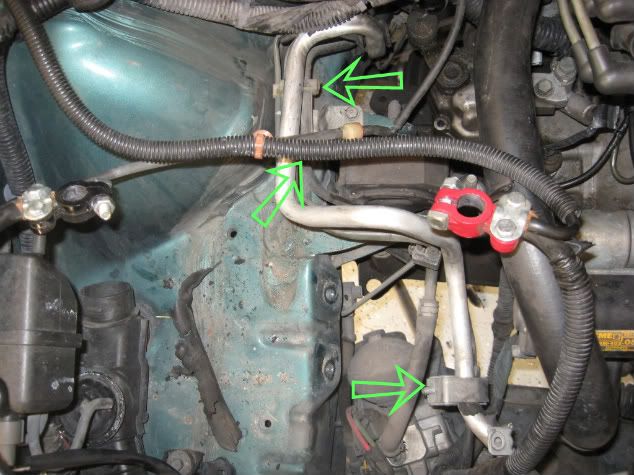
    - Start by unbolting the radiator supports and the strap that secures the A/C line to the frame. Then remove the two nuts that hold the condenser (they are right next to the headlights). Afterwards unscrew lines 2 and 3 in the picture. While you’re doing this unscrew the center A/C line mounting bracket located in the middle of the power steering cooler. Use two crescent wrenches to loosen the line at number 1 in the picture and disconnect the line. You should see an old black O-ring on the tip of the line.


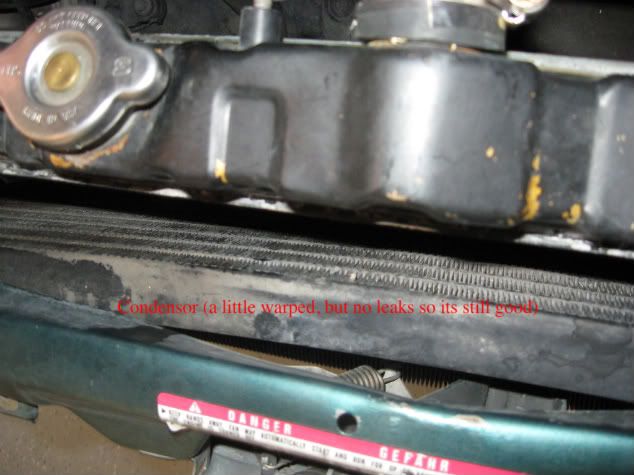
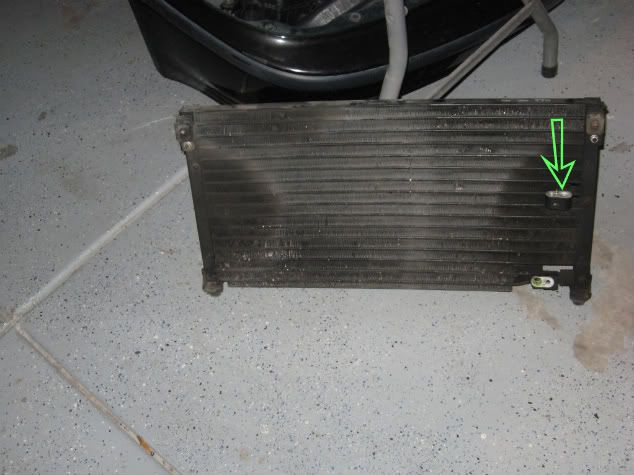
    - Now unbolt both fans from the radiator (eight bolts all together , two on the tops and bottom of each fan) and disconnect the plugs and slide them out. Move the radiator out of the bottom supports and slide it back just far enough to get the clearance that you need to slide the condenser up and out. My condenser was a little warped, but there wasn’t any leaks in it so its still good. There’s a green arrow on the condenser, that’s where your going to put the A/C Flush after you pour it into a squeeze bottle and then into the condenser. Let the flush hang out in there for a good ten minutes before blowing out with the compressed air and the air gun with the rubber tip.


    - When you remove all the lines your going to remove the air intake box and tube and set them aside for now, also loosen the two nuts that hold this vacuum box and unplug the two electrical connections that hold it on and move it aside as well and don’t disconnect any of the vacuum lines except for the one that goes to the charcoal can , its not necessary.


    When removing the lines kinda massage them out, but don’t force or bend any of the lines of you could crack them which would require them to be replaced. Use two crescent wrenches on all the lines so as not to twist them when removing. The lines you want to disconnect are :

    - The two lines that go to the firewall 1 and 2 , 1 you’ll need two crescent wrenches and the other you’ll need to remove the nut that holds the two lines together.

    -The low pressure line at the front near the radiator 1, use two crescent wrenches

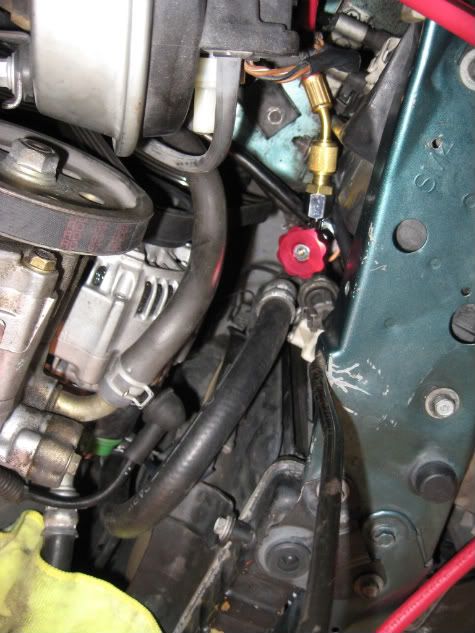
    -The switch 1 , and line connecting to the receiver/drier 2. DON’T THROW AWAY THE SMALL SEAL FOR THIS SWITCH !! I couldn’t find a replacement for this small switch so you have to reuse this seal when putting everything back together. Also note what the new high pressure quick connect looks like.

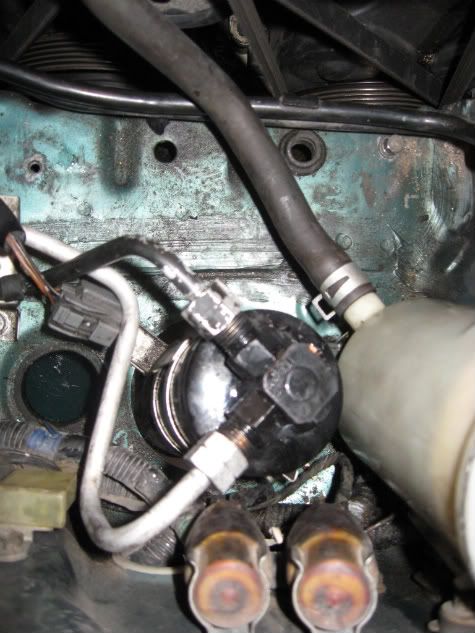
    - Remove the holding clip from the A/C lines near the receiver/drier and also the windshield washer reservoir tube. Then disconnect the lines goin to the receiver/ dryer. Pull the power steering fluid reservoir up and move it to the side , but DON’T disconnect any of the hoses . This should give you better access to the mounting bolts holding the receiver/drier in place. Remove the mounting bolts holding in the old receiver/drier and pull it out, when installing the new one make sure you DO NOT TAKE THE CAPS OFF THE ENDS YET !! If you do so before you’re ready to pull vacuum on the system it will be useless and you will need a new one. When adjusting the receiver don’t tighten the screw that holds in place until after you test fit it and then mark the position of the receiver and the bracket with a paint maker , because adjusting it after you tighten that screw is a pain. After you remove the windshield washer tube be careful when installing everything back together that you don’t drop anything into the fluid reservoir.


    - Use two flat head screw drivers and release the latches holding in the A/C lines and also unbolt the support that hold them in and remove them.
    Last edited by Gummiegorilla; 09-03-2010, 08:42 AM.

    Comment


      #3
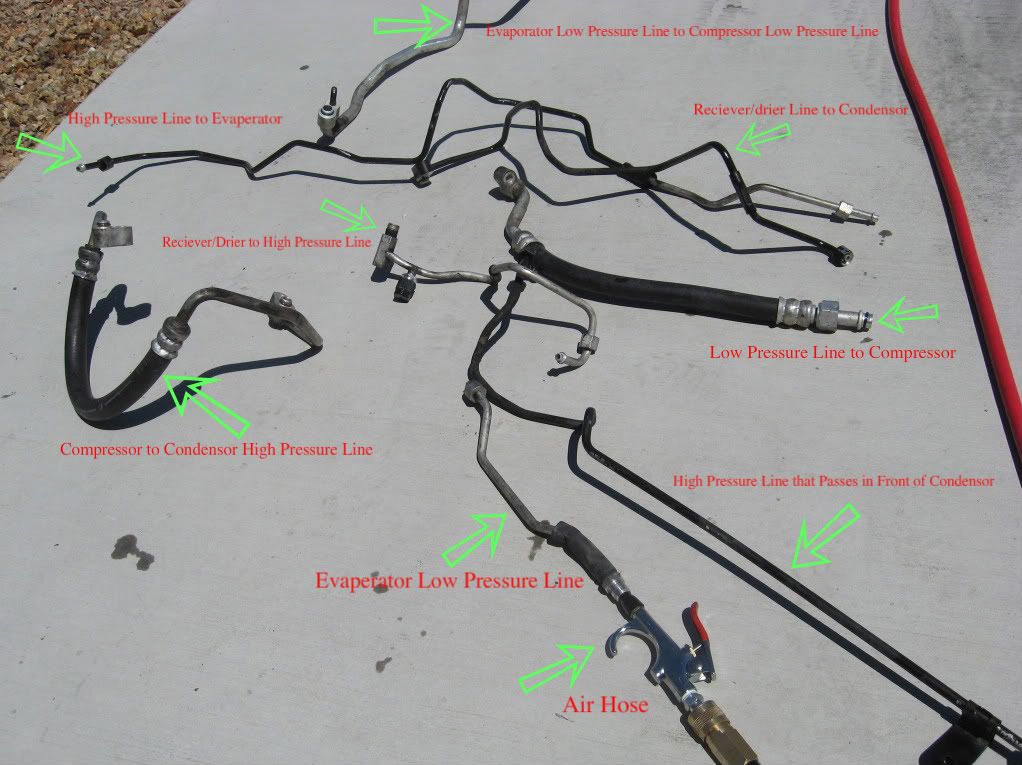
      - Once you have all the lines disconnected from their brackets and mounts go ahead and start to pull them all out taking note on where they all go. Get out you squeeze bottle of A/C flush again and fill each line with it , and let it set in each line for about tem minutes before flushing it all out with the compressed air. Here’s a diagram of the lines and which one goes to where.


      Step 8 : Removing , Flushing and Cleaning the Evaporator

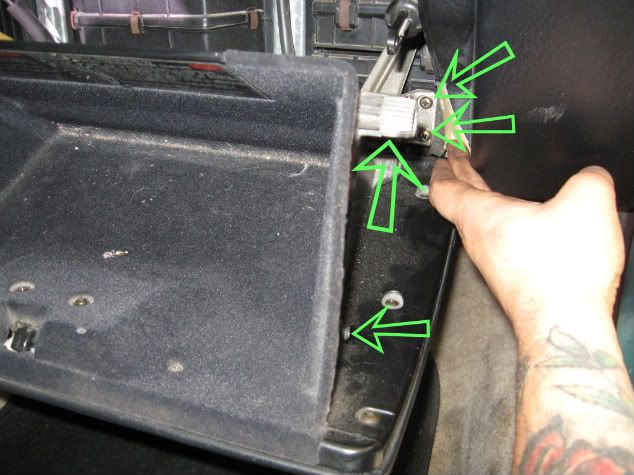
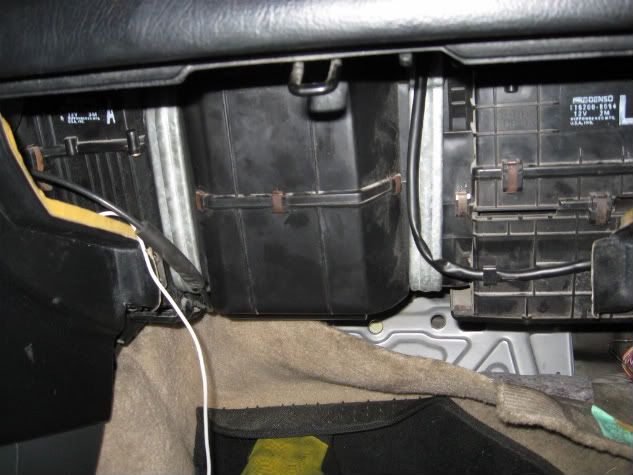
      - while you have all the lines removed because you just flushed them its time to remove the evaporator. First unscrew the little arm bracket and squeeze each side if the glove compartment so that you can gain access to the mounting screws mounted behind the small pieces of dash fabric. Then remove the four screws (two on each side) that hold the glove compartment on. Now you’ll have access to the evaporator housing. Unplug the temp sensor plug at the top of the housing. Unscrew the screws on the mounting straps, remove the straps (one is bigger than the other) and push them down then slide them out. Then remove the blots holding it in and gently pull it straight out , the firewall boot should also slide out with it.
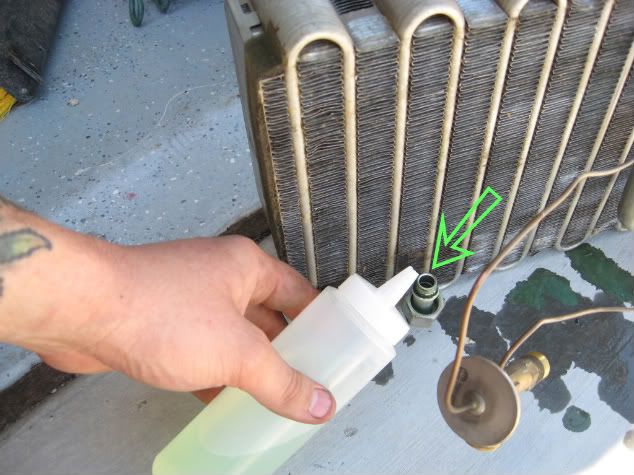


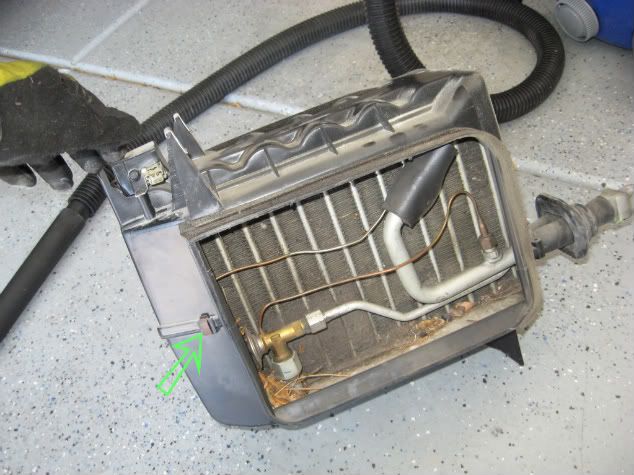
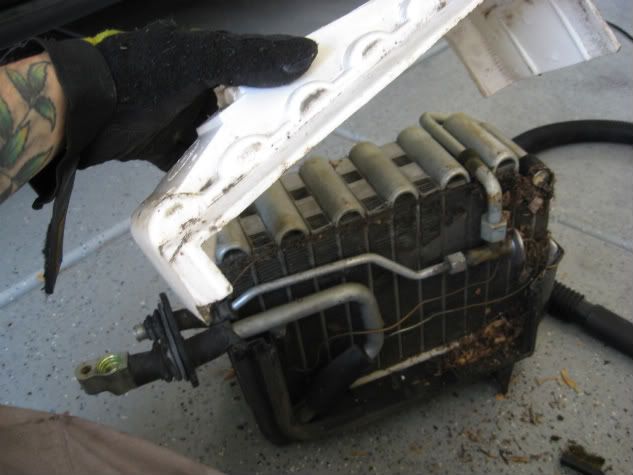
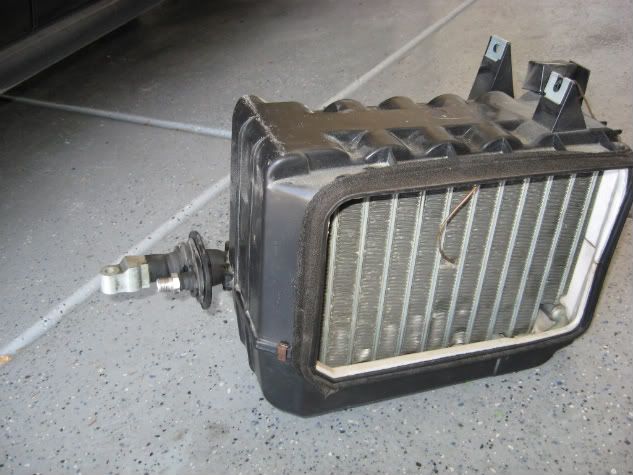
      - Now we have to remove the housing to get access to the evaporator to clean and flush it. My evaporator was pretty filthy , it had like leaves and kinds of crud in it. First unclip any retaining clips with a flathead and remove the two small screws holing the housing together. DON’T just pull the housing apart yet , first use a razor to cut the foam seals at the seams ( you don’t want to pull this foam off because its what seals the air flow into the vents once you install it again). Now gently pull apart the two plastic pieces of the housing. Underneath it you’ll see Styrofoam retainers holing the evaporator in place , be really careful when pulling these off and DON’T break them. Use your shopvac to get all the debris out of the housing and the air gun to blow anything out of the ribs of the evaporator. You should see the temp probe crammed into the ribs of the evaporator , go ahead and pull it straight out .Now pull the evaporator straight up and out.
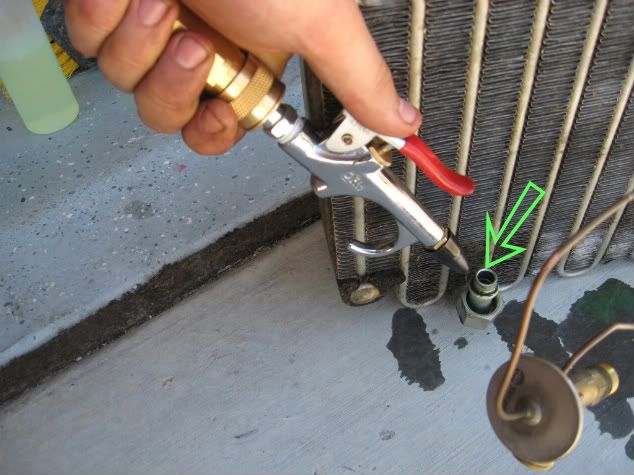


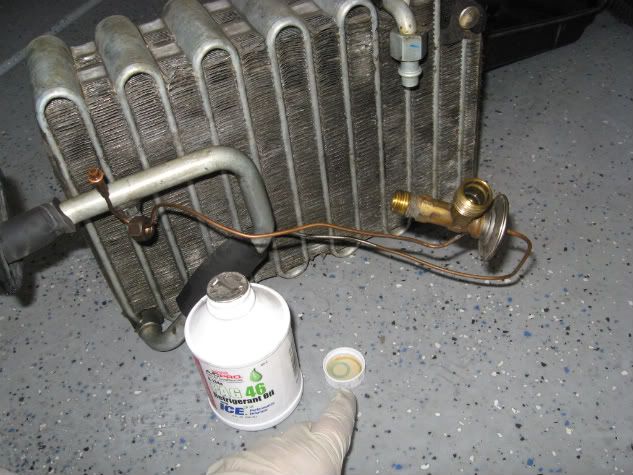
      -(Updated) Now that you have the evaporator out of the housing use two crescent wrenches on all the lines marked with green arrows, but DO NOT remove the copper sensor wire that’s foam tapped to the hose. Also DO NOT throw the smallest O-ring away for the expansionvalve because we will need to reuse it ( I couldn’t locate a new one that would fit unless youre completely replacing the expansion valve then the new one should come with a new ring set ).Grab that squeeze bottle full of A/C flush again and fill the port of the evaporator and let it stand in there for about ten minutes before flushing it out with shop air. After flushing out the cleaner with air go ahead and put the new green O-rings back on the fittings making sure to coat them all with PAG oil before installing. If there’s any crud stuck on the line just use your wire brush to get it off before installing the new O-ring.


      - After everything is done and nice and clean go ahead and put the evaporator back together making sure to be extra careful with the foam pieces and then reinsert the sensor wire back into the ribs of the evaporator. Nice and clean !


      - Before reinstalling the evaporator in the car, replace the firewall boot first ( Trust me it will be easier to get the lines back into place this way). Then reinstall the evaporator into its place making sure to get the condensation drain hose on the bottom of the hole in the housing in the right position before sliding it back into place. Put all the screws and straps back on , the connect the plug and your good to go !


      Step 9 : Installing All the Lines, Battery, Intake, Alternator , Power Steering , Drive Belts, Compressor , Pulling Vacuum, and Filling the System.

      - Now that all the main components of your system are clean and dry (Condenser, Evaporator, and all lines) its time to put everything back together. Since the evaporator is already in place start from there and reinstall all the lines using the new green O-rings in the kit making sure to coat them all in PAG oil before putting them on. There’s only a few sizes that you will need out of this kit and you won't be using all of the O-rings so you will have plenty left over (incase you spring a leak in the future you’ll have extras) Then install the condenser and all the lines leading to it. DON’T OPEN THE CAPS TO THE RECIEVER DRYIER YET !! I cant stress that enough, its going to be almost the last thing you do before you finish. Install the compressor the same way that you removed it.

      - Once you have the parts of the A/C system all together , install the alternator and power steering pump again the same way you removed them. Put the belts on. Tighten the drive belts. Install the battery tray, battery, all the intake components, and at this time also put that vacuum box back in its place and connect that one line back to the charcoal can. Put back the windshield washer tube and power steering fluid reservoir.

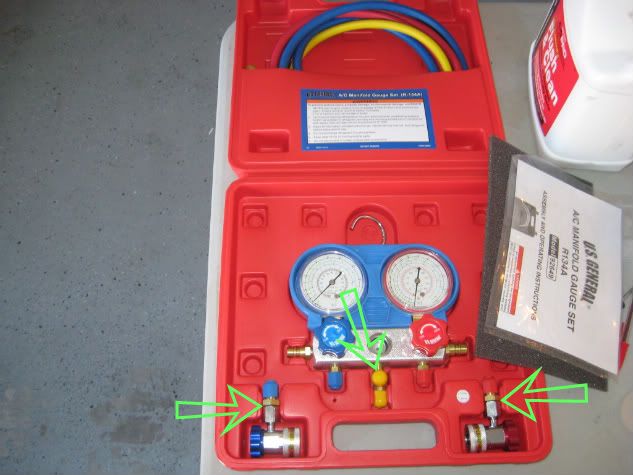
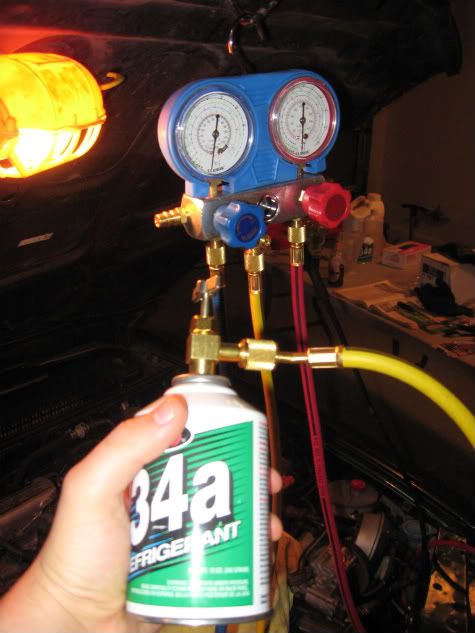
      - Assemble the A/C Manifold Gauge lit from Harbor Freight. The tool itself is pretty delicate so use a lot of care when screwing the brass fittings together and tightening the valves. Use two crescent wrenches to tighten the fittings at the quick release ports. Now you’re going to use the vacuum pump to pull vacuum on the tool itself to check for leaks in the gauge set by connecting the yellow hose to the R134a side of the pump and opening both valves. Make sure you fill the vacuum pump with proper amount of the yellow jacket vacuum pump oil or you may damage the pump when you turn it on. (Note : on my gauge set the valve under the yellow cap in the picture wasn’t fully tightened , so I could hear a hissing from it when I tried to pull vacuum on it. I used the valve tool to tighten it up.) If the gauge holds a reading of 27-30 in of mercury its good to go and you can start the fill process.


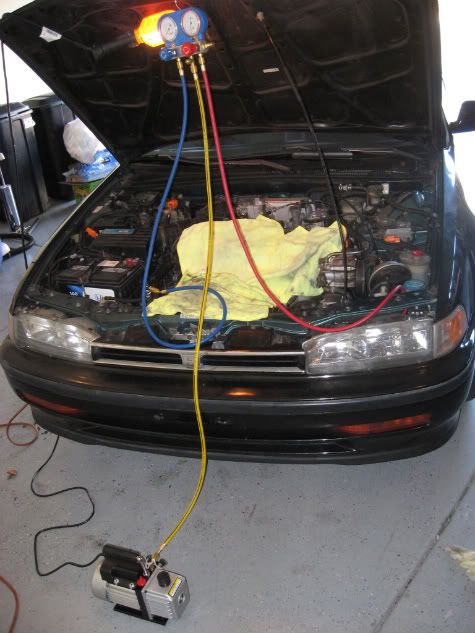
      - Assuming that all the A/C lines and components are all hooked up with new oiled O-rings (except for the two small ones) now its time to remove the caps on the receiver/drier. Once you open it up it will pop and blow the little caps off , you really only have about an hour and a half to work with it open before it becomes useless and you have to buy a new one. That’s why it was so important to not open it until your ready to pull vacuum and charge the system. Now oil the O-rings for the receiver/dryer and install the A/C lines to it and your system is now closed. With both valves of the gauge closed connect the blue valve to the low pressure line, and the red hose to the high pressure line. The yellow hose should still be connected to the vacuum pump, and the pump should have the proper amount of oil in it before turning it on. Now open both valves on the gauge and turn the pump on. You should see the low side needle drop down to 27-30 in/mg right away. Keep the pump on about 25-30 mins and then shut it off. If the gauge goes back up towards zero turn the pump on again and pull vacuum again (the reason that this happens is that there could be excess water that’s turning to vapor in the system and bring it back up to zero). If you pull vacuum on the system more than three times there’s a leak somewhere and you’ll have to inject the system with UV dye and hold a black light to all the components and lines to find it. But if you’ve done everything the right way , the only places that might have leaks would be the evaporator or the condenser , possibly the compressor as well. But keep in mind that’s worst case scenario. If it holds the vacuum its time to charge it up. Close both valves on the gauge and remove the yellow hose from the pump.

      Last edited by Gummiegorilla; 06-02-2012, 09:11 AM.

      Comment


        #4
        - IMPORTANT : charging instructions must be followed carefully or you could get hurt !!

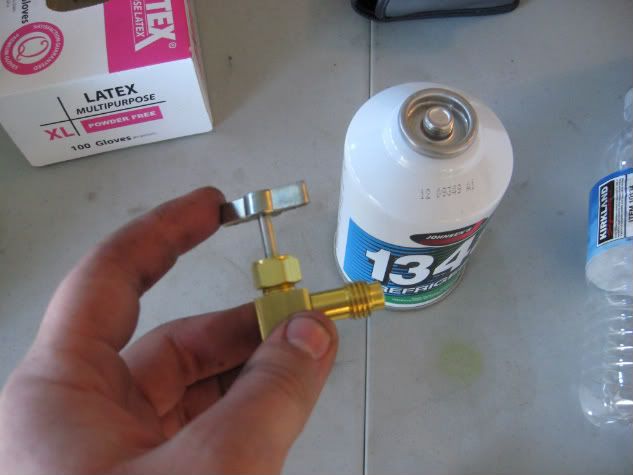
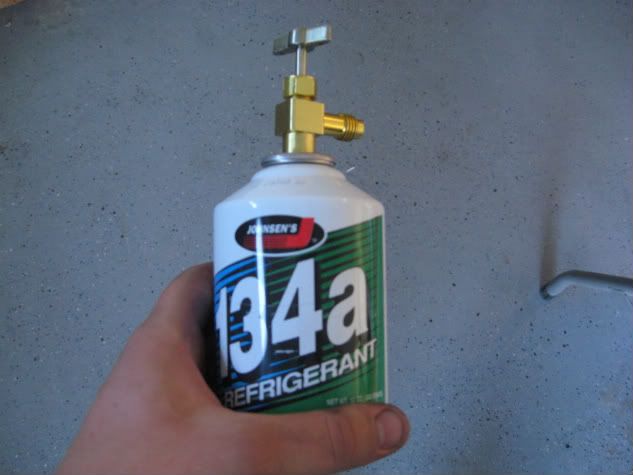
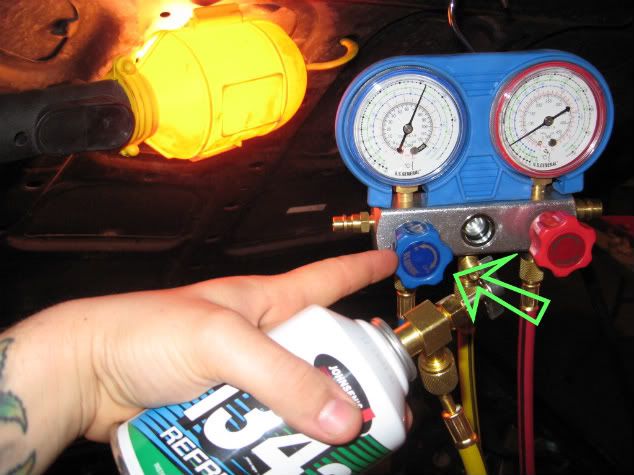
        1- Connect the can tap dispenser to a can of R134a but don’t screw it into the can yet

        2- Connect the yellow hose to the can tap dispenser

        3- Tap the can of R134a
        4- Purge air from the yellow hose with the valve above it (you’ll hear a strong hissing ) once air is purged release valve.

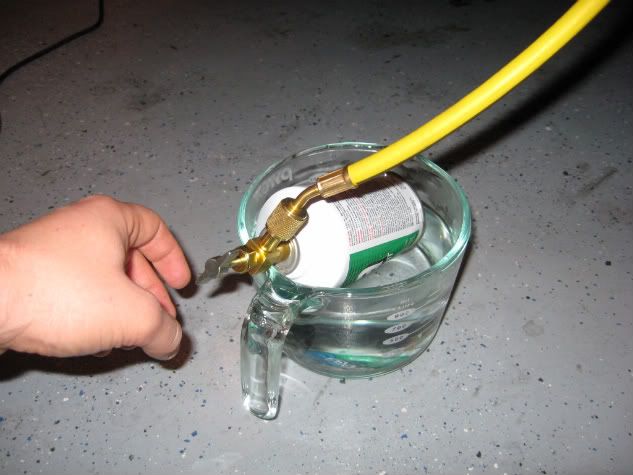
        5- Heat up the measuring cup half full of water , and microwave it for about two minutes so the water is nice and warm but not boiling. OPEN THE LOW SIDE VALVE ON THE GAUGE SET ONLY, OPENING THE HIGH SIDE WHILE FILLING MAY CAUSE THE CAN OF R134A TO EXPLODE !! Now place the can of R134a into the warm water. Doing this eliminates the need to constantly shake the can back and forth.

        6- Now after the first can of R134a is the system go ahead and close the low pressure valve and remove the empty can of R134a. There should now be enough pressure in the system for the switch to turn the compressor on.
        7- Start your car and turn the A/C controls to full blast with the maximum cool setting with the windows completely rolled down and the A/C button pushed.
        (Updated)7-a: If the readings on the manifold gauge low side pressure steadily builds but the high side pressure stays @ zero or doesnt build very high the problem is a faulty expansion valve. It will need to be replaced as it cannot be cleaned an reused. Please only add one can of R-134a to the system and then check your manifold gauge set because if you have a faulty expansion valve and you dont realize until you completely fill the system youll have to purge all of it again and refill which can be quite expensive.
        8- Attach another can of the R134a to the yellow side hose , tap it , purge the air , open the low pressure valve, and put the can in the warm water. Make sure to do it in that order with every new can or the air in the yellow line will just end up in the system and then you’re going to have to evacuate it and refill it again. My car took roughly 4 cans of R134a give or tale a little. Remember its probably not a full 4 cans worth , you loose some of it purging.
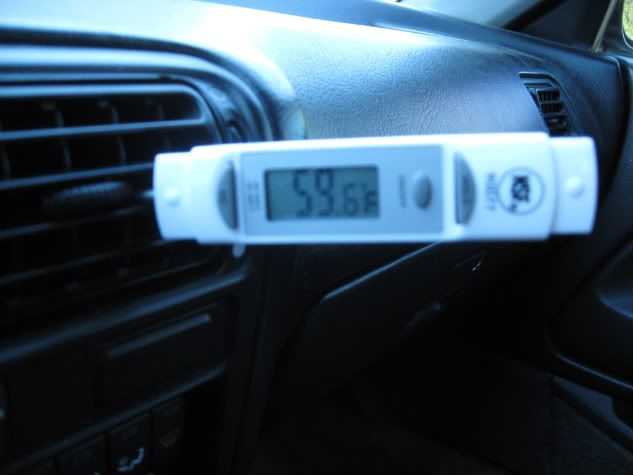
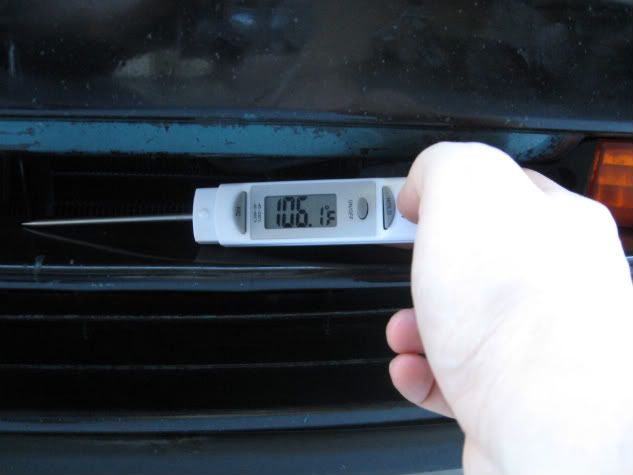
        9- while you’re putting the R134a Into system have the Digital thermometer in the center vent to let you know what the temp is. When I finished this project the inside vent temps were roughly 59 degrees with a peak low of 56 degrees. Keep in mind that before my vent temps were the same as the outside ambient temps. Actual air temp is about five to seven degrees warmer than that. The ambient air temperature around the condenser front bumper area was about 106-107 degrees , not to bad when you live in Vegas hehehe.

        10- Now put your car back together , front bumper and whatever else you removed , put back.

        Step 10 : The Most important thing of this How-To

        Enjoy You’re Newly Retrofitted A/C System !! You Worked Hard For It !!


        I hope that you guys enjoyed this ,
        Peace ,
        GUMMIEGORILLA.
        Last edited by Gummiegorilla; 06-02-2012, 09:12 AM.

        Comment


          #5
          I hope that Deev deems this STICKY worthy Also if anyone has any questions reguarding this DIY shoot me a PM and I'll get back to you as soon as i can
          Last edited by Gummiegorilla; 09-02-2010, 08:45 PM.

          Comment


            #6
            This is one of the better DIY's I've seen on here in quite some time.

            nice job!


            Formerly 91AccordExR33
            11.68 @ 127mph
            417whp/375wtq
            Sold: 8/2016

            Comment


              #7
              Not to bash your DIY or anything but... Wouldnt it just be easier to refill the system with r12?

              Comment


                #8
                great diy!!!

                Comment


                  #9
                  Great write-up.

                  Originally posted by Tippey764 View Post
                  Not to bash your DIY or anything but... Wouldnt it just be easier to refill the system with r12?
                  Good luck finding R12. It's been banned from production and consumer use since the mid 90s.
                  My pictures/photos will return soon...

                  Comment


                    #10
                    Originally posted by Tippey764 View Post
                    Not to bash your DIY or anything but... Wouldnt it just be easier to refill the system with r12?
                    It has been banned from production , and even if you can find it it'll run ya about 40$ a pound and you need a license to carry it , plus if theres a leak in your system say goodbye to all that R12

                    Comment


                      #11
                      Originally posted by Boost_Lee View Post
                      This is one of the better DIY's I've seen on here in quite some time.

                      nice job!
                      x2! This is a great DIY! I have never worked on an A/C, but this makes things quite clear.
                      '92 LX.
                      JDM H22a.


                      My Member's Ride Thread

                      Sold to: tysCb7, johnD1079, AccordHybrid92, GUA-D'zCb-7, judonoh, DriftProjectR, AeyJayCB7, C91BLX7, H23CB7

                      Comment


                        #12
                        nice write up thats a hall of a long process lol why i jus removed mine
                        got a question..........
                        can i remove the evaporator if i dont have AC anymore? it only makes sense....
                        -Tyler

                        Comment


                          #13
                          X2. I cut the lines going to the evaporator so now they're just sticking out of my firewall.

                          ^^^^^
                          Click picture for MRT


                          Sparkin CB7

                          Comment


                            #14
                            fantastic diy friend.
                            **Blk Housed Slut Crew Member #1**

                            **Don't b scared be prepared for the worst**
                            Da Drizzle's Sedan - Dr. Diy's Blk Housed Thread

                            '90 2Tone Coupe-Car Heaven_'89 Lude-Junk Yard
                            Mostly Usdm, some Jdm,Edm,&Puerto Rican RICE

                            Comment


                              #15
                              Originally posted by tm123 View Post
                              nice write up thats a hall of a long process lol why i jus removed mine
                              got a question..........
                              can i remove the evaporator if i dont have AC anymore? it only makes sense....
                              yes you can remove the evaporator , just take it out of the housing first, plug the hole in the housing that the A/C lines would normally go to and also the condensation drain hole. Then plug the holes in the firewall if you like. Put the housing back together and reinstall the housing and the two straps that hold it. the two plastic peices that make up the housing dont weight that much. The only reson that i say put the housing back is that you will need it if you still use your heater, other wise the air wont flow right and it will end up blowing under your dash. think of the housing sort of like a vent coupler hope this helps.

                              peace,
                              Gummiegorilla.

                              Comment

                              Working...
                              X