
Well this is a DIY I made its kinda quick but basically the alternator and power steering come off the same way and to adjust the belts is the same way too. Some people were wondering how to remove an alternator so I decided to DIY it. Hope this helps sorry for the sucky pictures. I am not responsible if you mess anything up. Do at your own risk!
NOTES: I have cruise control and Power steering removed so its easier for me. Taking off the Power steering pump is the same way as the alternator! and you do have to move that aside to reach the alternator (you do not need to take off the lines to the power steering unless you are changing the pump). Moving the cruise control (two 10mm bolts and a plug) to the side will also give you more leverage and clearance. I am also using f22a parts on my h22a so its basically the same.
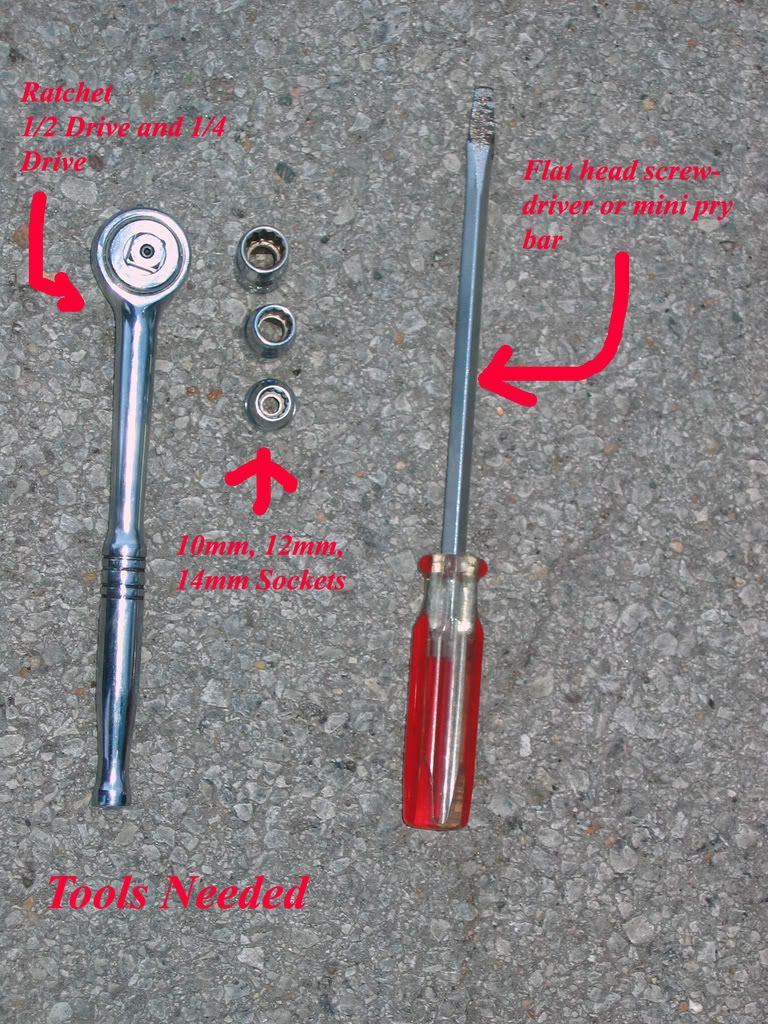
Tools needed:
1/2 drive or 1/4 drive ratchet(not pictured) - Your local parts store should carry these tools. Sears etc etc.
10,12,14mm sockets (wrenches are optional too but not pictured)
Flat head screwdriver or pry bar
REMOVING THE ALTERNATOR:
1. BEFORE YOU DO ANYTHING OR MOVE ON REMOVE THE TERMINALS OF THE BATTERY TO PREVENT PERSONAL INJURY.
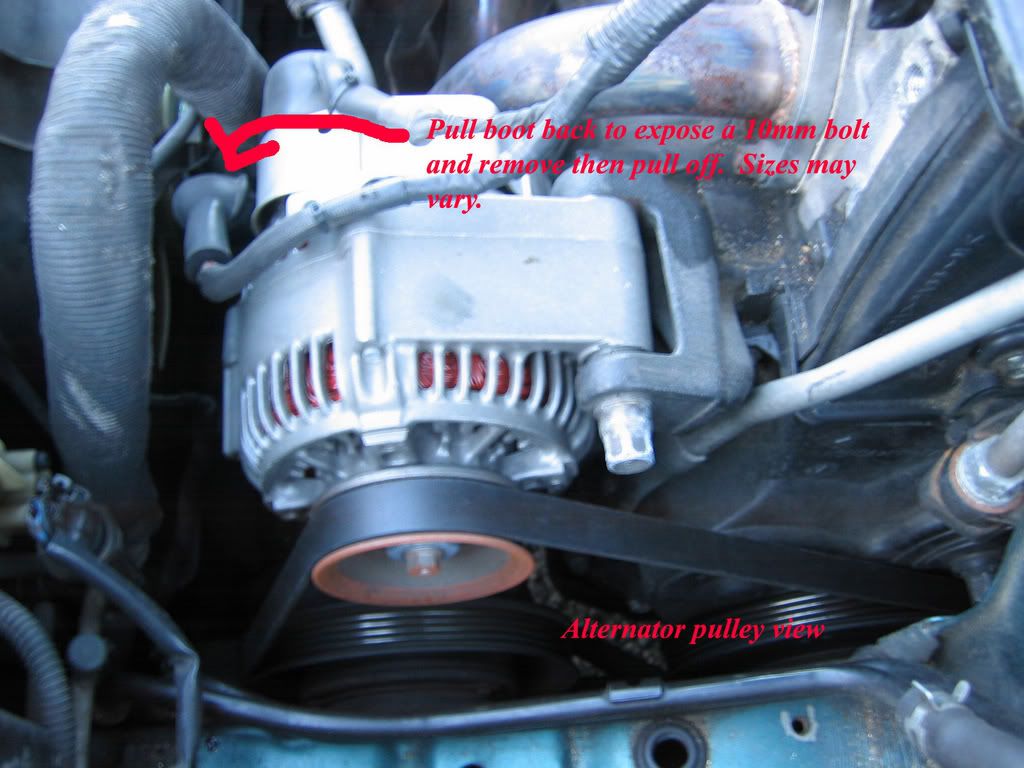
2. Start off by taking off the plugs on the alternator. One is a plug with a clip and the other is held on by a nut. You will need to pull back the boot to see these.

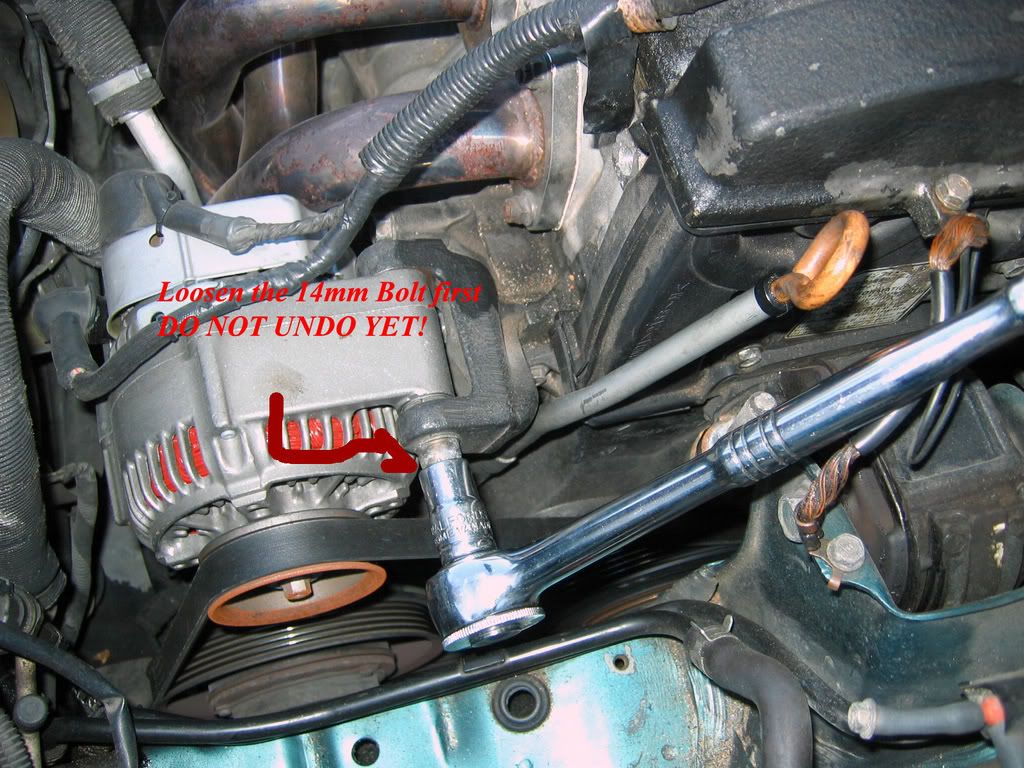
3. Start off by loosening the big 14mm bolt on top of the bracket but do not fully take it off.
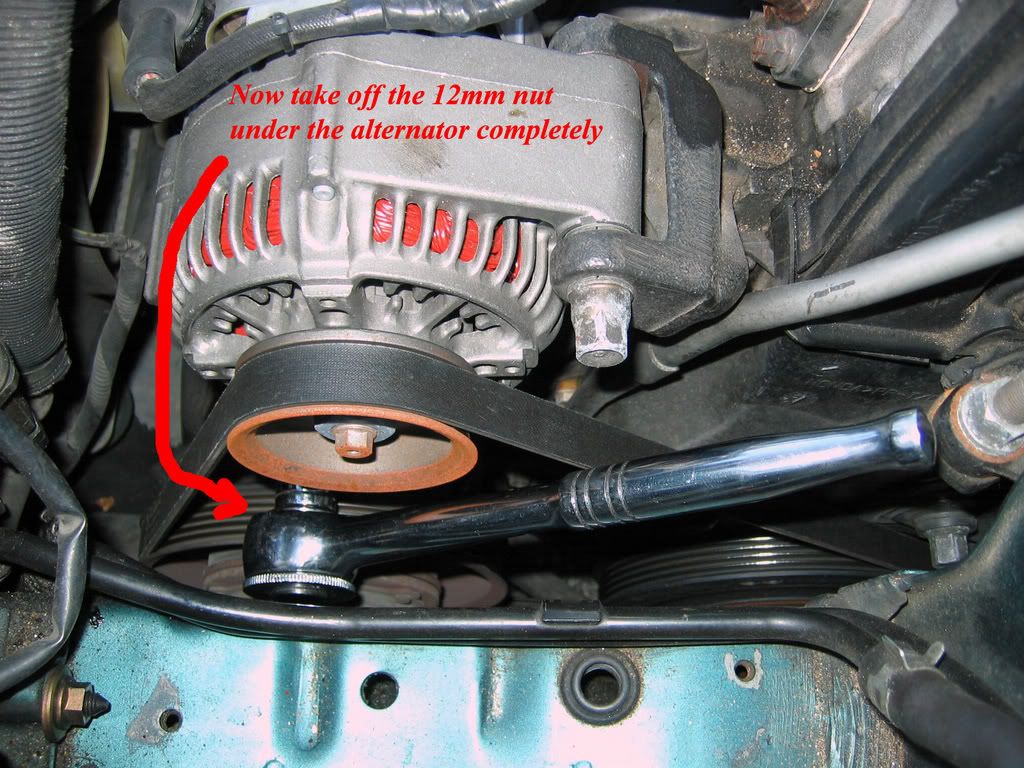
4. Next you need to find the 12mm bolt hidden under the pulley. Its sometimes hard to find might need a light or something to see it. It looks something like this:
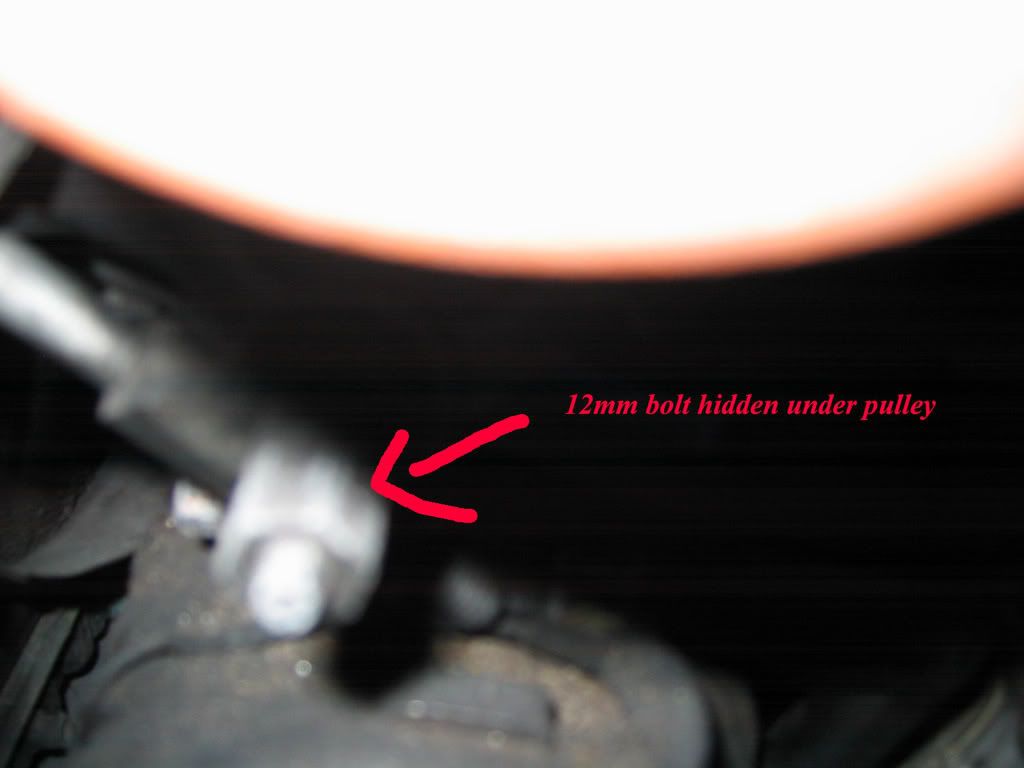
5. Get your 12mm and take the nut off.
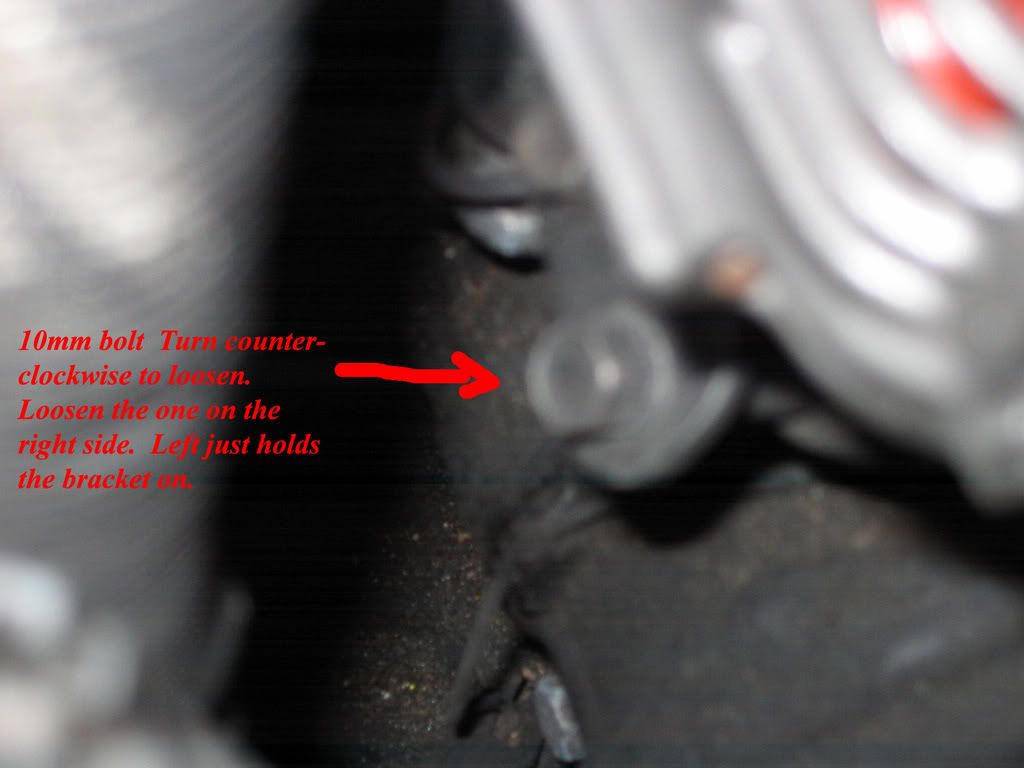
6. Now find the 10mm bolt pictured here. You will loosen the one to the right side. Use a 1/4 drive ratchet since it is a tight area. Also a 10mm ratcheting wrench also works. You will know if you loosened the wrong one because it's a short screw. IF you take it out just screw it back in it's no bigge if you take it out.
7. After loosening that the Alternator should start moving downward giving the belt slack. Loosen it to the point where you can get the belt off.
8. Next take off the 14mm bolt completely! and the alternator should be free sitting in the bracket.
9. Use a pry bar or mini screwdriver and pry the alternator out a bit and it should come right out.

10. Then when taking off the alternator pull out and move it a bit to the right to get it off that stud where the 12mm bolt went.
11. Reinstalling is basically the same way.
Hope this DIY helped. Sorry I didnt take off my parts =P They were working good haha. But hope the pictures and directions somewhat give you an idea on how to do this.
NOTES: I have cruise control and Power steering removed so its easier for me. Taking off the Power steering pump is the same way as the alternator! and you do have to move that aside to reach the alternator (you do not need to take off the lines to the power steering unless you are changing the pump). Moving the cruise control (two 10mm bolts and a plug) to the side will also give you more leverage and clearance. I am also using f22a parts on my h22a so its basically the same.
Tools needed:
1/2 drive or 1/4 drive ratchet(not pictured) - Your local parts store should carry these tools. Sears etc etc.
10,12,14mm sockets (wrenches are optional too but not pictured)
Flat head screwdriver or pry bar
REMOVING THE ALTERNATOR:
1. BEFORE YOU DO ANYTHING OR MOVE ON REMOVE THE TERMINALS OF THE BATTERY TO PREVENT PERSONAL INJURY.
2. Start off by taking off the plugs on the alternator. One is a plug with a clip and the other is held on by a nut. You will need to pull back the boot to see these.
3. Start off by loosening the big 14mm bolt on top of the bracket but do not fully take it off.
4. Next you need to find the 12mm bolt hidden under the pulley. Its sometimes hard to find might need a light or something to see it. It looks something like this:
5. Get your 12mm and take the nut off.
6. Now find the 10mm bolt pictured here. You will loosen the one to the right side. Use a 1/4 drive ratchet since it is a tight area. Also a 10mm ratcheting wrench also works. You will know if you loosened the wrong one because it's a short screw. IF you take it out just screw it back in it's no bigge if you take it out.
7. After loosening that the Alternator should start moving downward giving the belt slack. Loosen it to the point where you can get the belt off.
8. Next take off the 14mm bolt completely! and the alternator should be free sitting in the bracket.
9. Use a pry bar or mini screwdriver and pry the alternator out a bit and it should come right out.
10. Then when taking off the alternator pull out and move it a bit to the right to get it off that stud where the 12mm bolt went.
11. Reinstalling is basically the same way.
Hope this DIY helped. Sorry I didnt take off my parts =P They were working good haha. But hope the pictures and directions somewhat give you an idea on how to do this.


 ima make a DIY with the IAB to VTEC


Comment