This is a DIY to help those needing assistance with swapping a 5 speed transmission into a 90-93 Accord.
This DIY is from start to finish. There are other DIYs on CB7tuner however the information is not all in one place and are lacking pictures. This is my reasoning behind making another DIY.
TOOLS:
-Metric socket set 8mm+
-Metric wrench set
-36mm impact socket
-Breaker bar
-Ratchet
-Extensions
-Needle nose pliers
-Pliers
-Prybar(s)
-Floor jack(s)
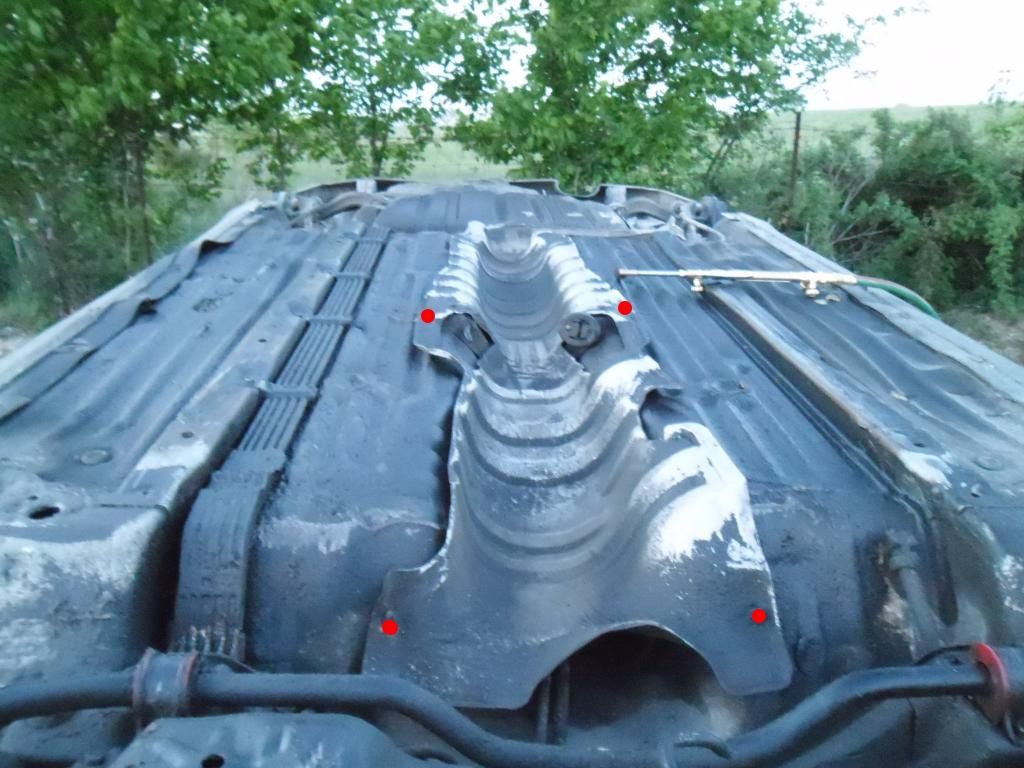
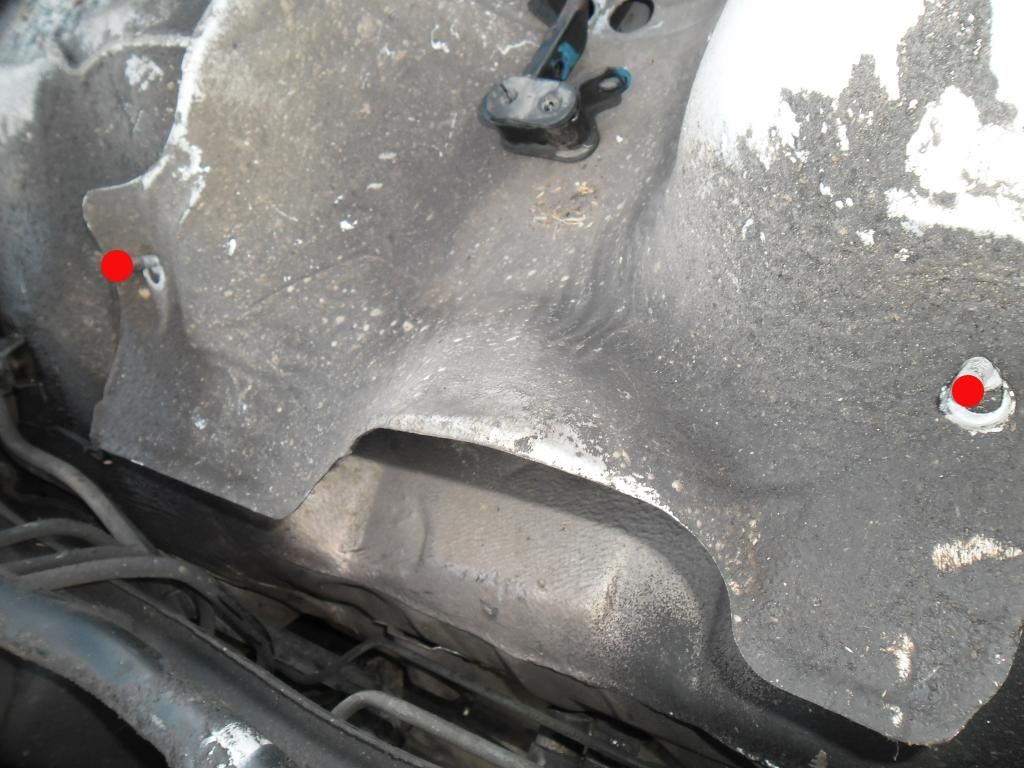
-Leather gloves (for dealing with heat shield).
-Welder (If not using ESP or Innovative passenger side mount).
-Drill
-Drill bits
-Grease
-Flat head screw driver.
-PB Blaster (Optional of course).
-Hammer (Rubber or claw).
-Objects to drive seals in.
-Hemostats
-Emery paper
-Torque wrench in ftlbs.
-Vise Grips
-Funnel
-Electrical tape
-Wire cutters
PARTS REQUIRED:
-5 Speed transmission (H2A5 or H2U5).
-Appropriate passenger side mount for the transmission you are using.
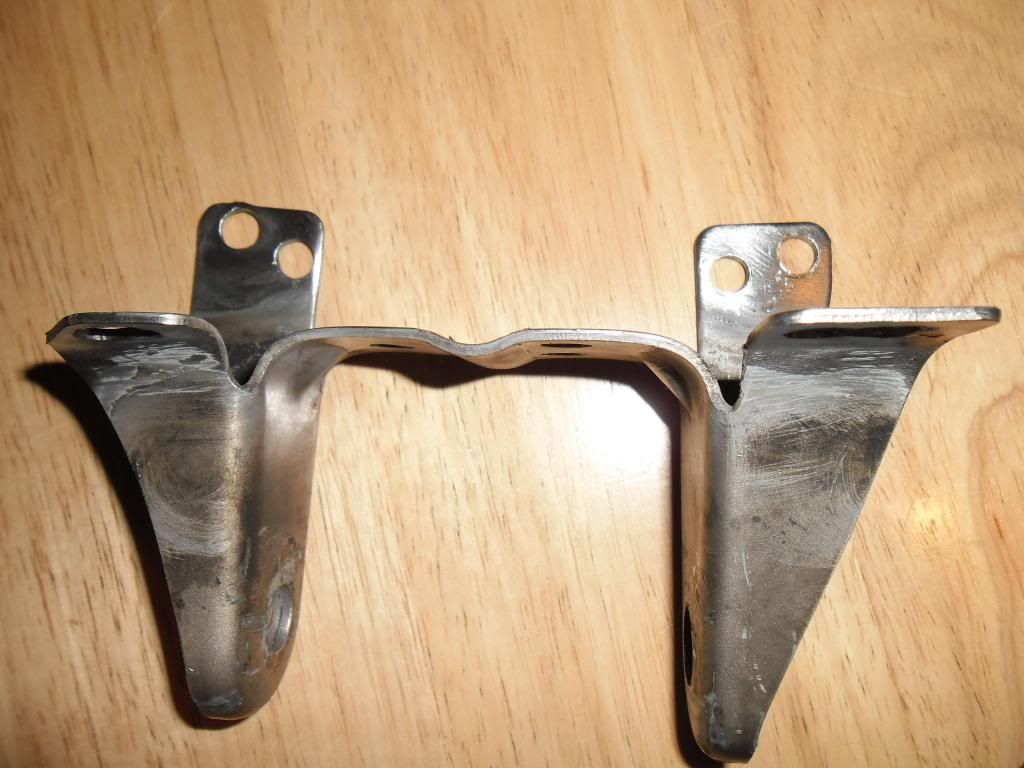
-Passenger side bracket. (Swap mount from Innovative or ESP.) I will be using a factory bracket in this swap).
-DX/LX 5 speed rear mount.
-DX/LX 5 speed rear T bracket.
-5 Speed starter.
-Lower 5 speed starter bolt. (Refereed to as the long transmission bolt).
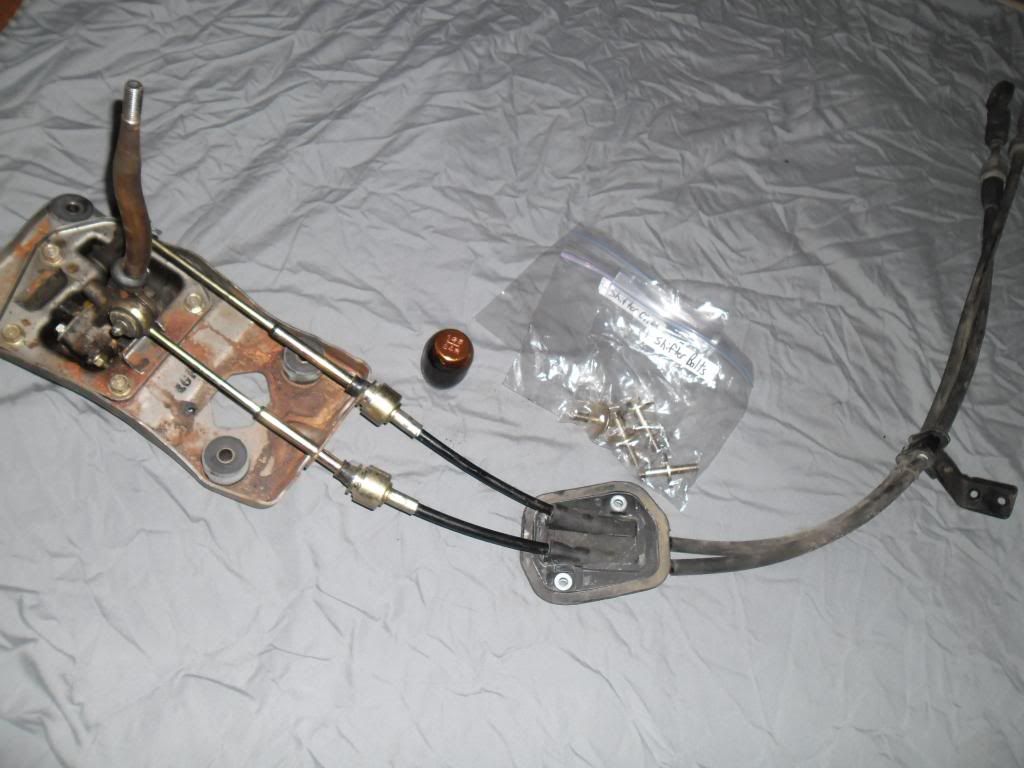
-Shifter assembly.
-Shifter assembly bolts & rubber bushings.
-Shifter C clips, 4 total. They are all the same.
-Shifter cables.
-Shift knob.
-Shift boot.
-Shift boot retaining ring with two phillips screws.
-Four shifter C clips. (One for each cable at each end).
-Flywheel.
-Clutch kit. (Pressure plate, clutch disc).
-Clutch release bearing.
-Pressure plate bolts.
-5 speed flywheel bolts.
-Clutch line (Valexracing on ebay or a custom bent-it-yourself hard line).
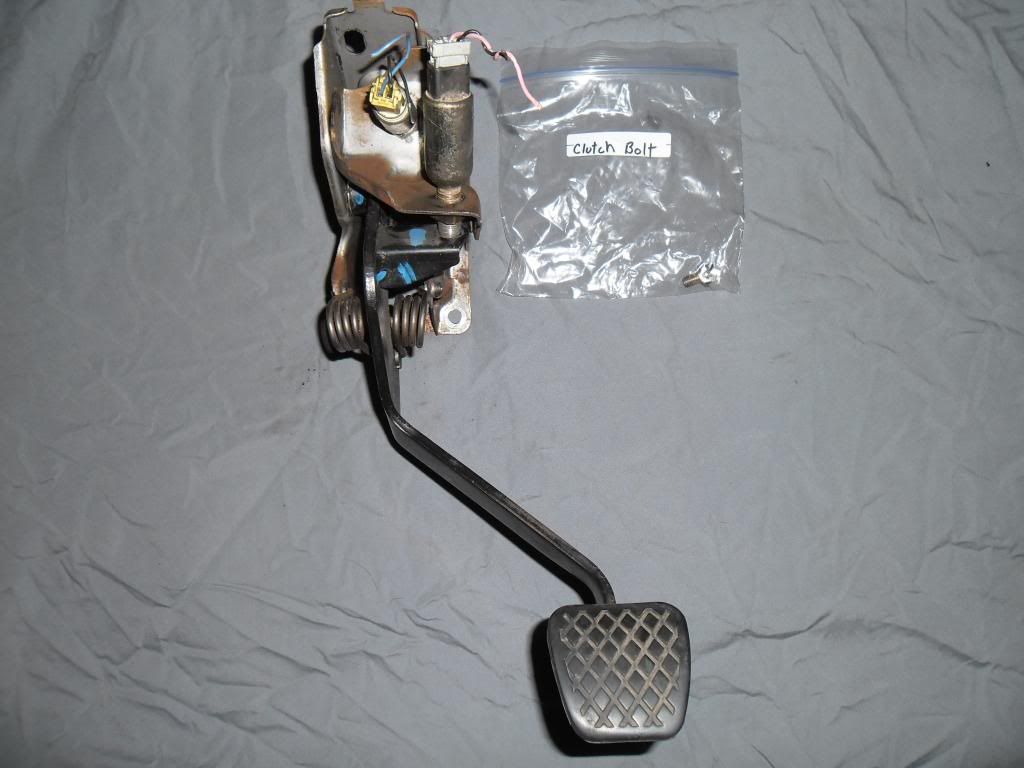
-Clutch pedal assembly.
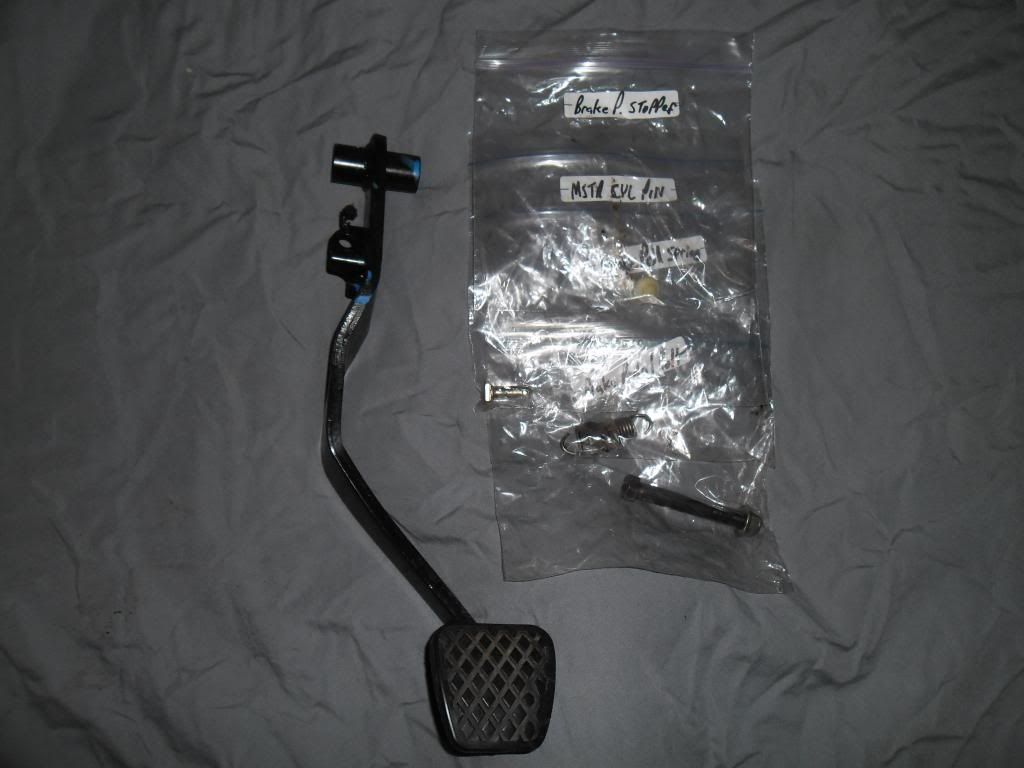
-5 Speed brake pedal arm.
-Clutch slave cylinder.
-Clutch master cylinder.
-5 speed driver side CV shaft.
-Intermediate shaft and 3 bolts.
-Clutch fork, spring and boot.
-Clutch hard line from slave cylinder to top of trans.
-Clutch rubber line from top of transmission. (End that attaches to top of trans has a banjo style fitting).
-5 speed inspection plate. (I have heard it called a bell housing.)
-Cotter pins.
REPLACEMENT PARTS:
-Clutch. You will want a good quality clutch and good quality parts. This is very important. Exedy, Daikin, LUK, Clutchmasters, Competition Clutches, even a Sachs. Use the appropriate stage or performance level for the power your making. Higher performance clutches are harder on the mating surface of the flywheel.
-Clutch release bearing. I have heard the bearing that comes with the Exedy clutch kits is a Nachi. I went with Koyo. $30 shipped.
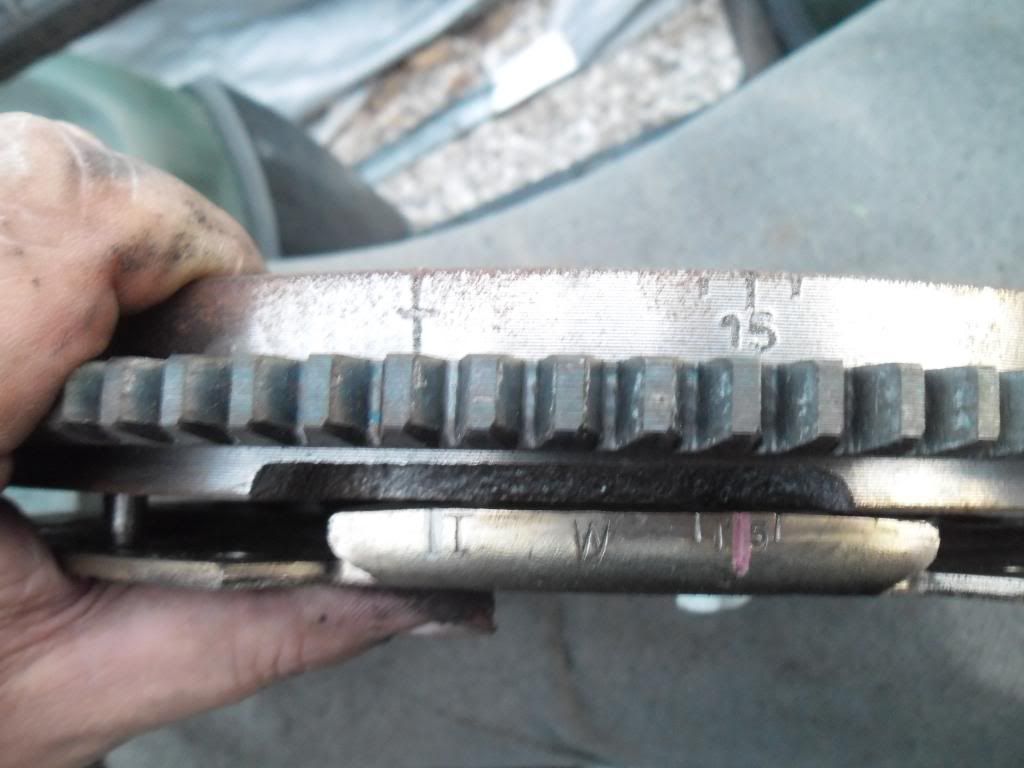
-Flywheel. You can go OE weight or a lighter weight aftermarket. Again, you will want a good quality flywheel. When a LUK is $50 shipped there is no excuse. You can also get an aftermarket Fidanza for $160ish shipped. With flywheels you want to see if it has timing marks before you install it. Some do not but they can be modified to have them. I used a Duralast due to last minute bullshit with a F1 Racing flywheel. Works great!
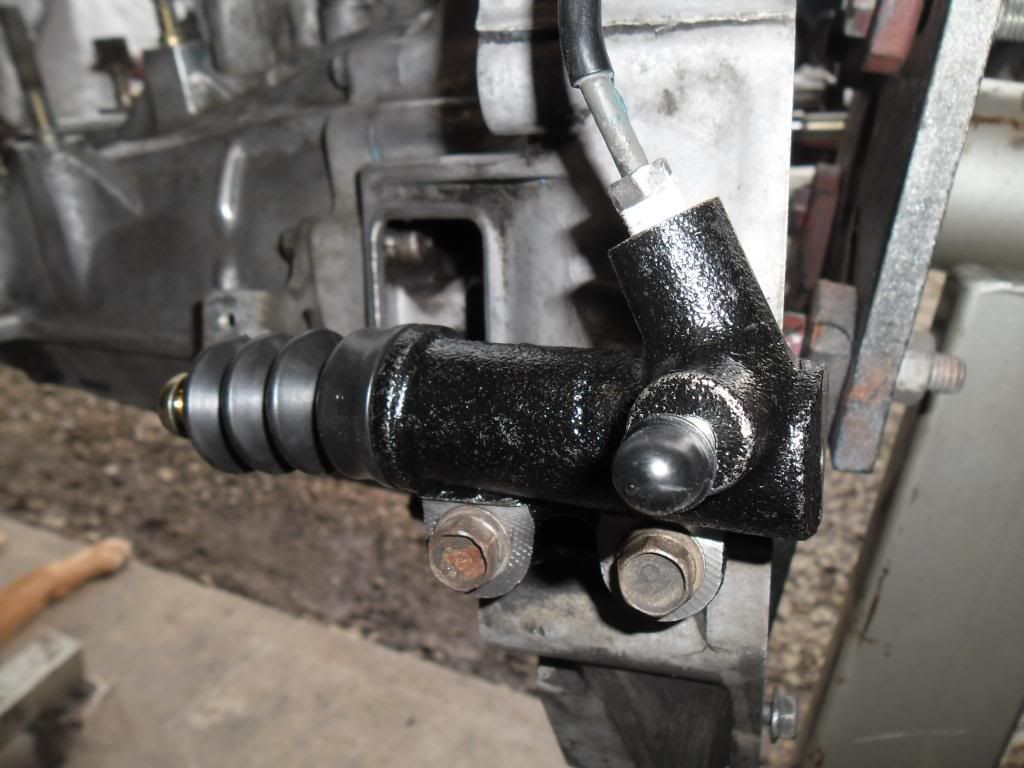
-Clutch slave cylinder. You will want a new one. I have used Centric in the past. $15 IIRC. It worked but not what I recommend. I got a Daikin/Exedy for $30 shipped. Its painted unlike the Centric one I had so it wont rust.
-Clutch master cylinder. You will want a new one not used as this part sucks and you won't want to do it anytime in the near future. You can get a Exedy/Daikin clutch master cylinder and slave cylinder together from Gripforce on Ebay for $55 shipped. Thats what I recommend.
-Engine mounts. You can get good ones or cheap ones and urethane fill them. I had good OEM ones so I used them. I seen a set of DX/LX 5 speed engine mounts in a complete set on Ebay for $90 shipped. If I didn't have good mounts I would have bought those and a couple tubes of Betaseal U-428.
-Rear main/crankshaft seal. You want a damn good rear crankshaft seal. I used an ARS (Arai Seisakusho) rear main seal. OEM will also work great. I believe ARS is OEM, not positive but either will work. I paid $25 shipped for my ARS rear crankshaft seal.
-Transmission seals. There is a shift rod seal, and two output/drive axle seals that need to be replaced. I used an Ishino right and an ARS left. I got both for $25 shipped. I used a NOK shift rod seal. The input shaft seal is internal. No need to replace it unless its leaking. I do not cover that in this DIY and its not a real common problem that I am aware of.
OTHER:
-Blue thread locker.
-Hondabond HT sealant.
-2 Quarts of Genuine Honda MTF or Syncromesh. I used Honda MTF.
-Dot 3 brake fluid.
OPTIONAL:
-ESP or Innovative driver side mount. You will need to contact ESP or Innovative as for which mount you need. I did not go this route so this will not be covered in this DIY. However everything else is just the same. You use your mount while the rest of us remove, relocate and weld brackets.
-Rear main/crankshaft seal case gasket set. Part number: BS40430. I went this route as I had another issue with the end of the crankshaft. My rear main seal was so bad it wore a groove in the crankshaft. I used the gaskets that came in the Fel-Pro kit at Autozone and didn't use the seal. I did this to space the seal case out just a bit, therefore the seal as well to get the seal to ride on a slightly different spot of the crank. You can read more on this in the rear main part of this DIY.
-GETTING A TRANSMISSION AND PARTS-
The first thing you will want to do is acquire a transmission and the related parts. I'm up in the air about whether to start on automatic transmission removal first or prepping your parts for installation. Since it's more common for people to continue to drive their Accord while acquiring the funds and the parts required for this conversion I'm going to start with the prepping first.
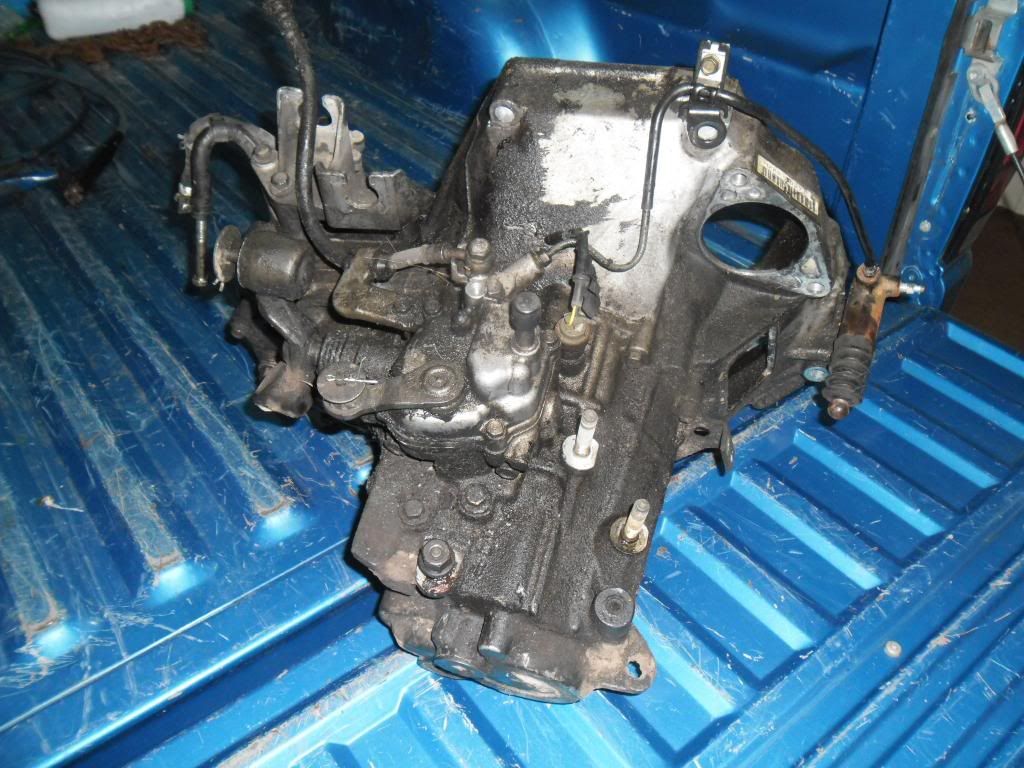
You will want a 5 speed transmission. An H2U5 or H2A5 is probably what most of you will use. You want to try and get it from a good source as you don't want a bad one. Mine came from a car that I own that got totaled. More on that later but I knew it was good and that's my point.
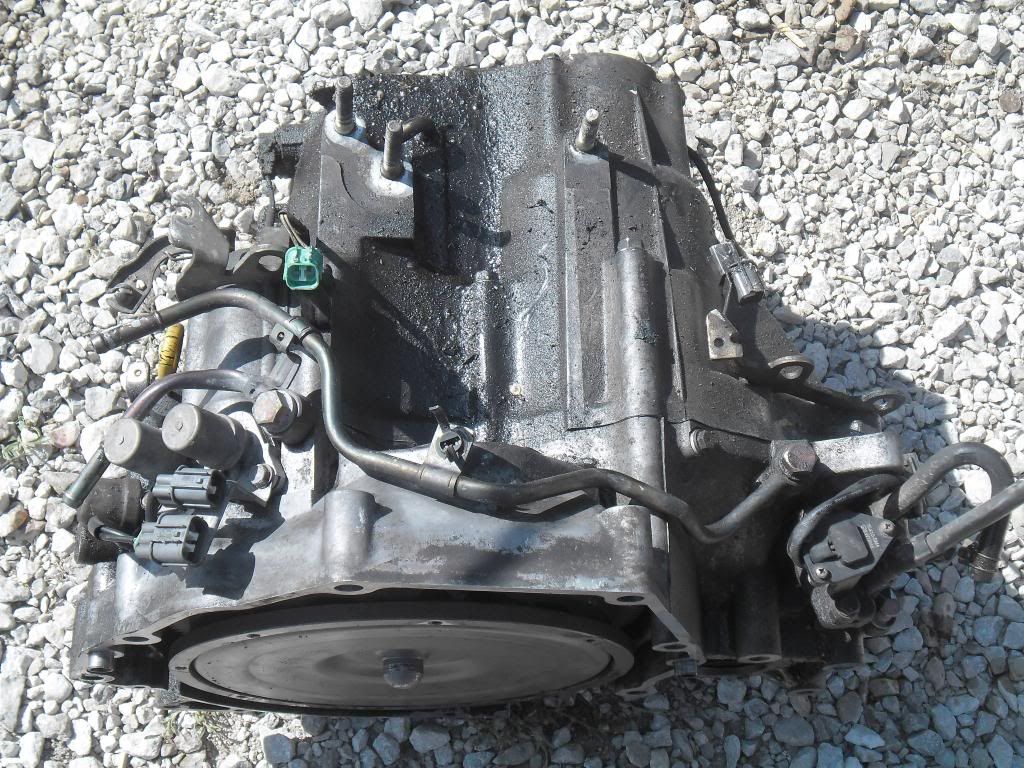
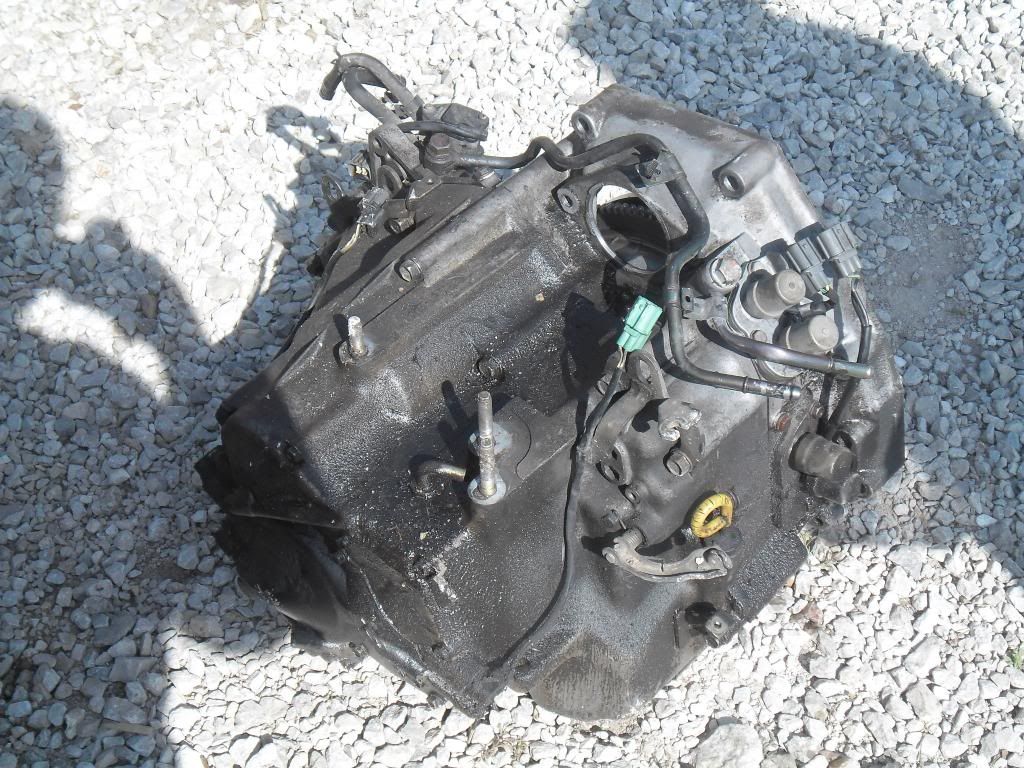
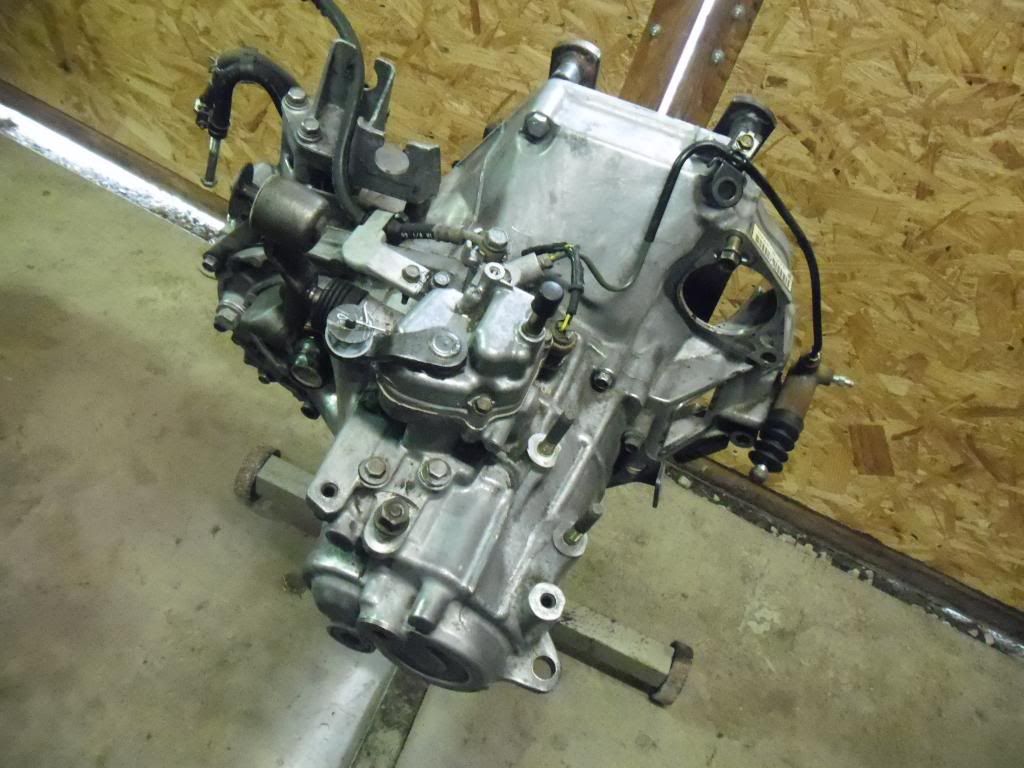
Below is my H2A5 in the back of my pickup, all dirty and nasty.
-PLUG HOLES-
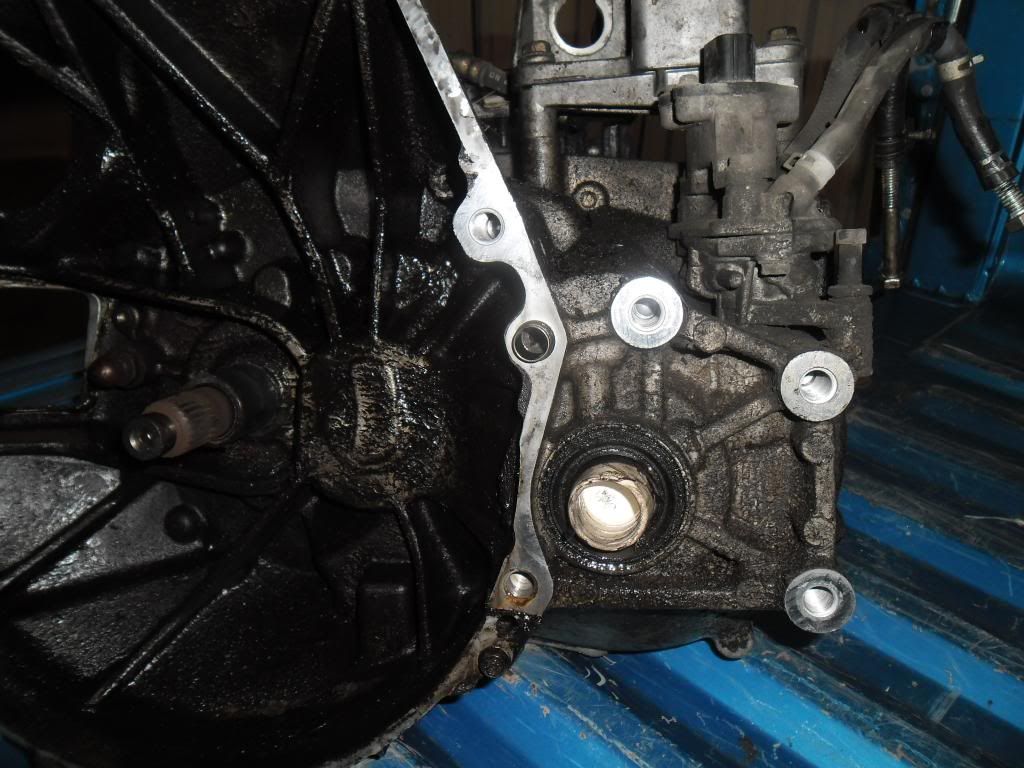
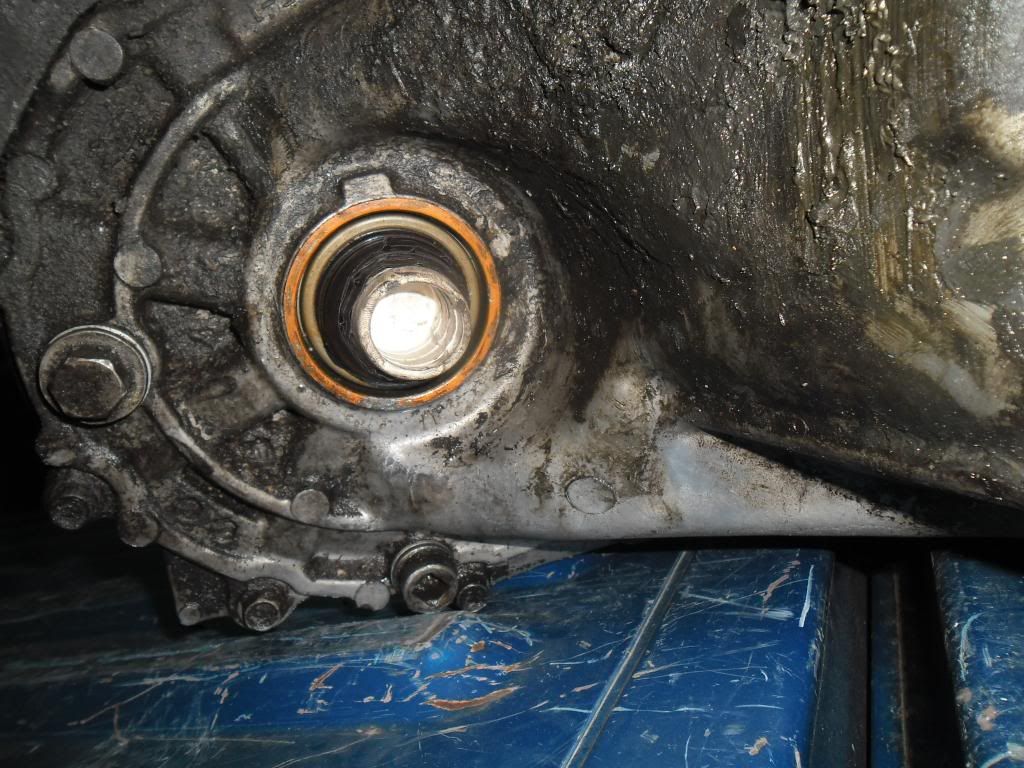
First go ahead and clean the transmission up. Most of the time they have 20 years of road grime and dirt on them. You want to get it pretty clean. You don't want a bunch of shit getting into the transmission when you open it up. Which you will be doing later. Remember to plug the holes where the CV shaft/intermediate shafts go in before you spray it. I used the rubber stoppers off the bottom of a chair and electrical tape. Also plug the hoses coming off the VSS. I used some bolts. Remove the clutch fork, spring and boot too. It's pictured later in this DIY so don't worry about which way it goes.
Below are some photos of the objects I used to plug the CV/intermediate shaft holes.
-CLEAN-
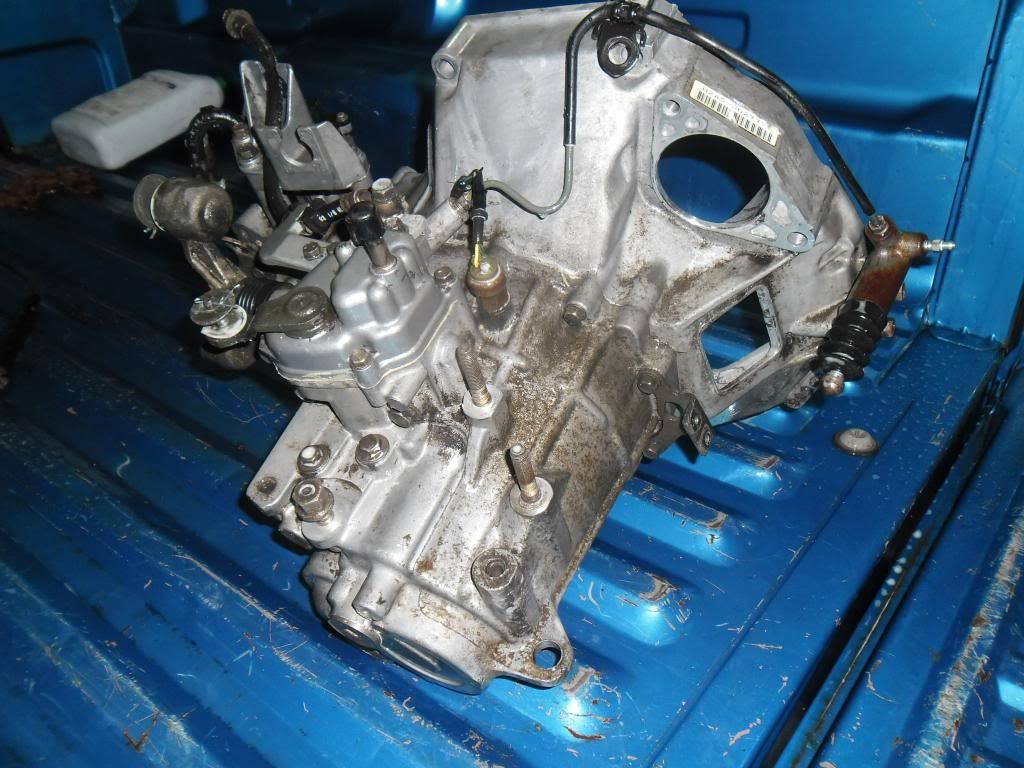
Below is my transmission after some Simple Green and the car wash. I clean it up further but this will do.
-CV SHAFT/INTERMEDIATE SHAFT SEALS-
Take your new CV shaft seals and find something to push on them with. Pictures are better at explaining this. I made my "object". You want to push on them to the outer side. The middle is fine but the middle towards the outside is best.
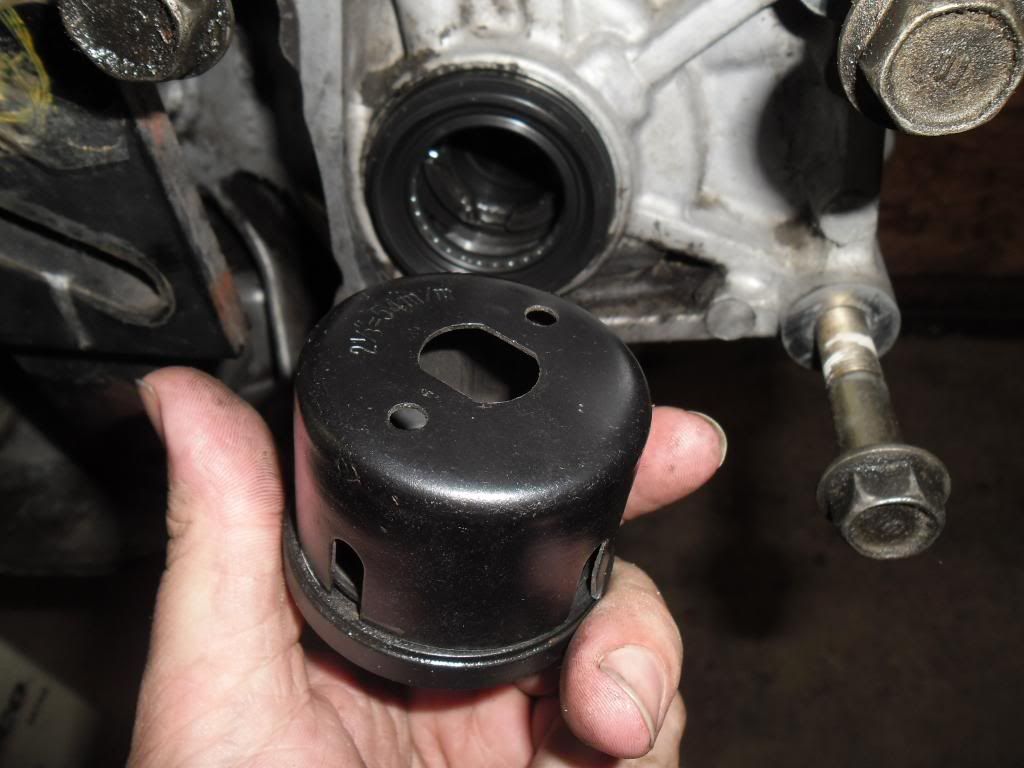
Now that you have something to drive your new seals in its time to pry your old seals out CAREFULLY. There are seal pullers you can use. If your careful you can use a flat head screwdriver as I did. Pry on one side a bit, then the other. This is refered to as "wallering" or "waller" it out where I live. That's the best way I can describe it. Walk it out? I don't know...
Below is the intermediate shaft side with the seal out.
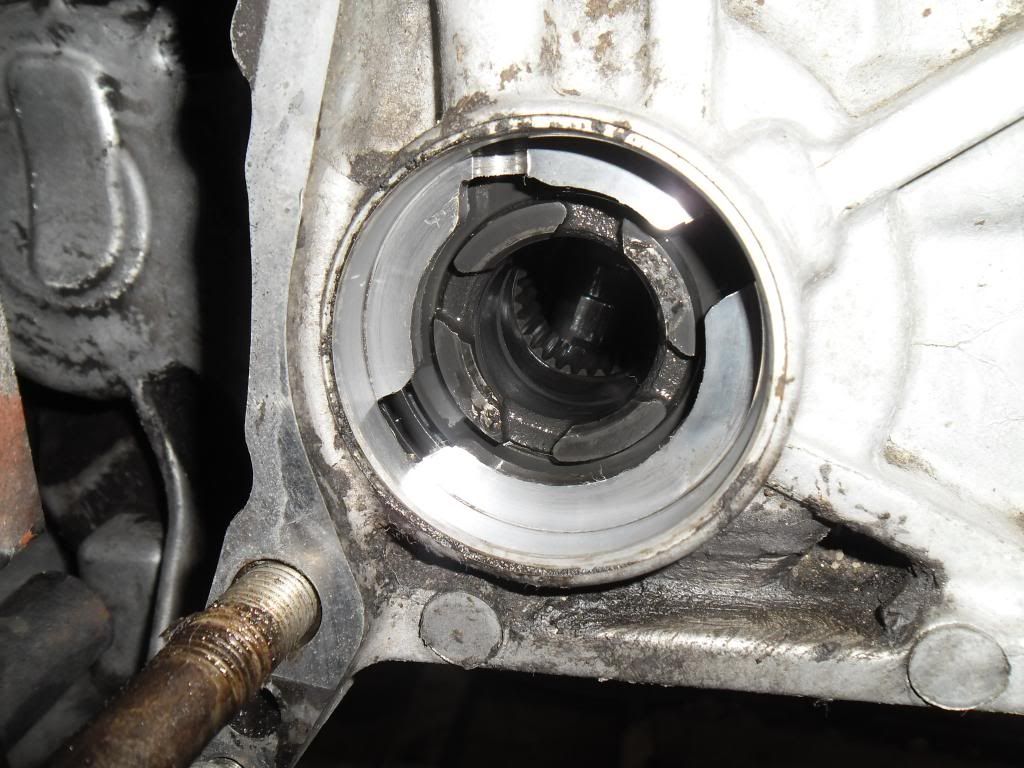
The passenger side CV shaft seal with the seal out.
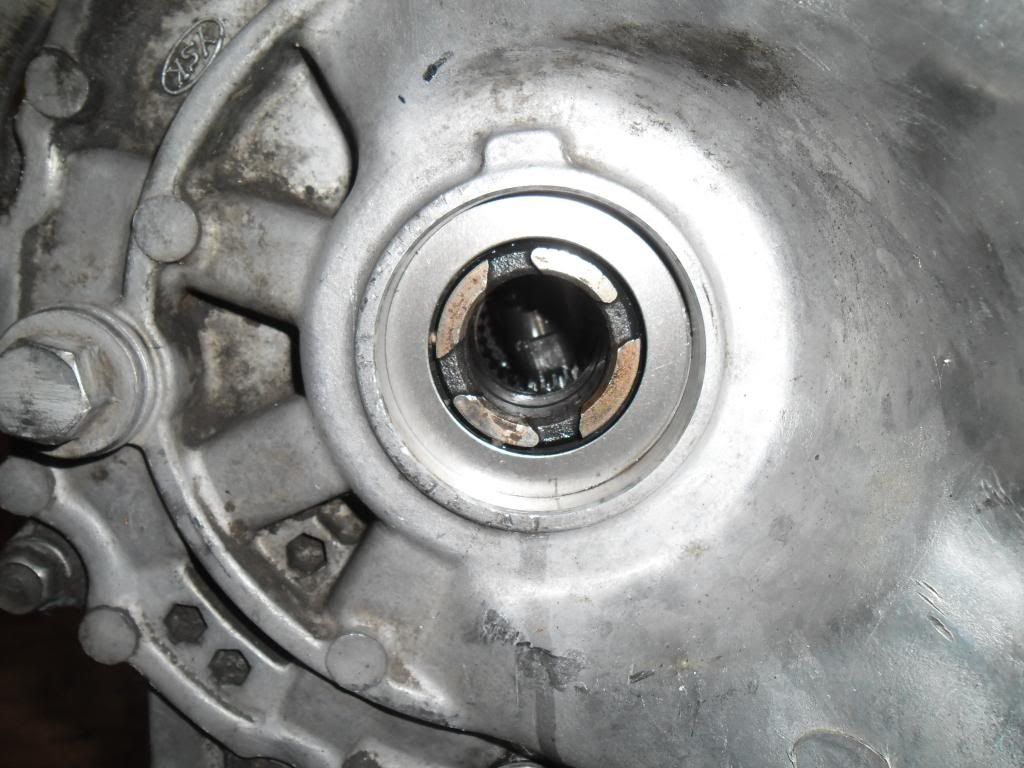
The seals are different sizes! They are close so you will have to size both up to which ever side you do first. You will know when you have the right one (if you have any sense). You can also look up part numbers or whatever you have to do to keep them straight. One will go, one won't.
Clean the holes out first! Below shows how this is done. Tap in a circle on the object while against the seal until the seal sits down in the recessed hole. You will hear the sound change to a more solid tap and the seal will not proceed to go any further once its reached the proper depth. Do not use excessive force.
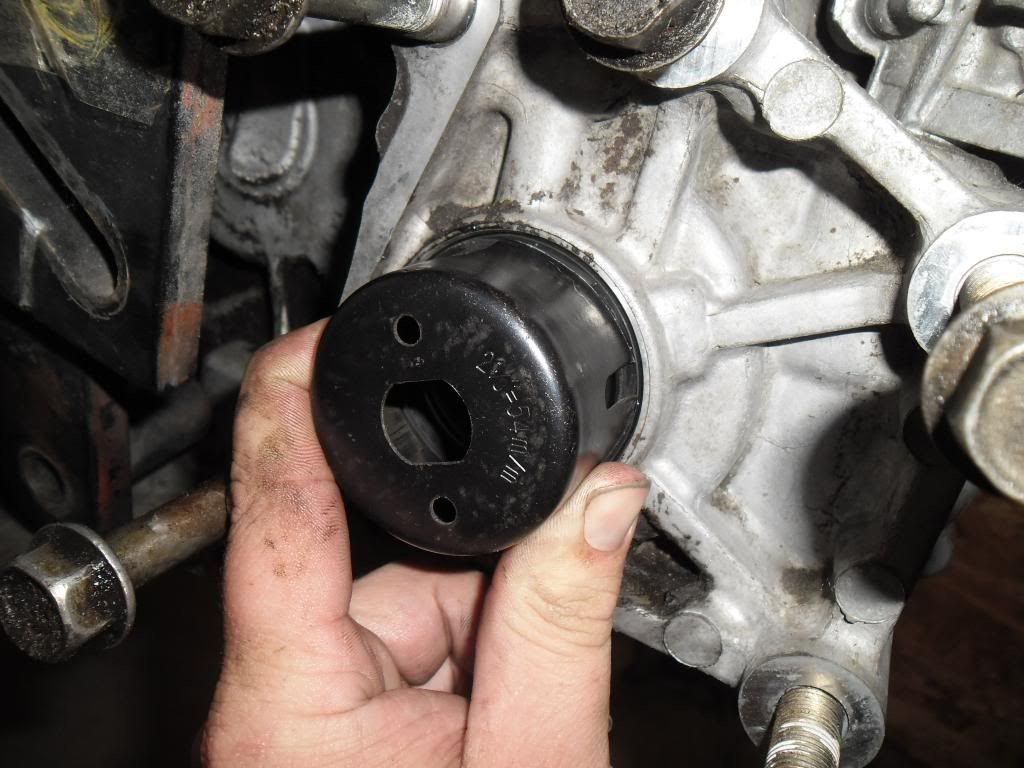
And the seals are in. These pictures should give you a better idea of the proper depth for the seals.
Passenger side CV shaft seal.
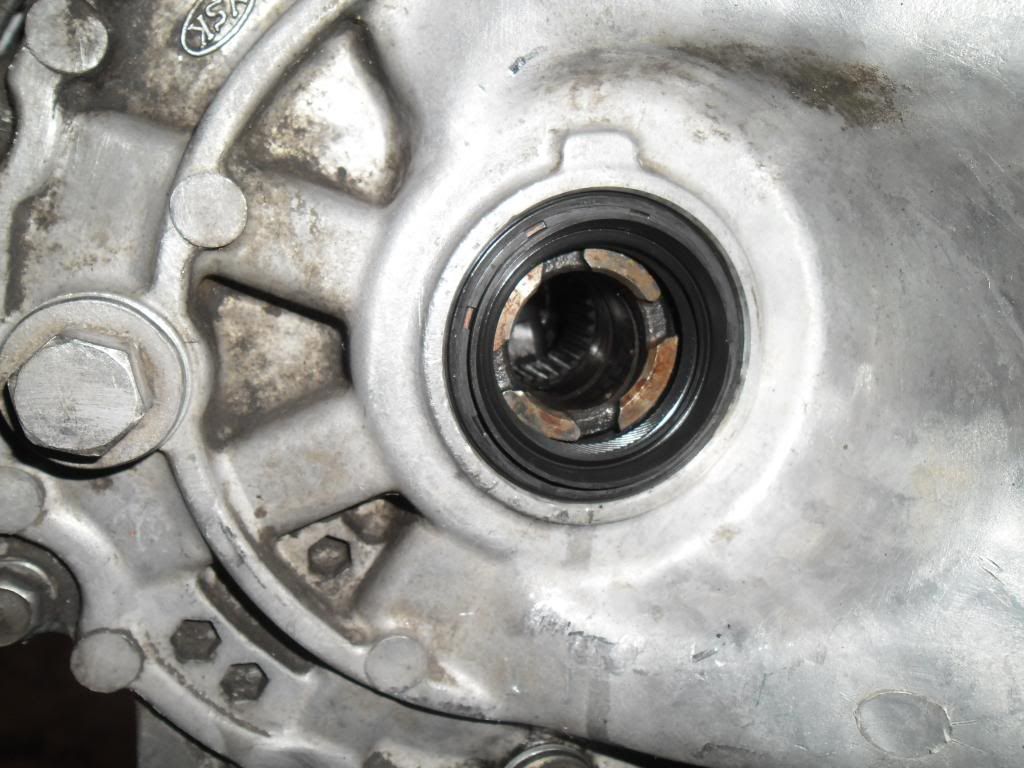
Driver side intermediate shaft seal.
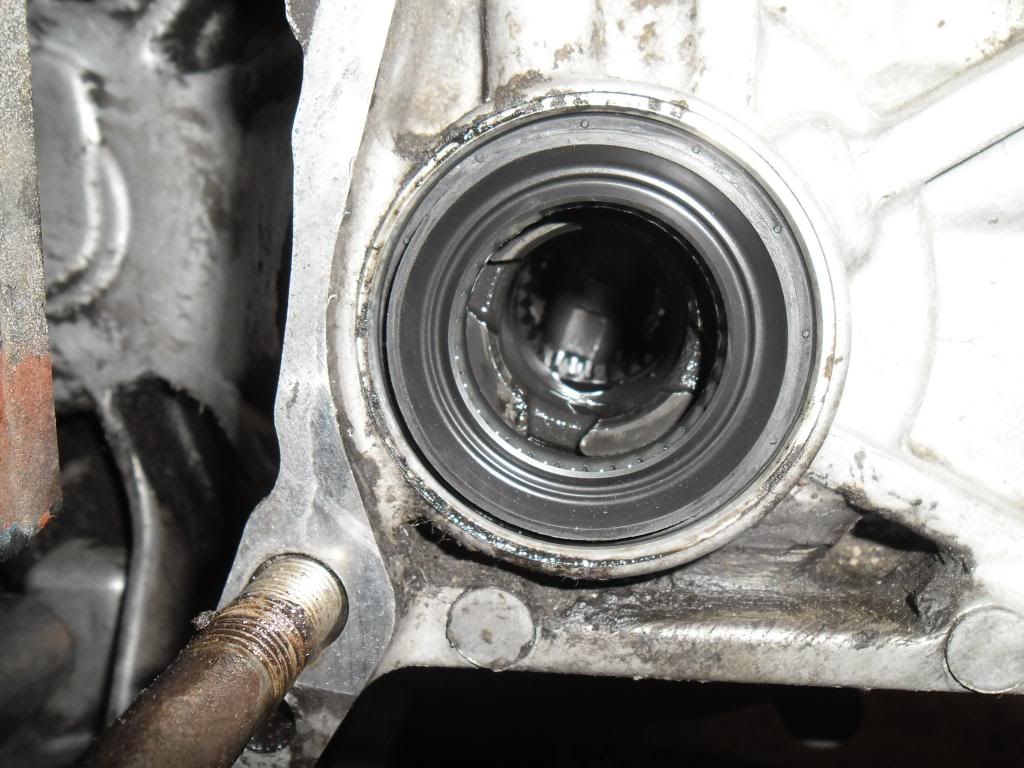
Now use some paint caps and paper tape (or anything else that serves this purpose) as I did to keep dirt and debris out of the trans while you do the rest.
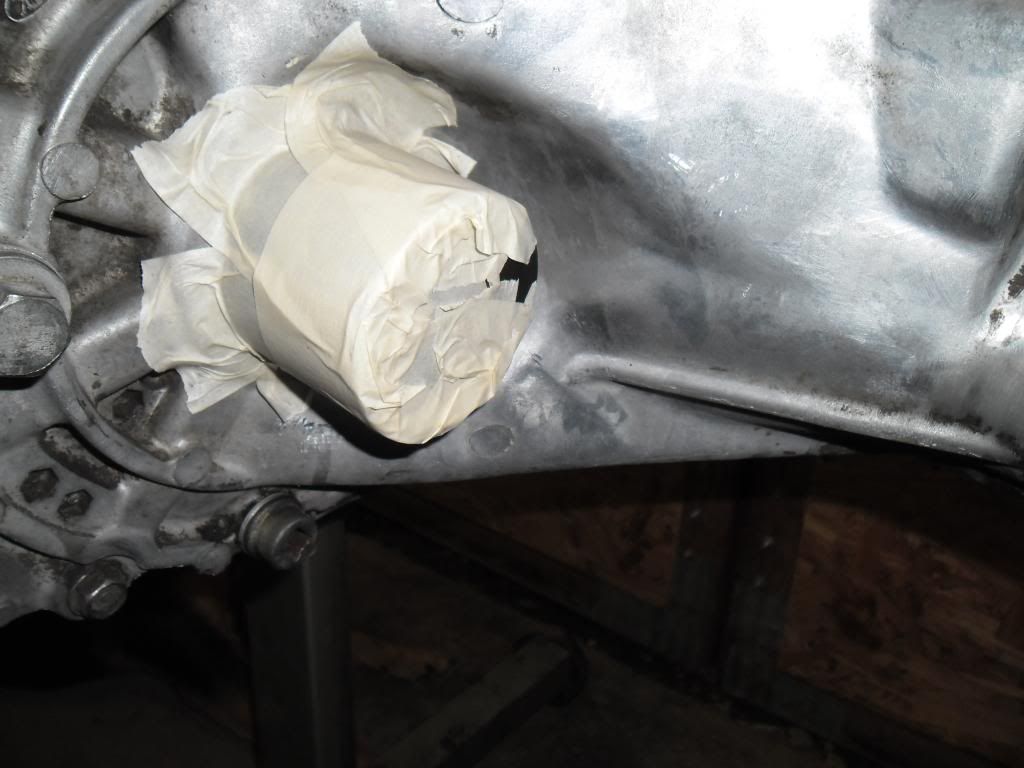
-SHIFT ROD SEAL-
Now your ready for the shift rod seal. Get cleaned up, put some rubber gloves on if you have them and get comfortable. What your about to do can screw you around real good if you don't do exactly as I say and read this before you do it.
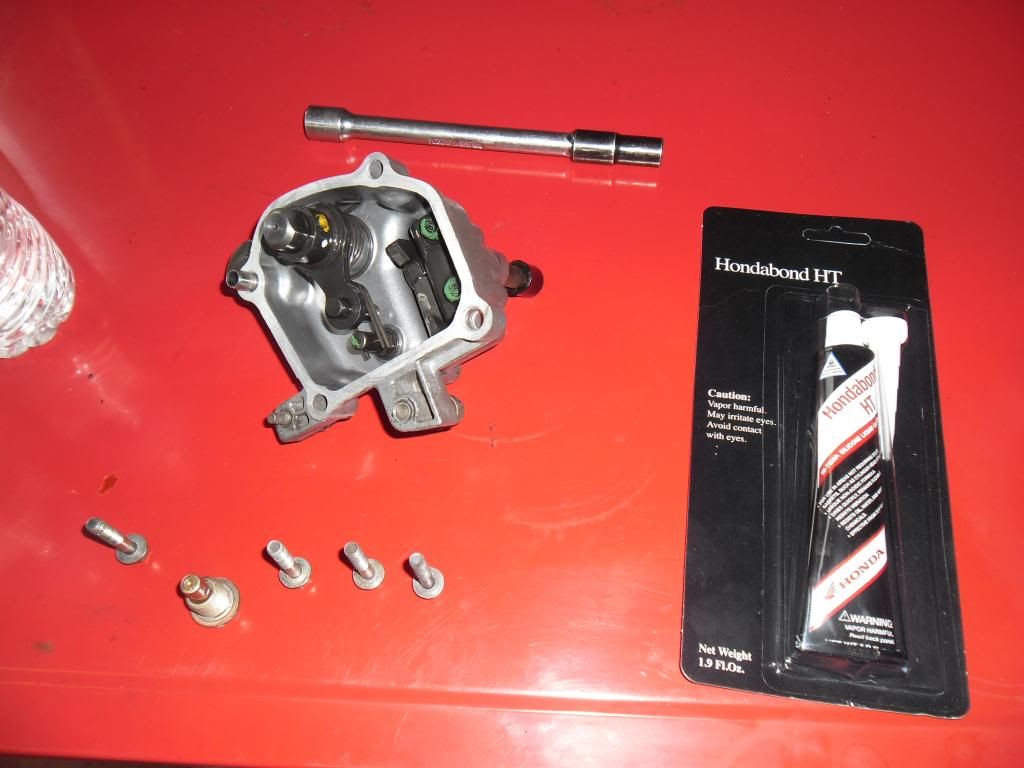
You need a 10mm and a 12mm socket. A 12mm 6 point is preferred. Also if you have your MTF already purchased grab a bottle of it too, crack the cap open and pour a bit in the cap and have it on hand. You also need your Hondabond HT sealant.
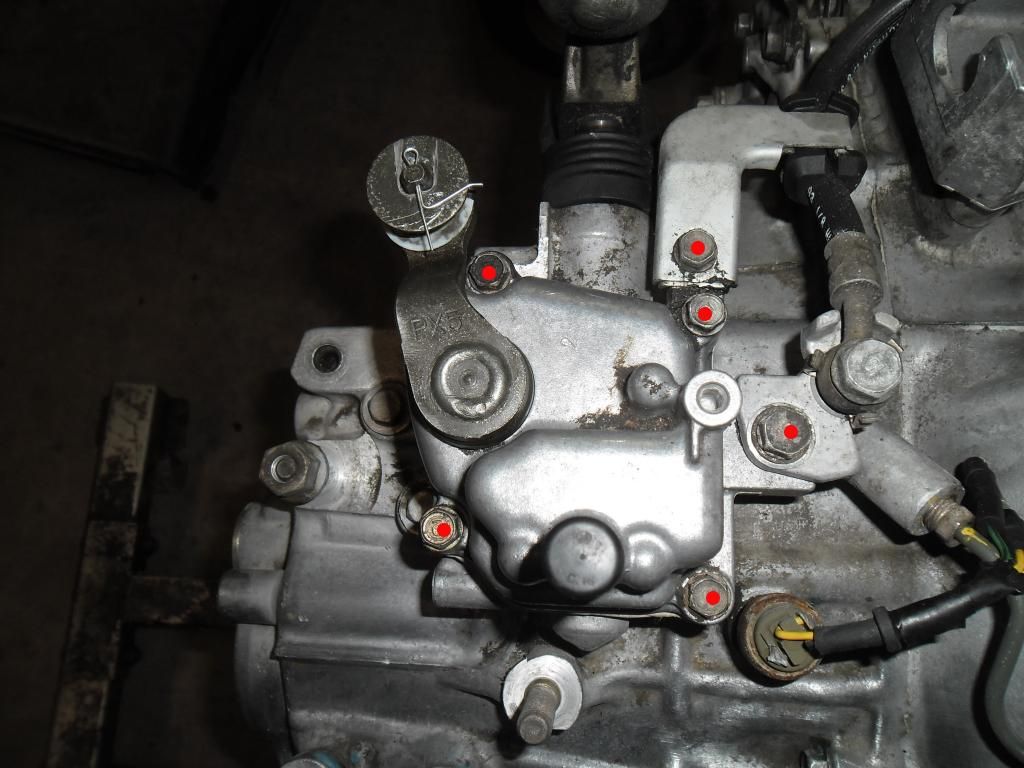
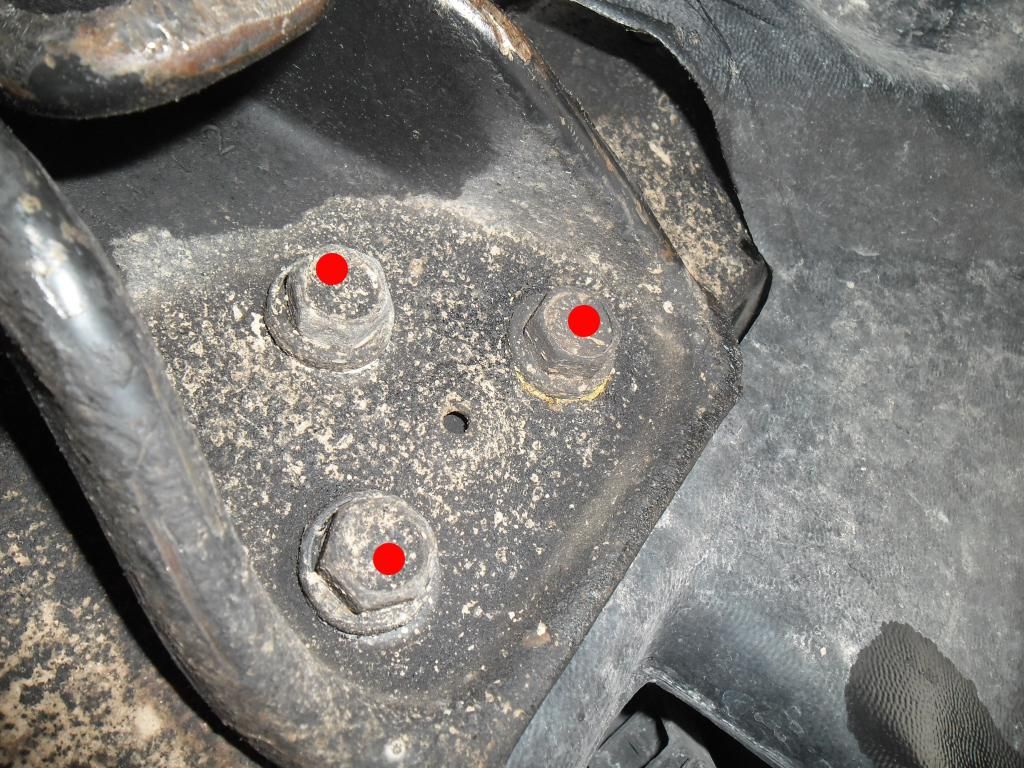
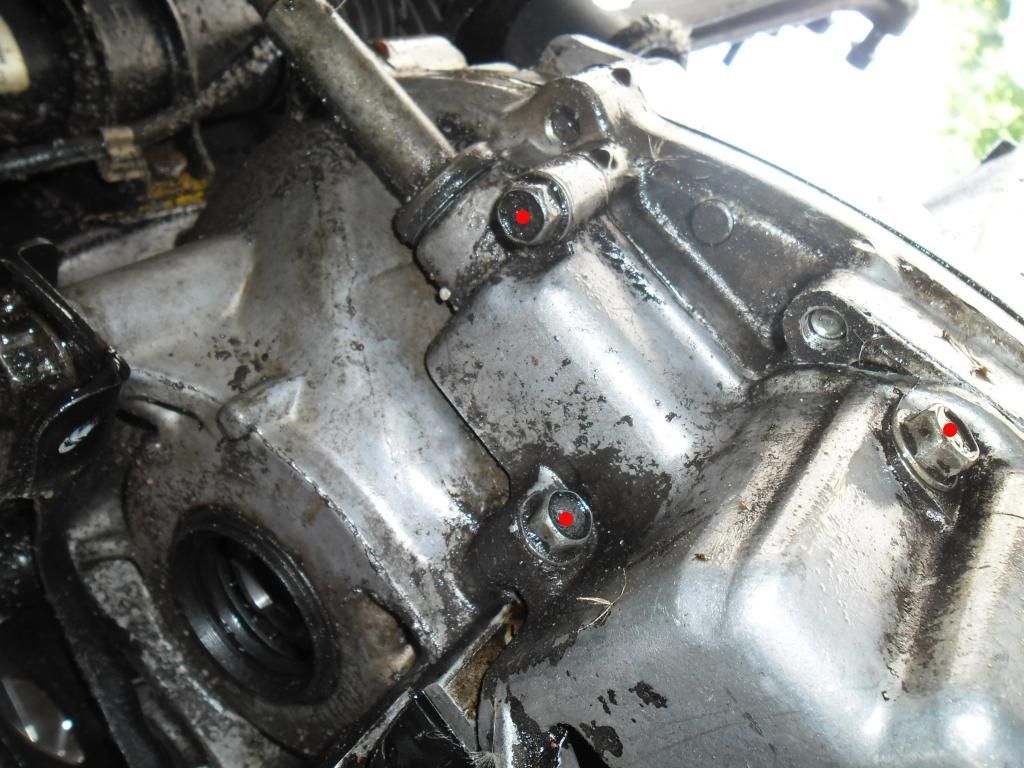
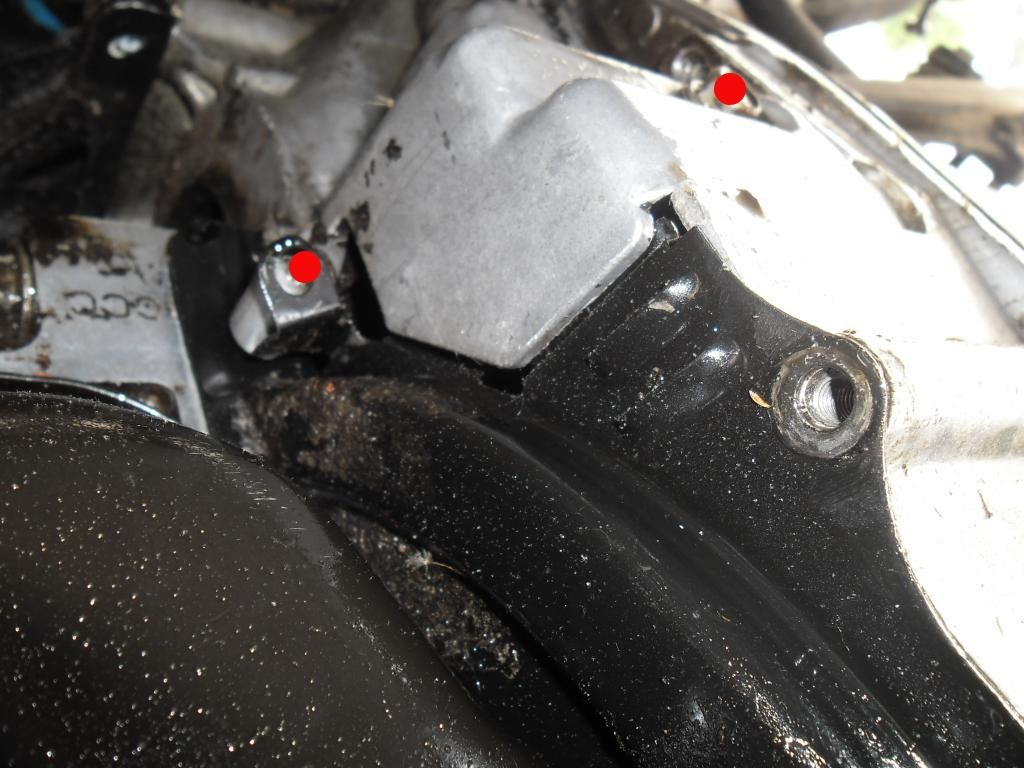
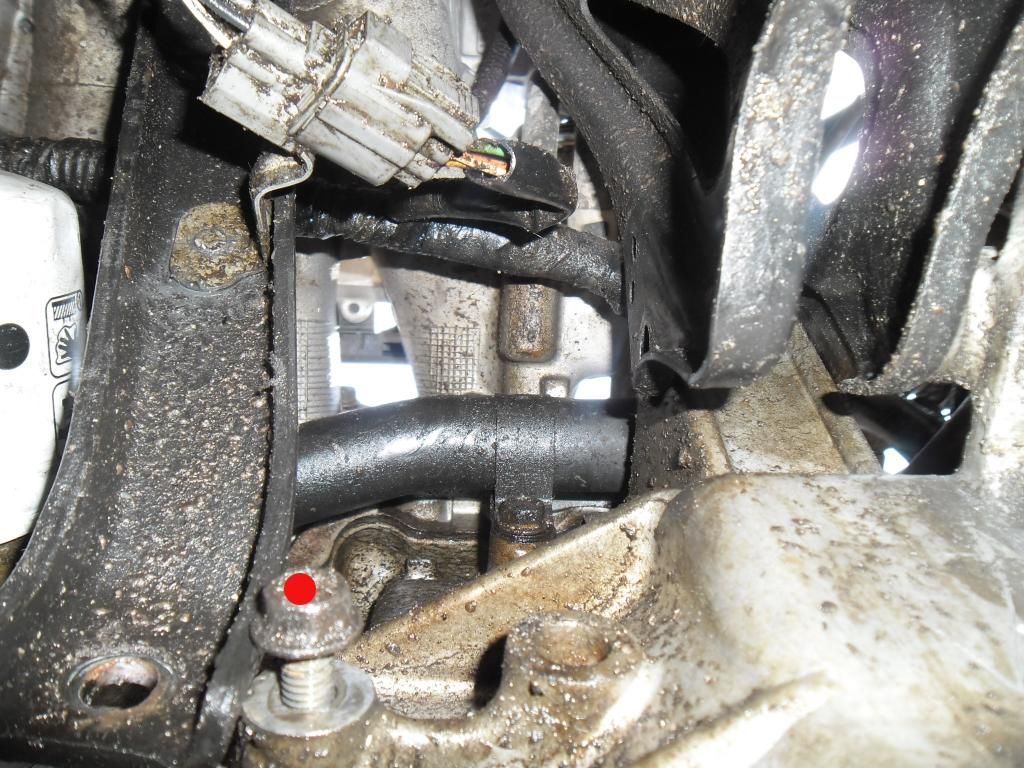
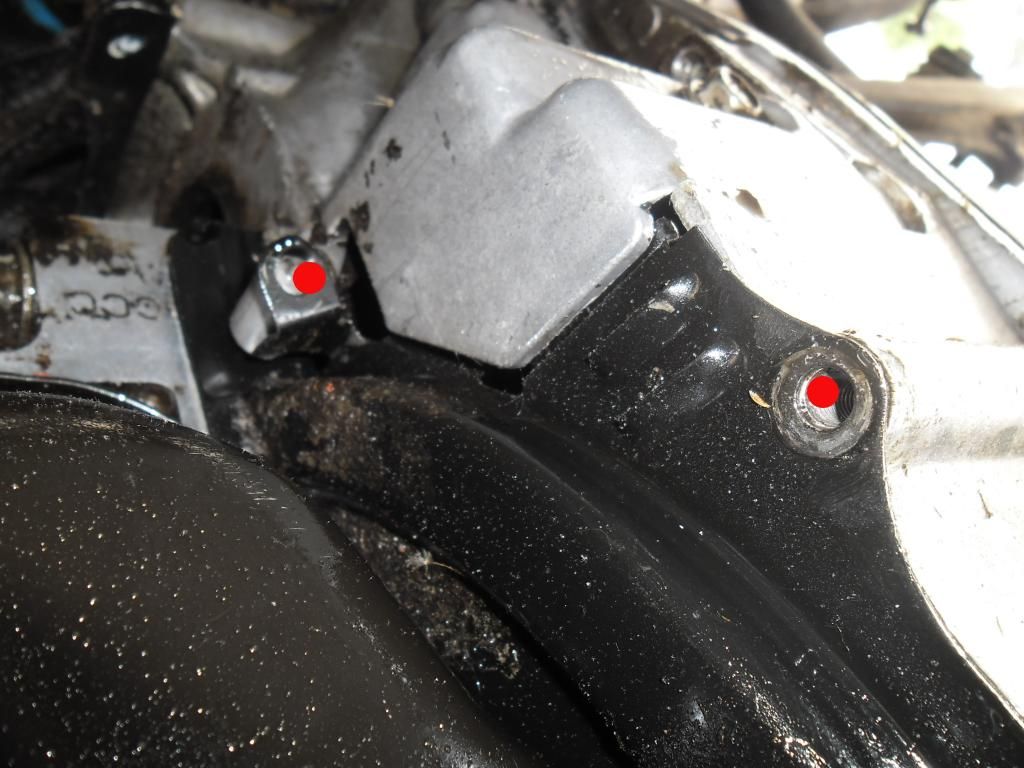
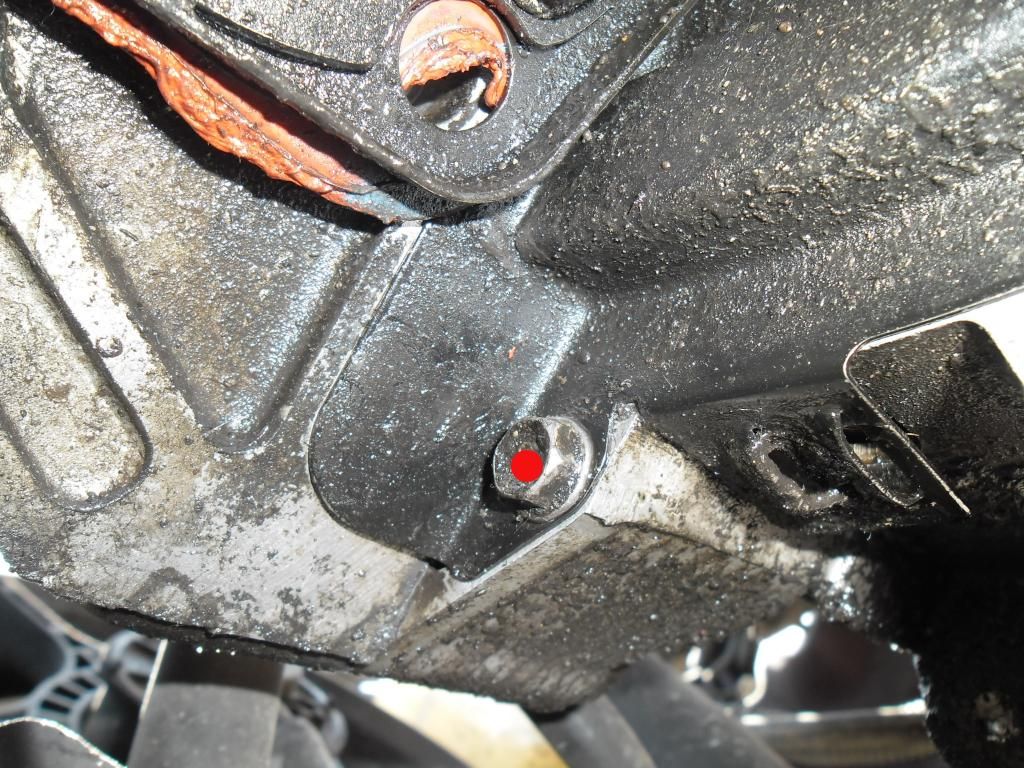
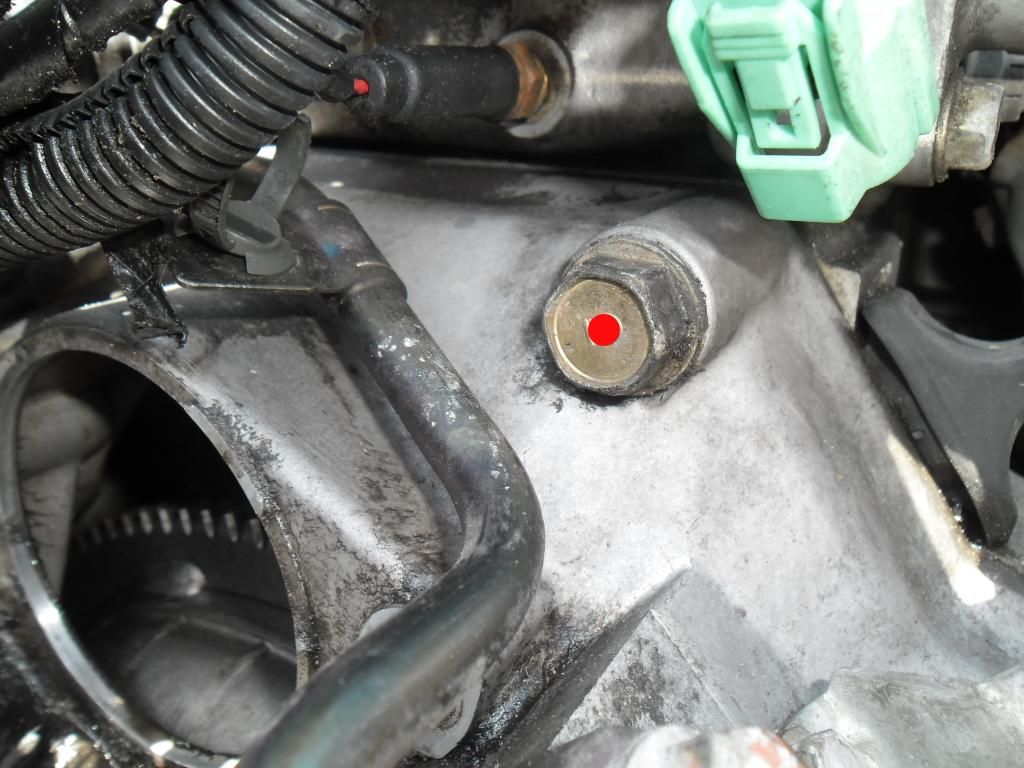
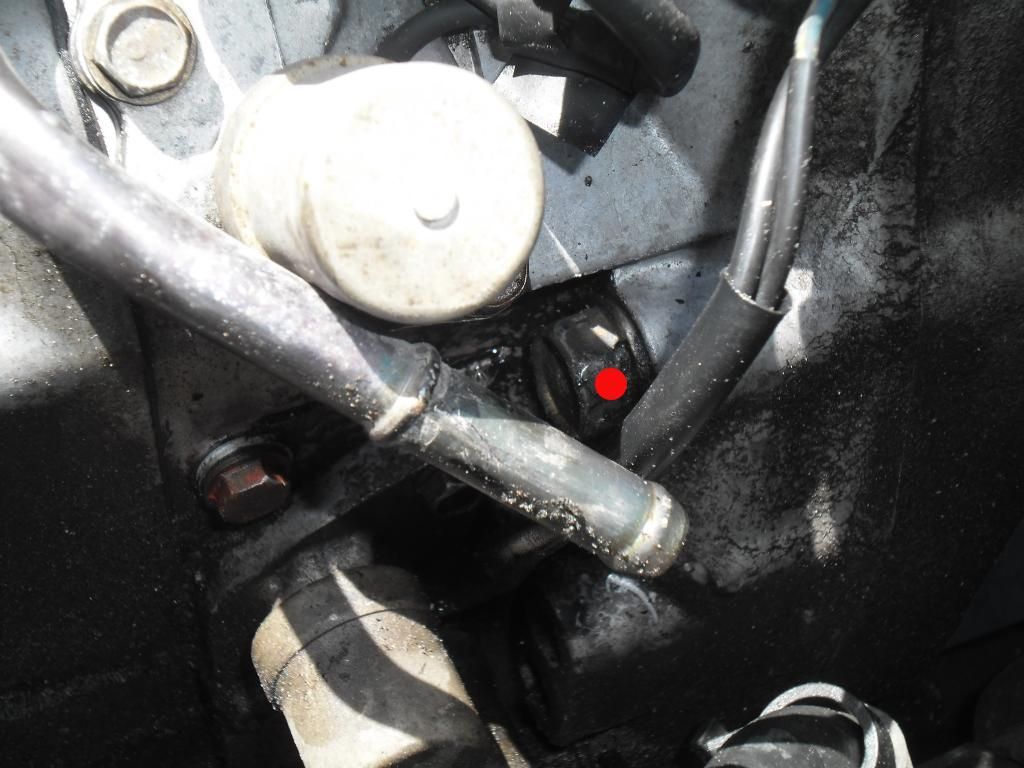
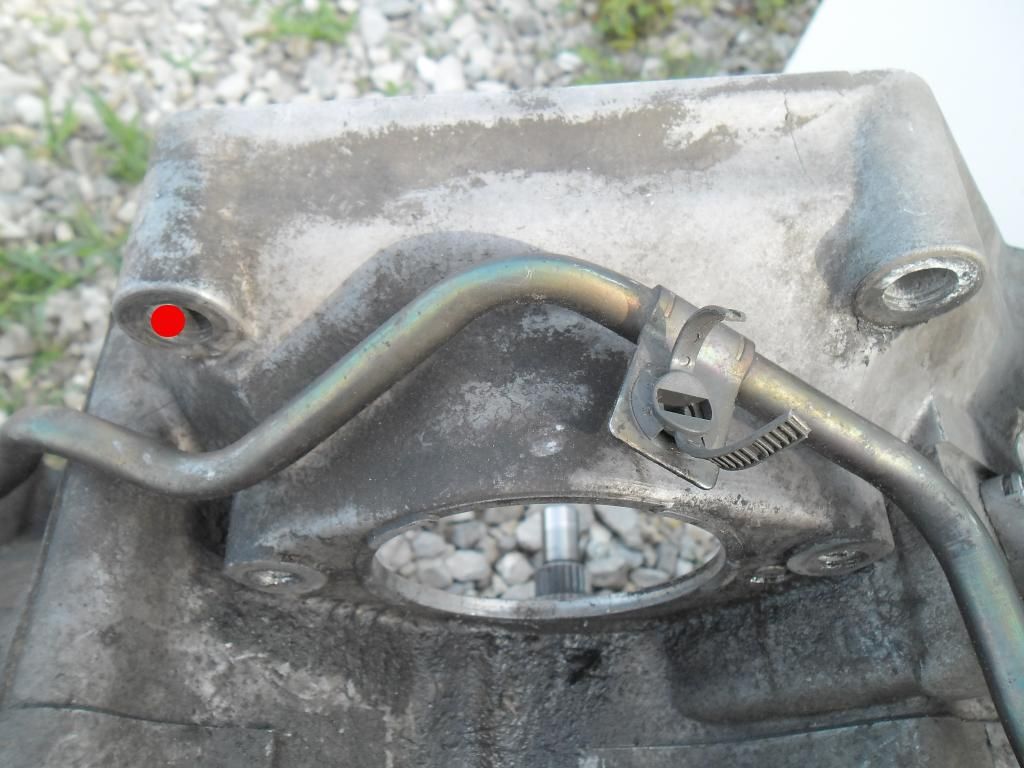
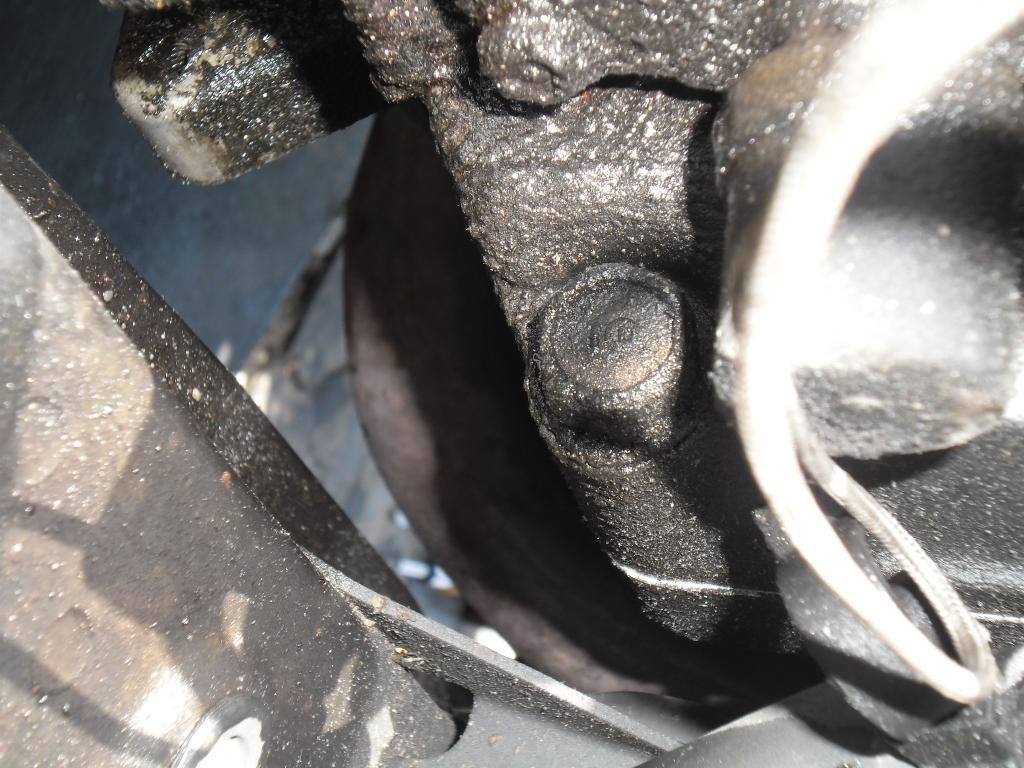
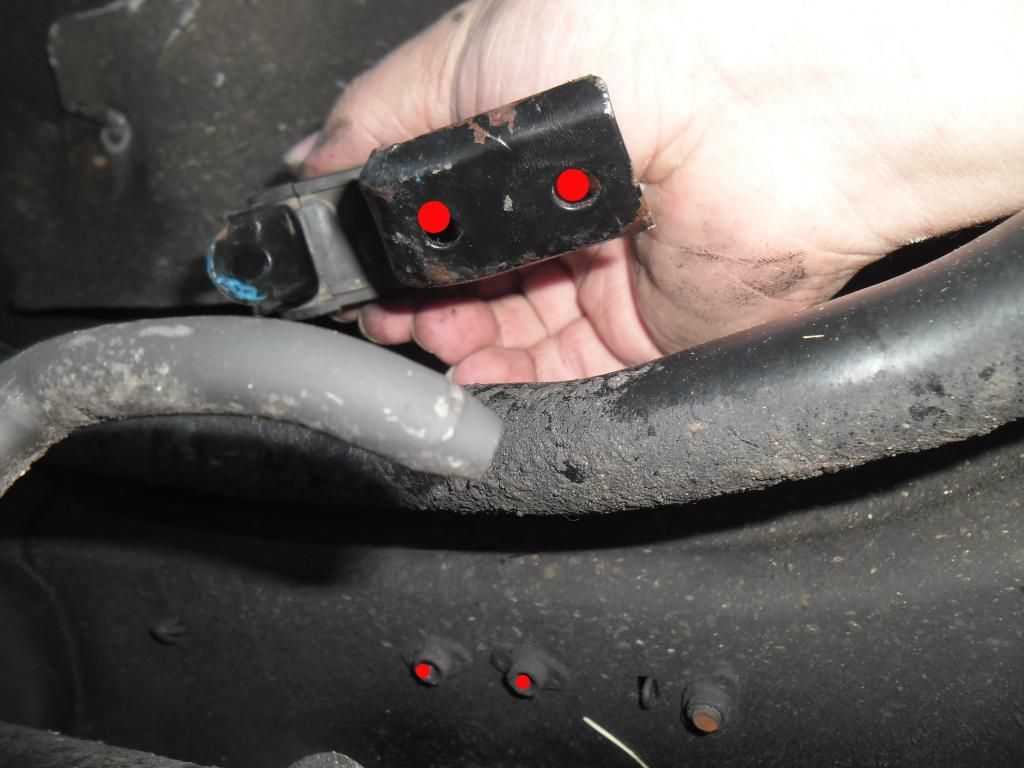
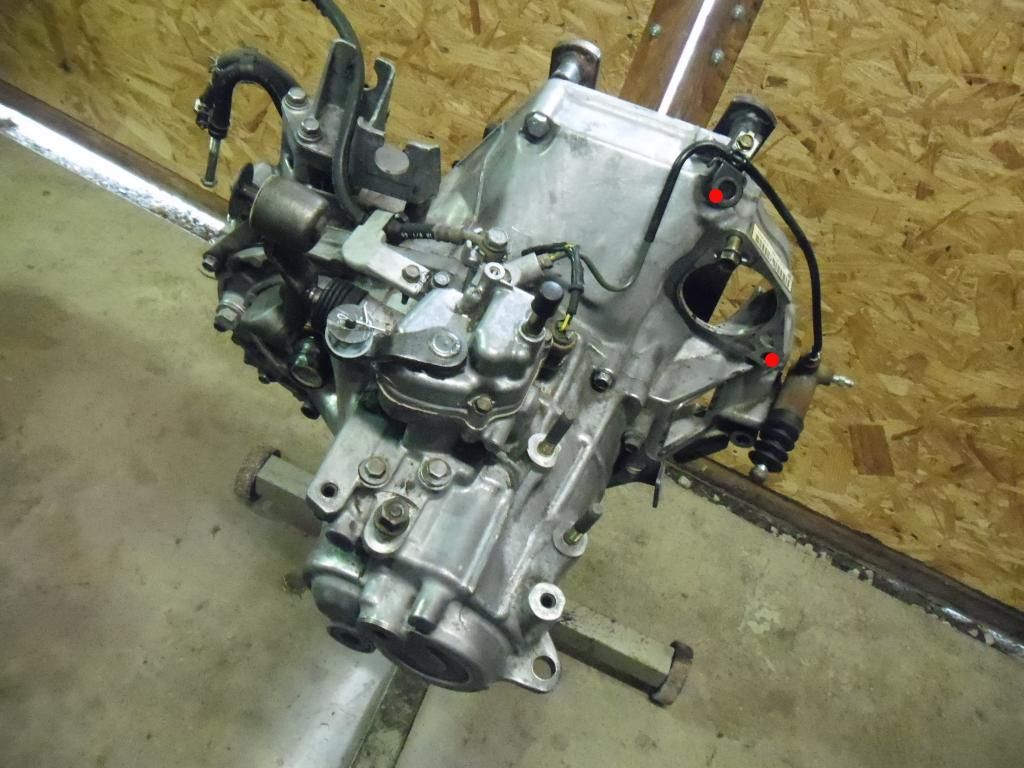
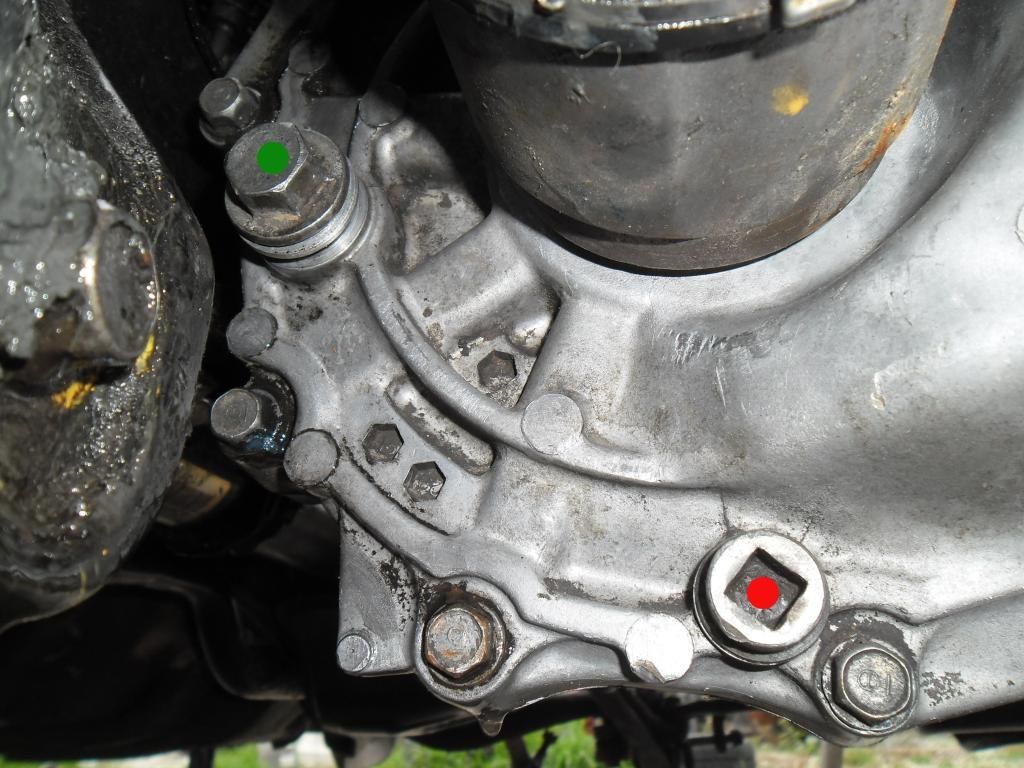
Remove the bolts with the red dots in the picture below.
Now you will need to pry this cover off. Below is how I did this with an extension.
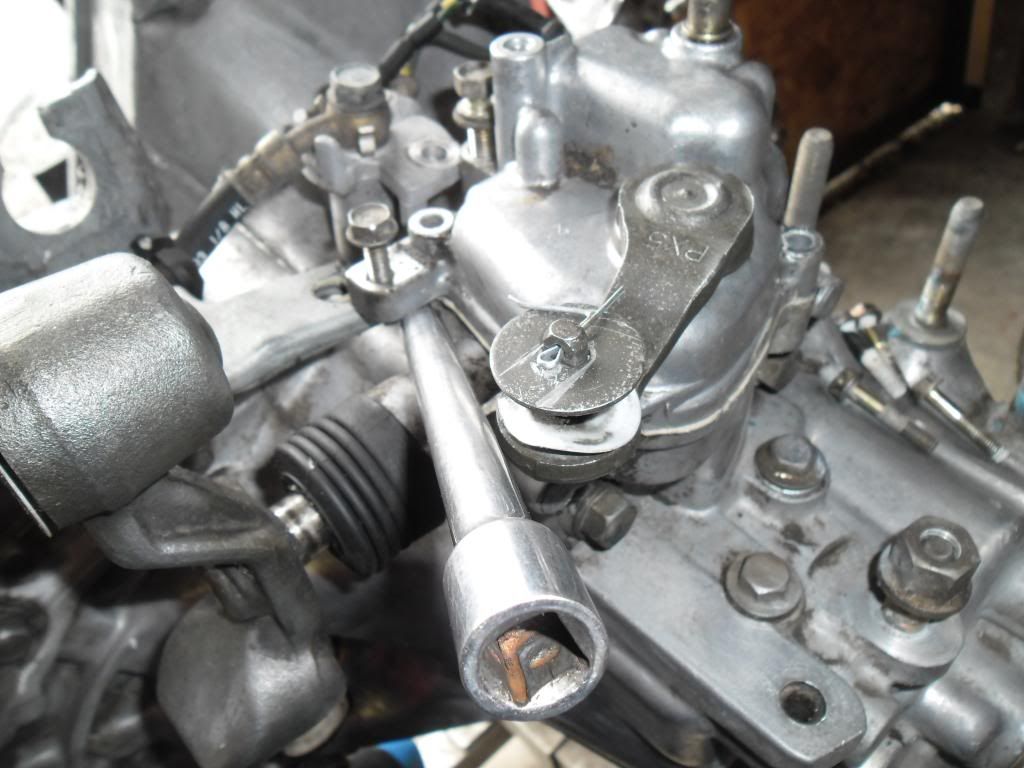
The cover will come off. You will need to wiggle the fork selector on top of this cover when you go to pull it off.
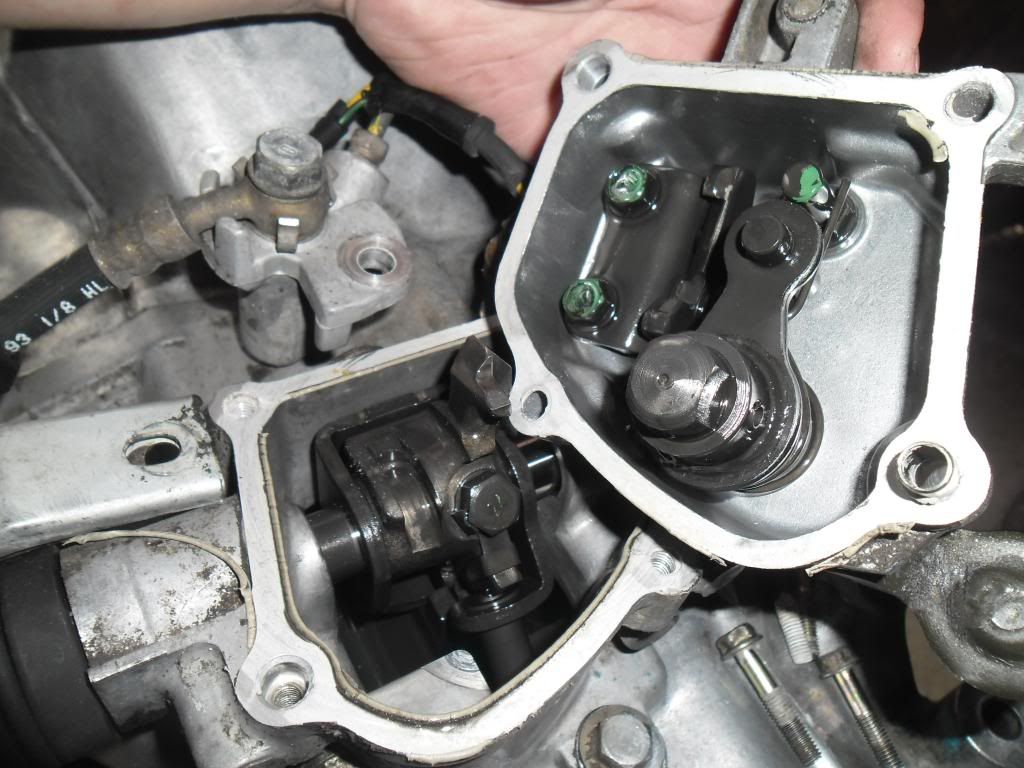
Bend this tab back like so with your flat head screw driver.
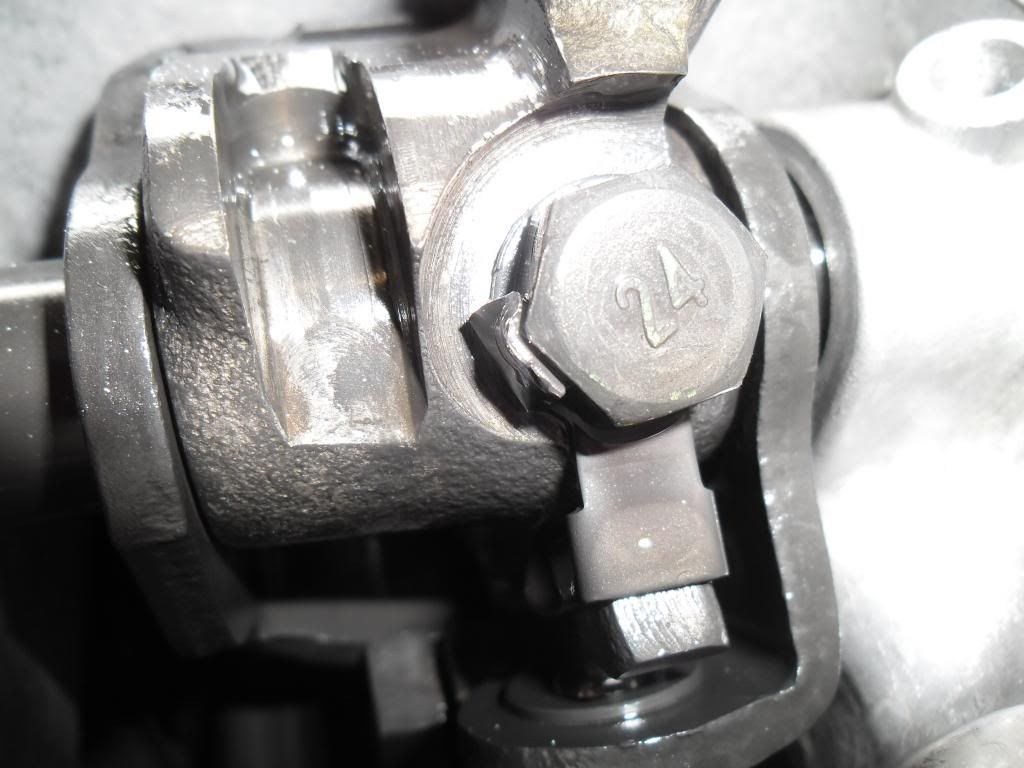
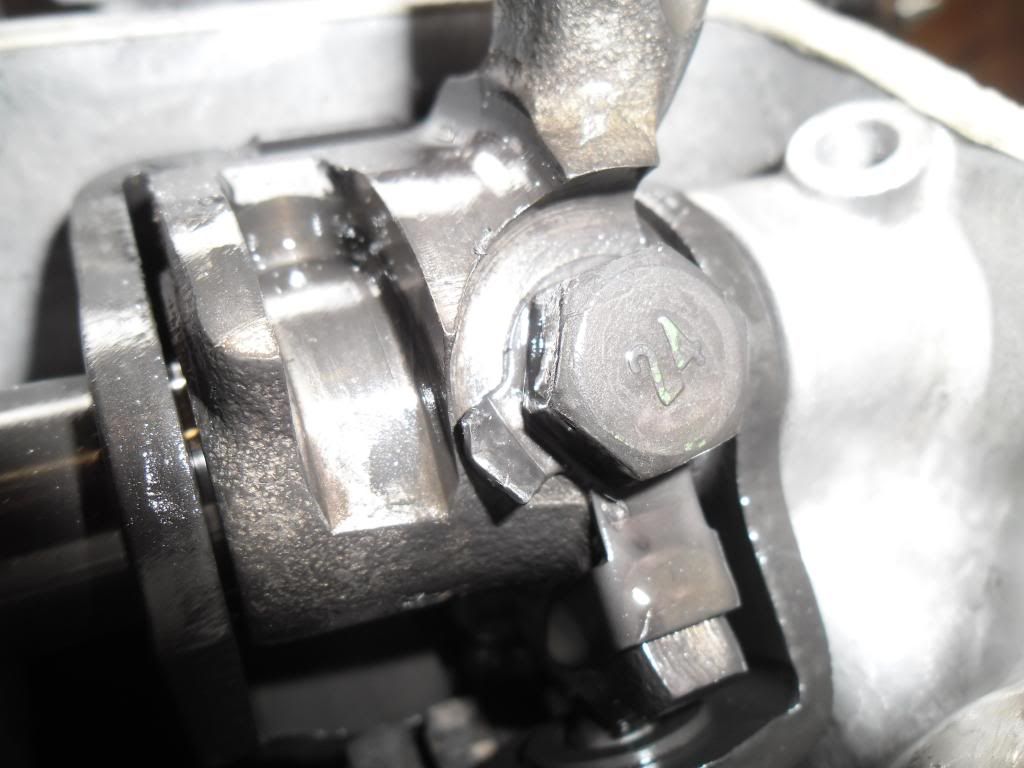
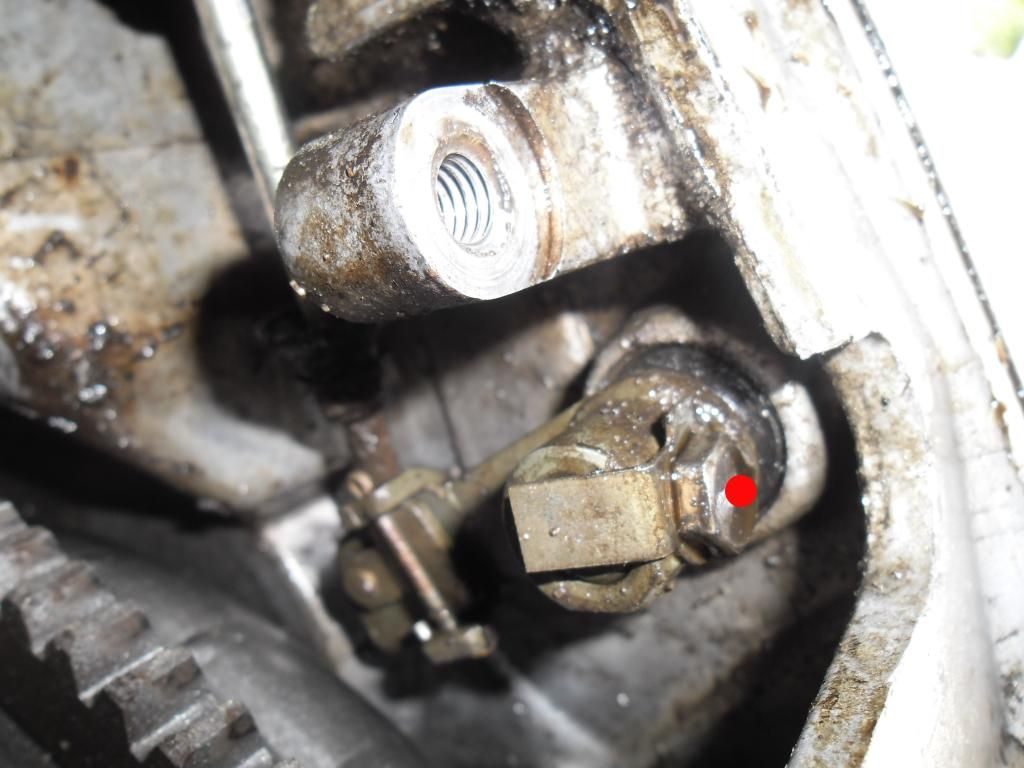
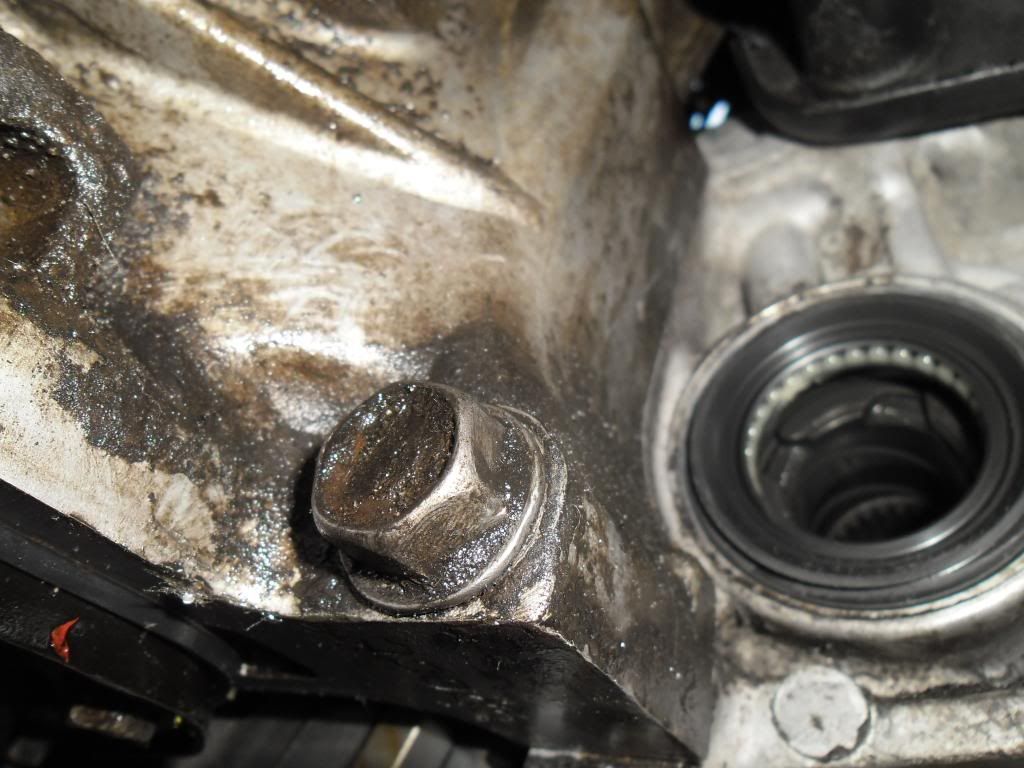
Now you can access the 12mm bolt with your 12mm 6 point socket. PAY ATTENTION! Before you get the bolt all the way out you need to grab a hold of the metal piece which staked the bolt in place like so. If not it will fall in the trans and your screwed.
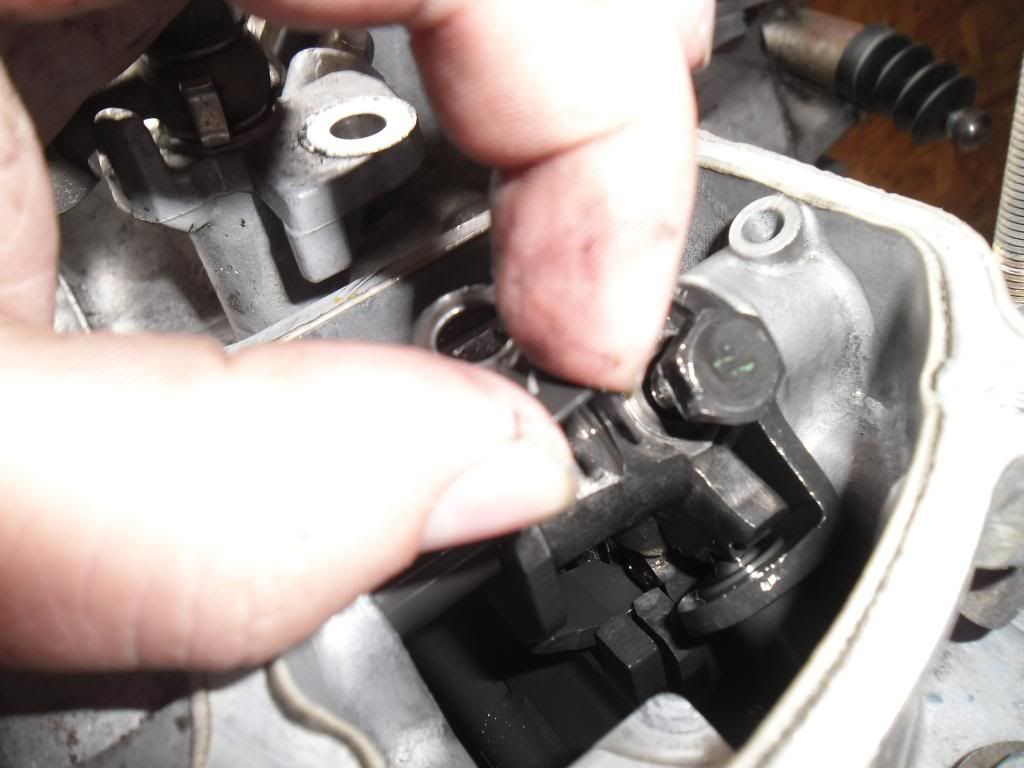
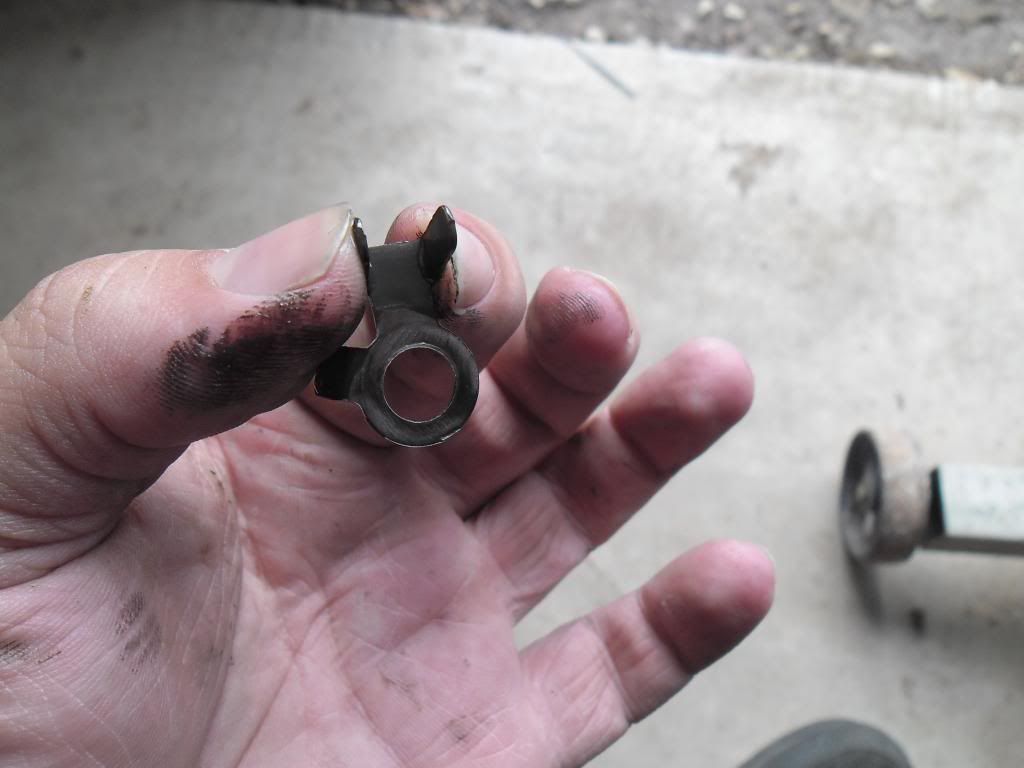
With this 12mm bolt and the lock out you can now pull the shift lever out. Twisting as you pull lightly straight out.
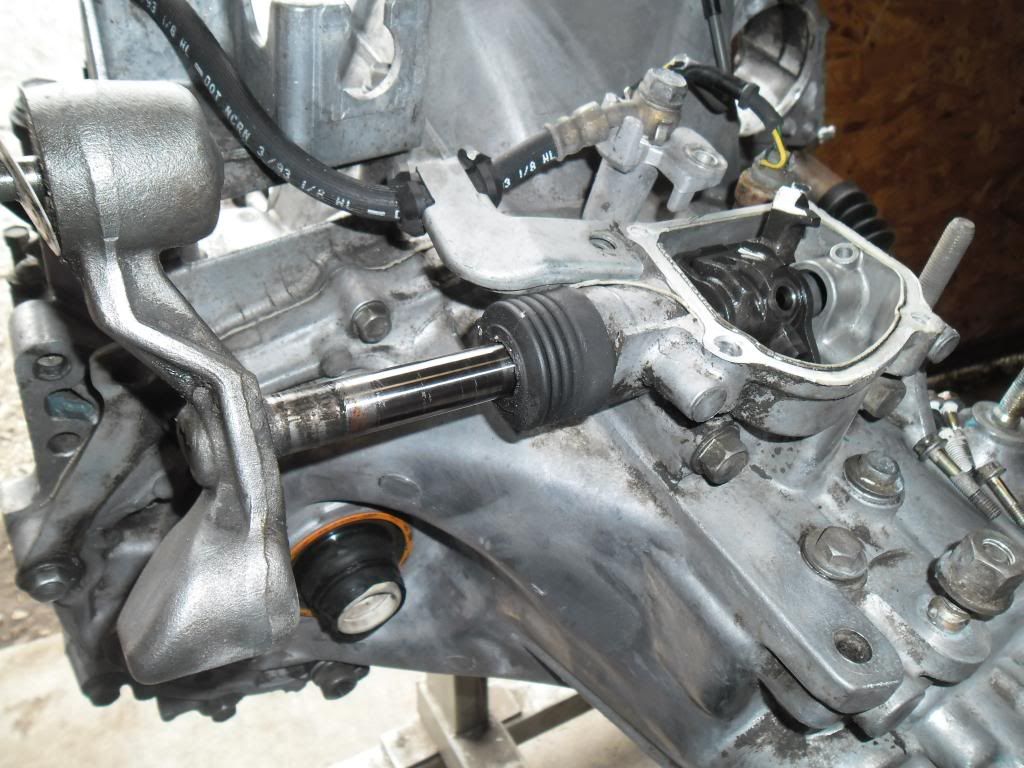
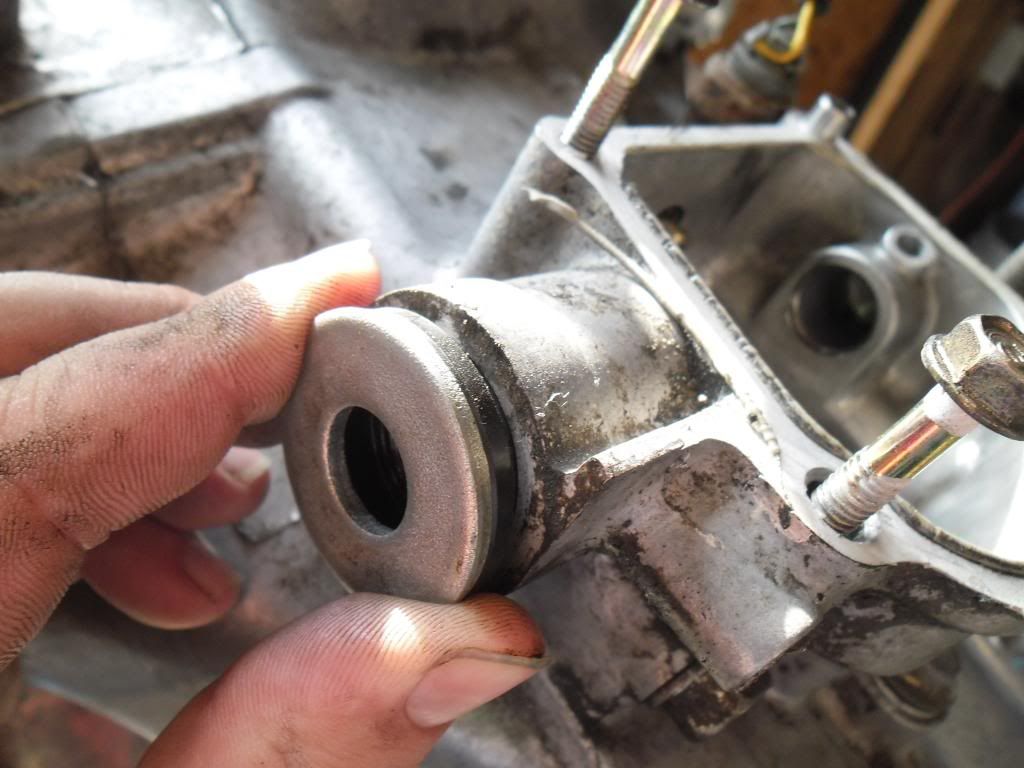
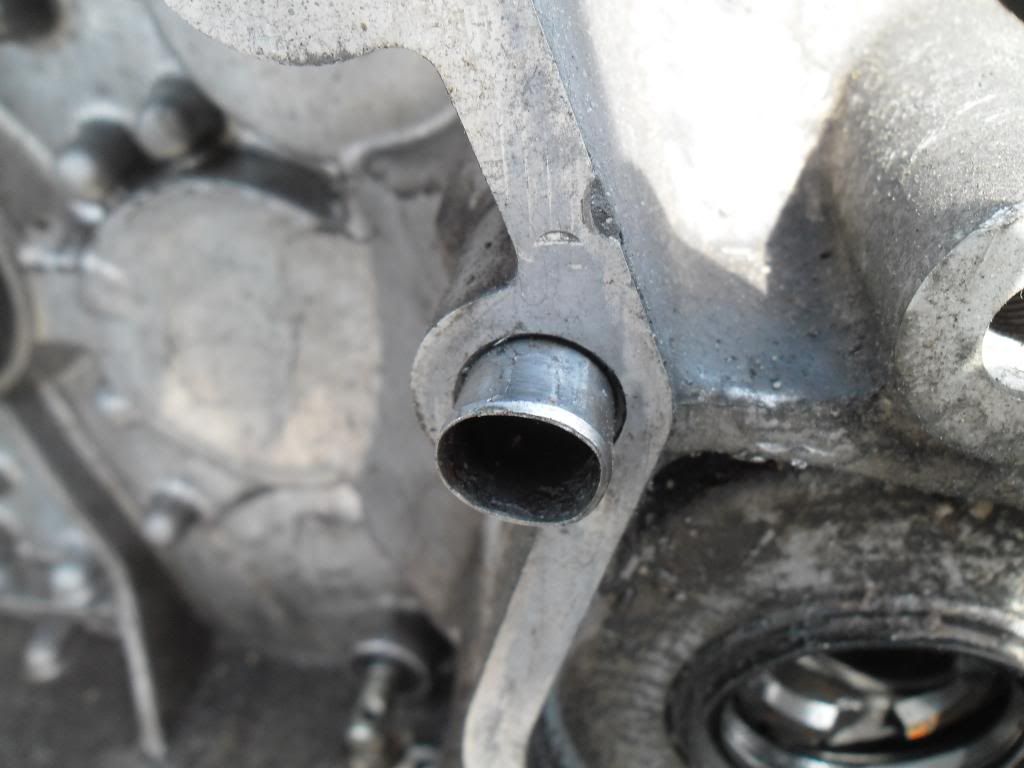
Pull the shift lever boot off and now you can access the seal. You can waller this seal out with a flat head screw driver as well. Once the seal is out clean the hole. Find an object to drive this seal in. A flat washer works great. Tap it in until it fits like so. Remember not too far! If you drive it in all the way flush you wont be able to put the boot back on as the boot installs on the lip of the seal between the transmission case and the seal.
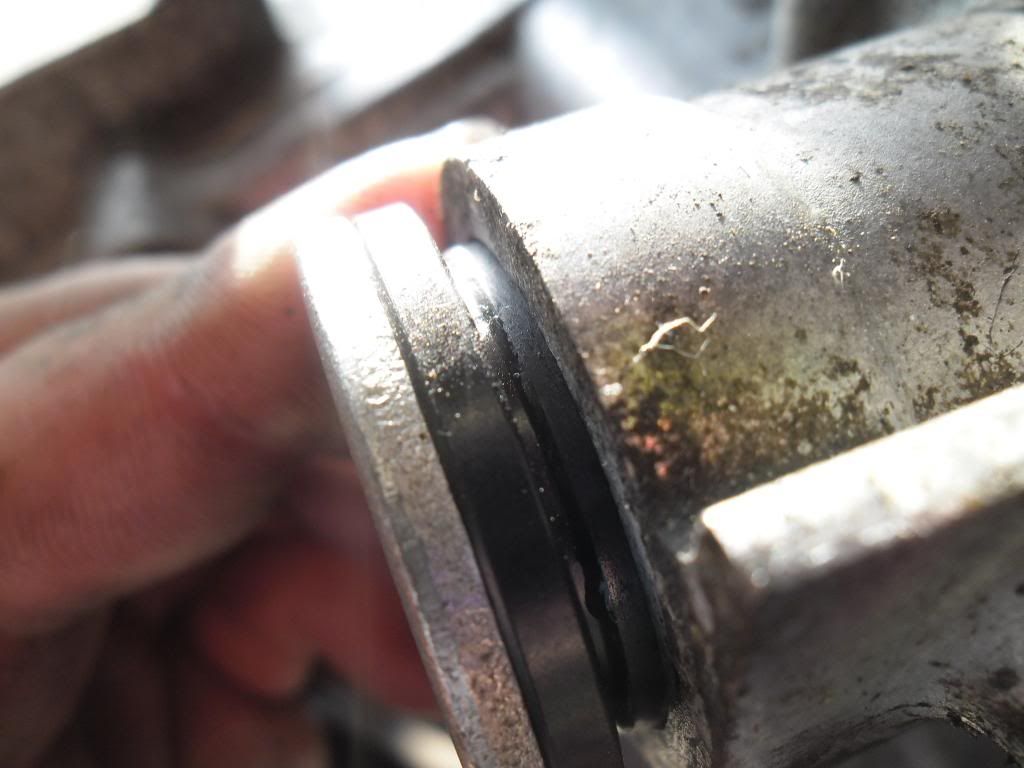
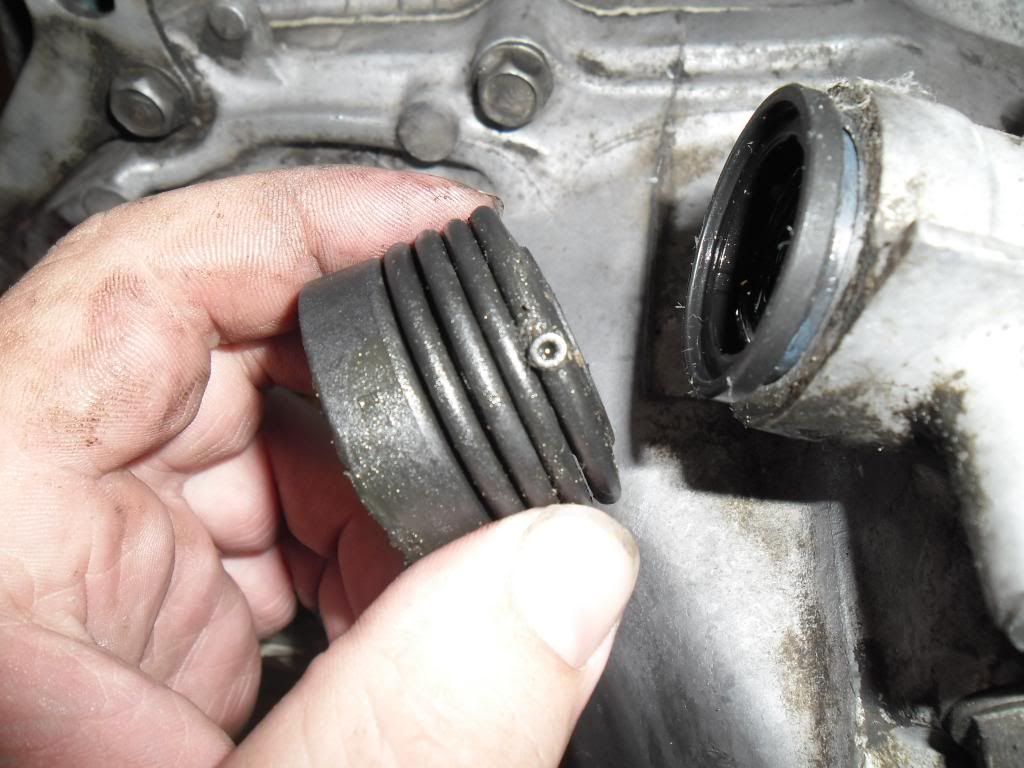
Install the shift lever boot. Note the hole goes down.
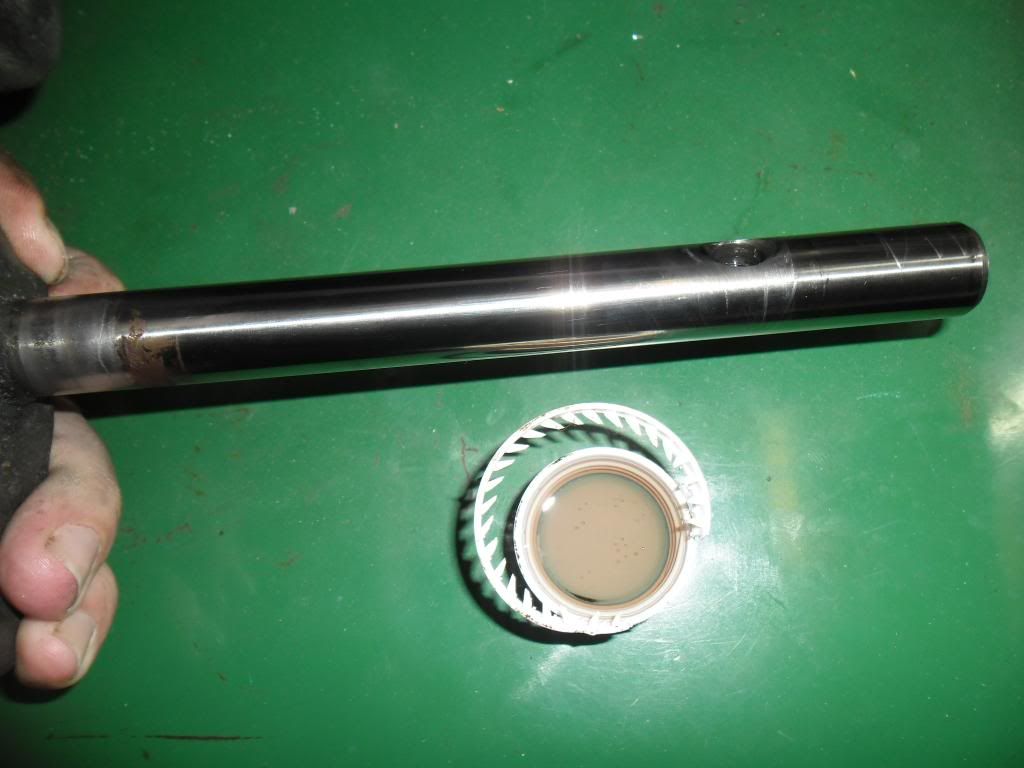
Lube the shaft and the seal up with your MTF and install the shift lever. Carefully twisting and pushing gently. Making sure its lined up with the interlock properly. Remember the end on the shift lever that the shifter cable attaches to goes to the top!
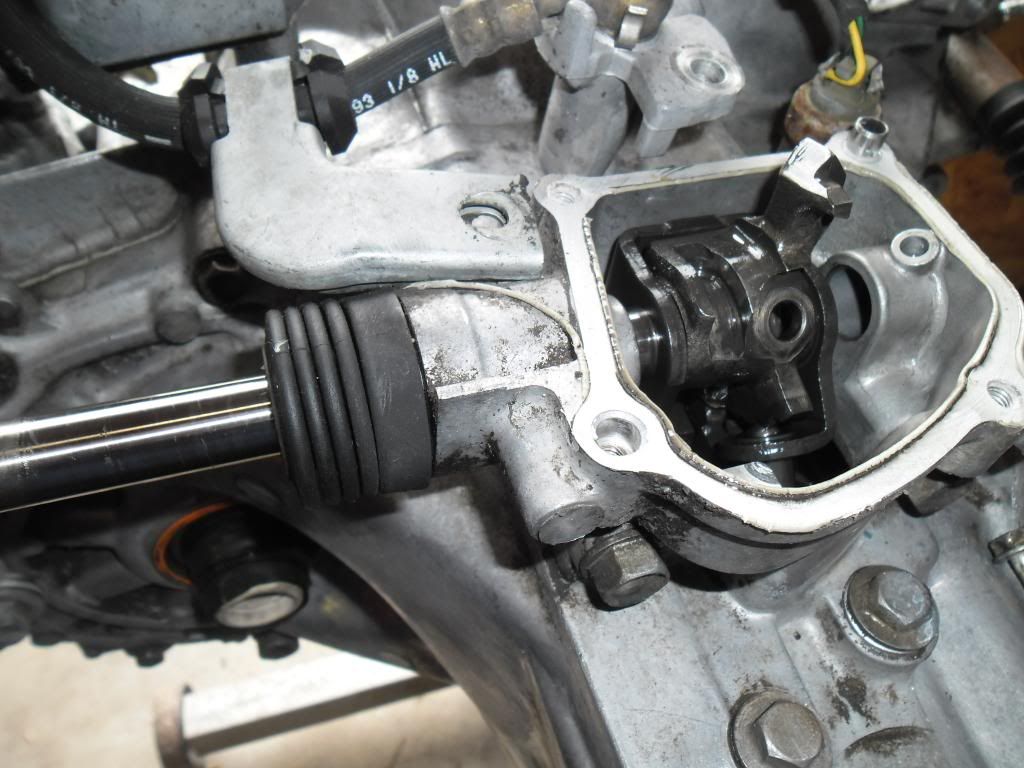
Line the hole up in the shaft, put the bolt through the lock and then get the bolt started. Making sure not to drop the lock into the transmission.
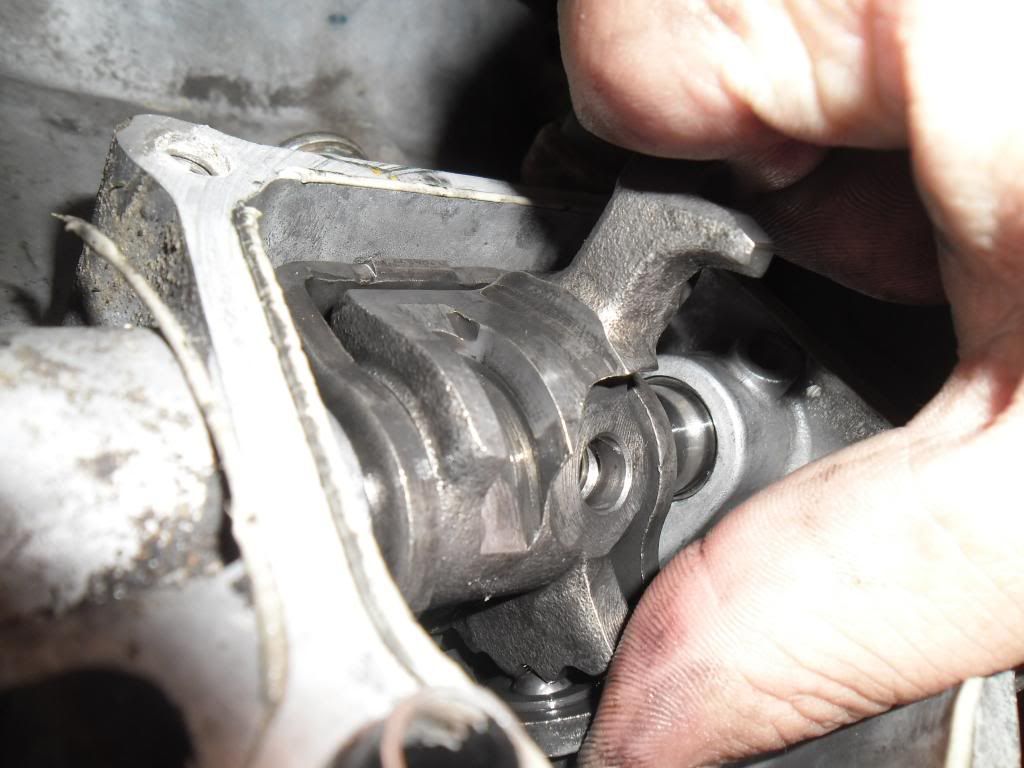
Don't forget to bend the lock tab back over after torquing bolt down. I went to 45ftlbs as that's about what I felt it was when I went to remove it.

Use a rag and stuff in the hole to keep debris and the sealant out of the transmission.
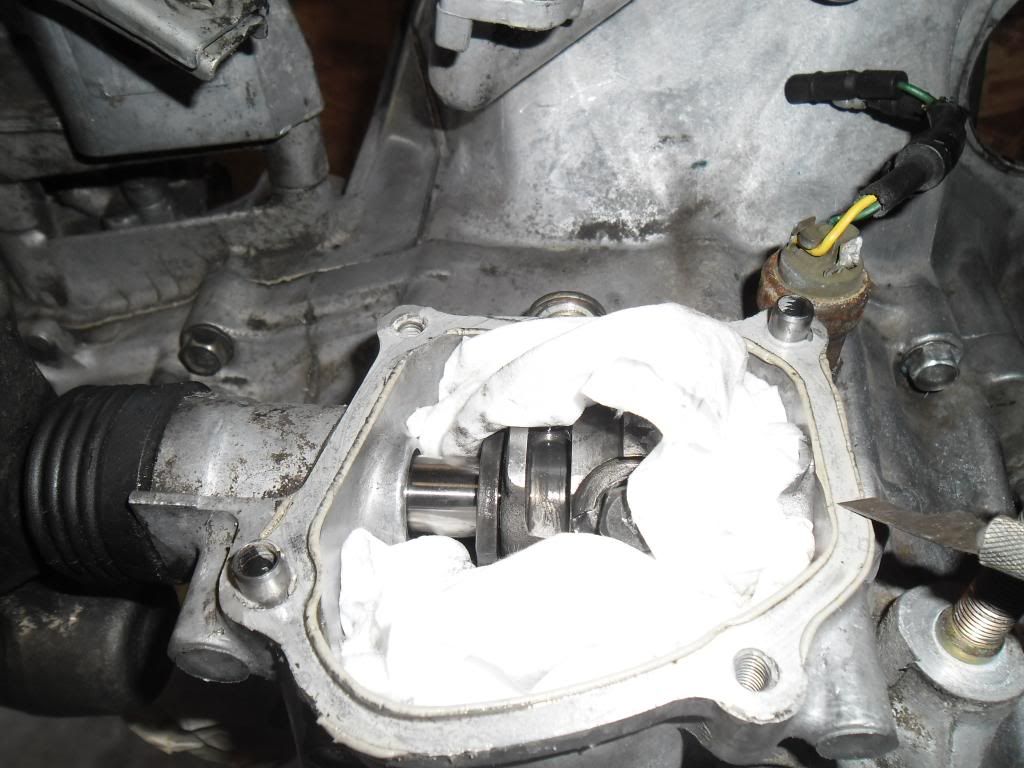
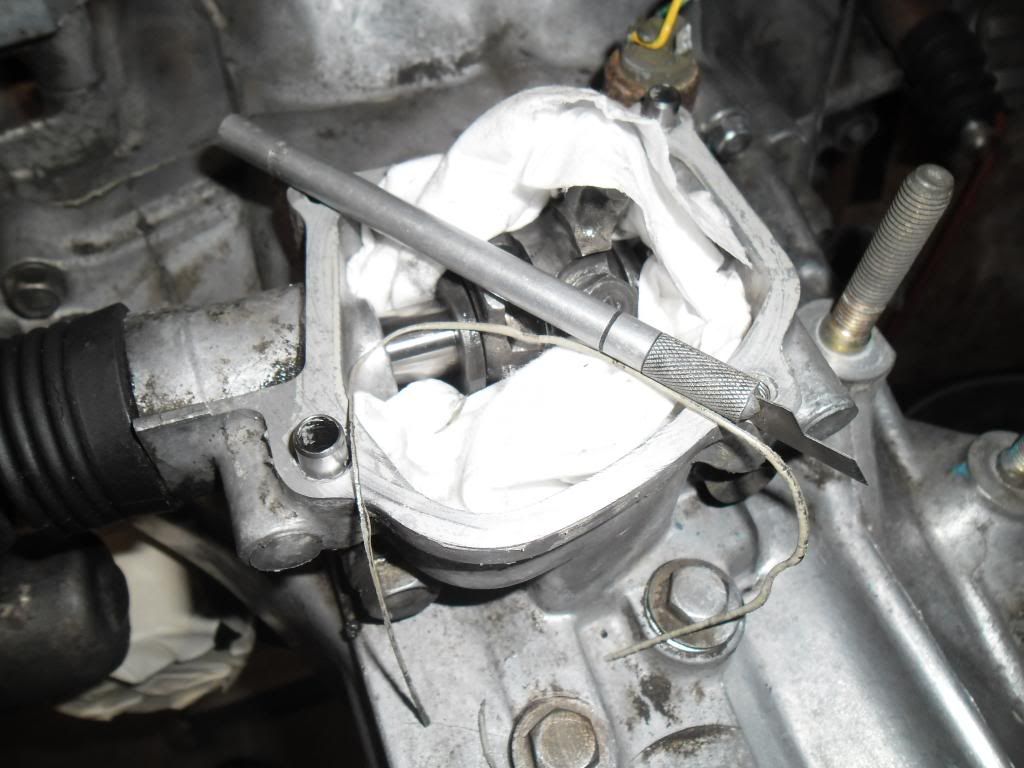
Clean the surfaces where the cover meets the transmission. Both sides. I used some lacquer and a craft knife.
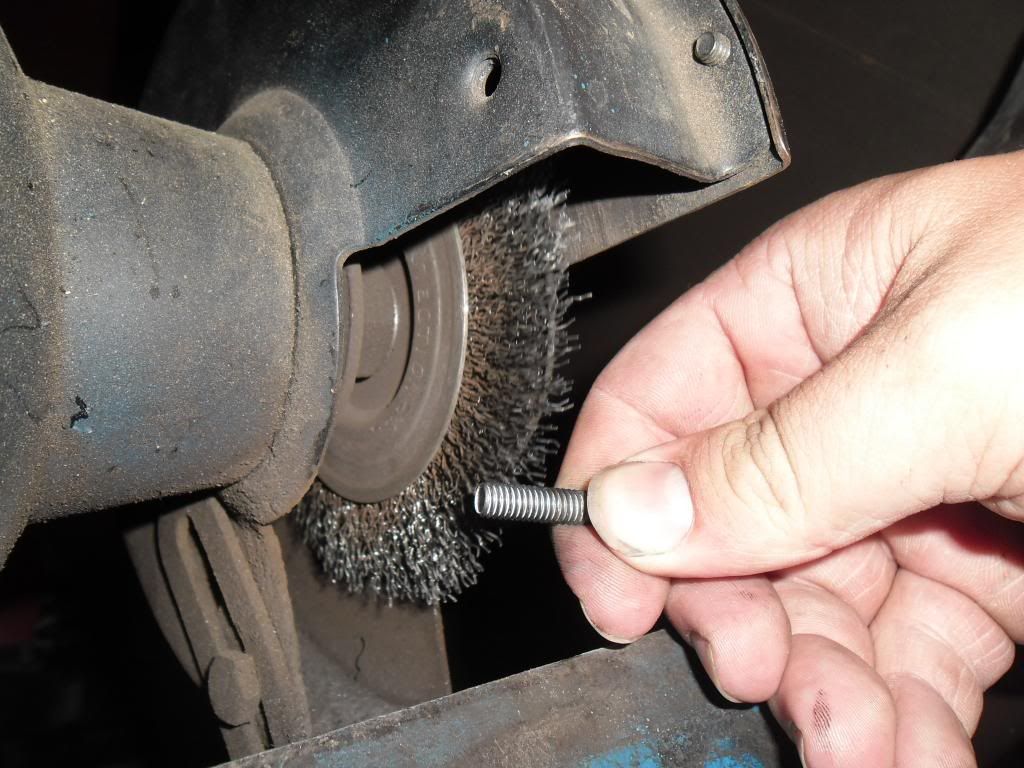
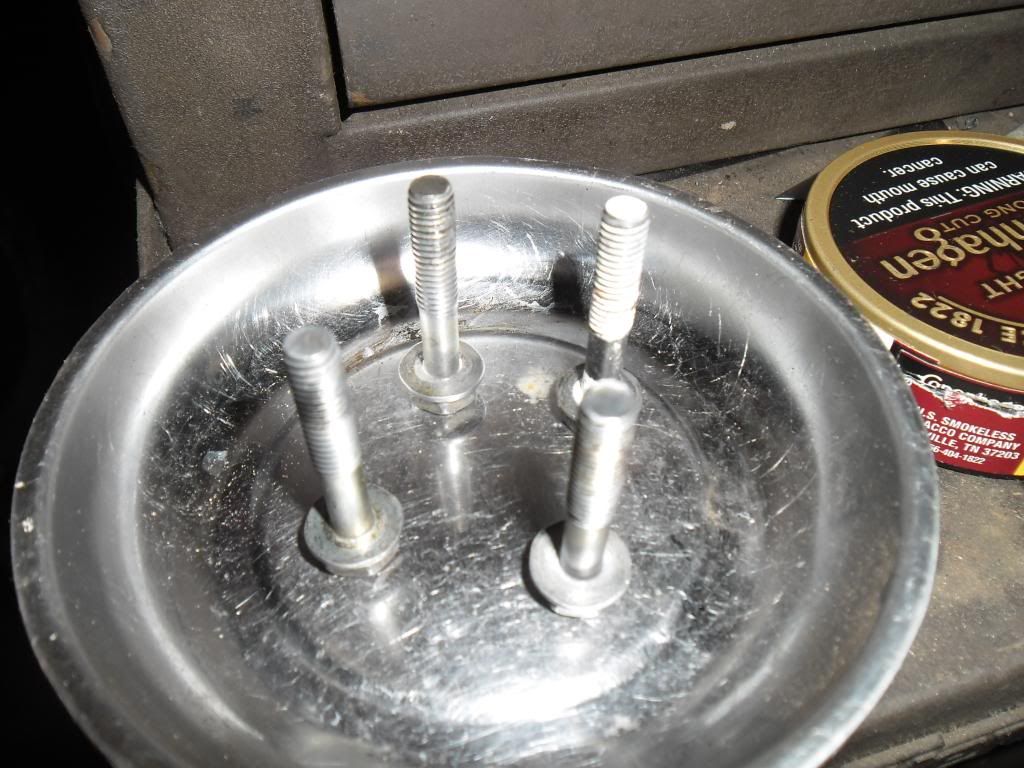
Clean your bolts up. I used a wire wheel.
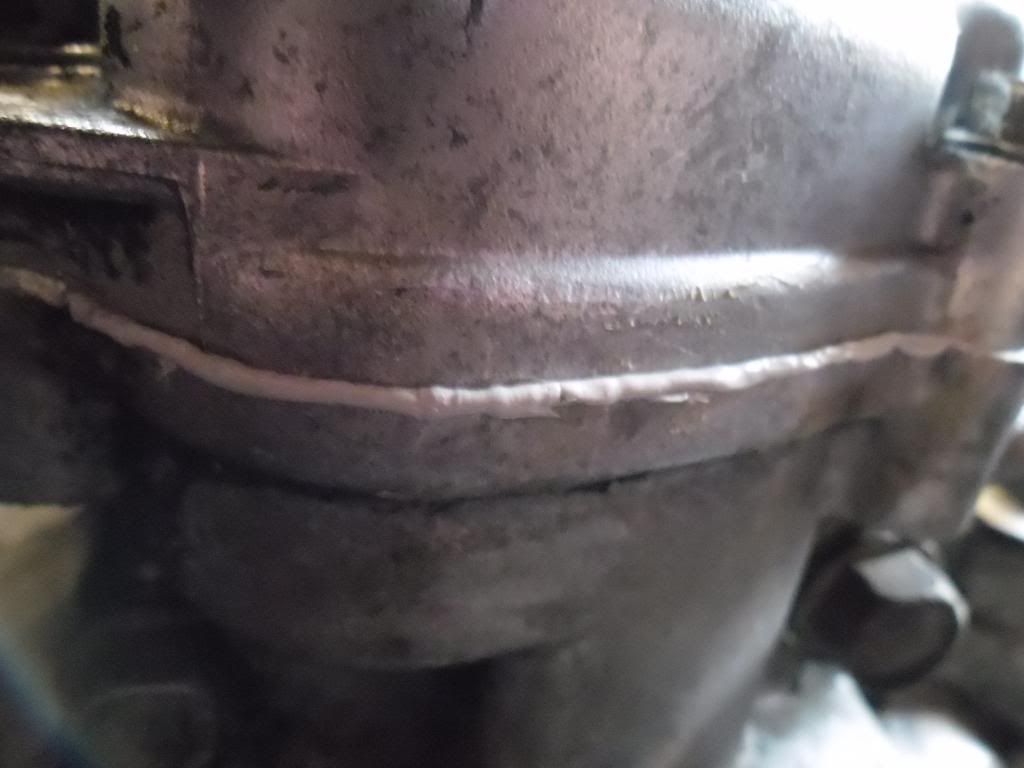
Get out your Hondabond HT and put a THIN line of sealant like so. I spread mine out with my finger. Note the interlock bolt removed, you don't have to do that. Mine had 375K on it and was wore. Yours more than likely wont be.
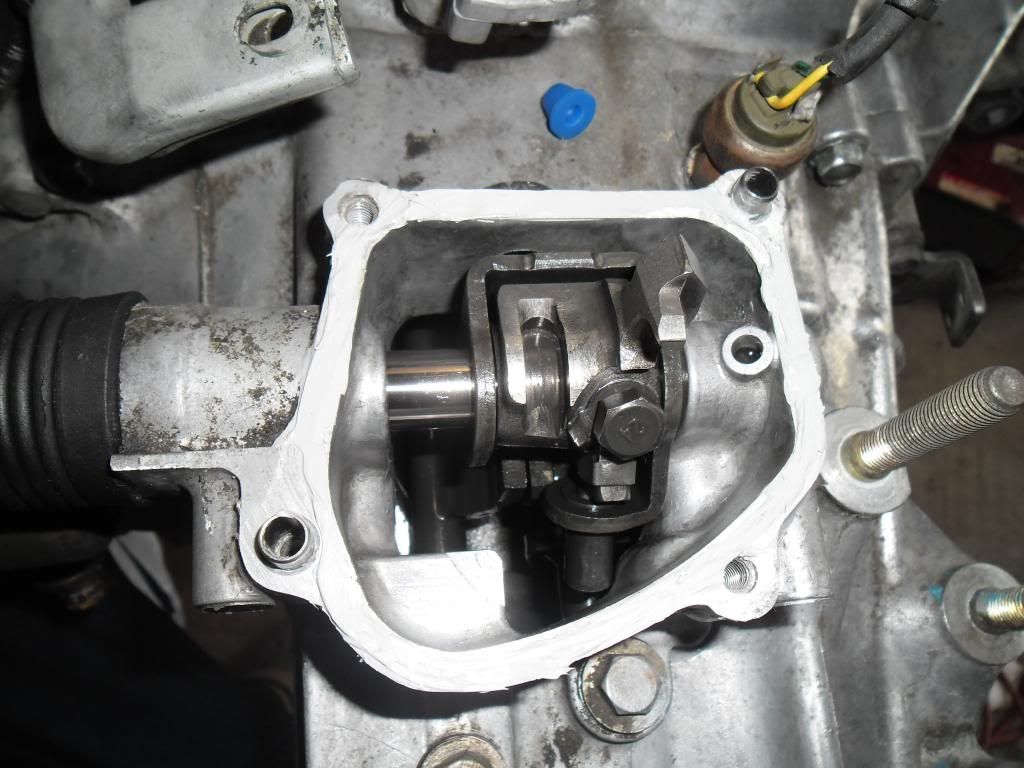
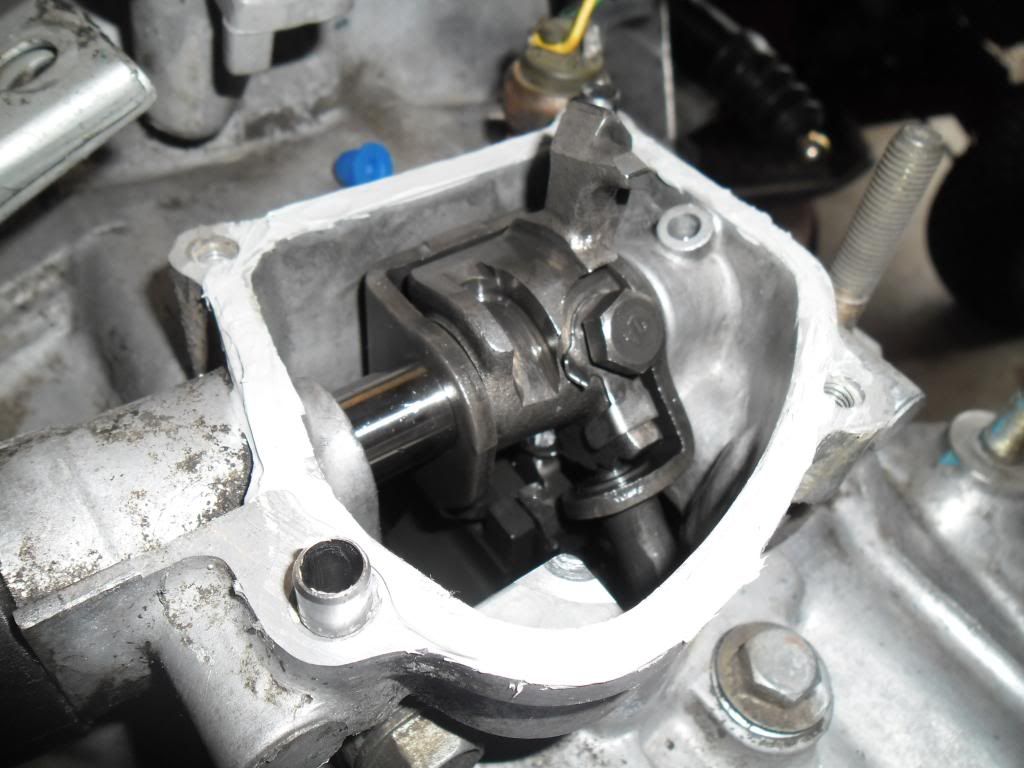
Re-install. Torque down in a criss-cross pattern. If you put the proper amount of Hondabond HT on the mating surface it should look like this. As long as its not oozing a dripping everywhere your ok. Also note in the picture above I had not staked the bolt with the lock yet, don't forget!
-CLUTCH RELEASE BEARING-
Clean off the sleeve on the input shave where the clutch release bearing rides. If it feels rough or has any scaring from the previous clutch release bearing you can use some emery paper and LIGHTLY clean it up. Once this is done apply a very thin coat of grease all over this sleeve. Also apply a small amount of grease on the ball the clutch fork rides on.
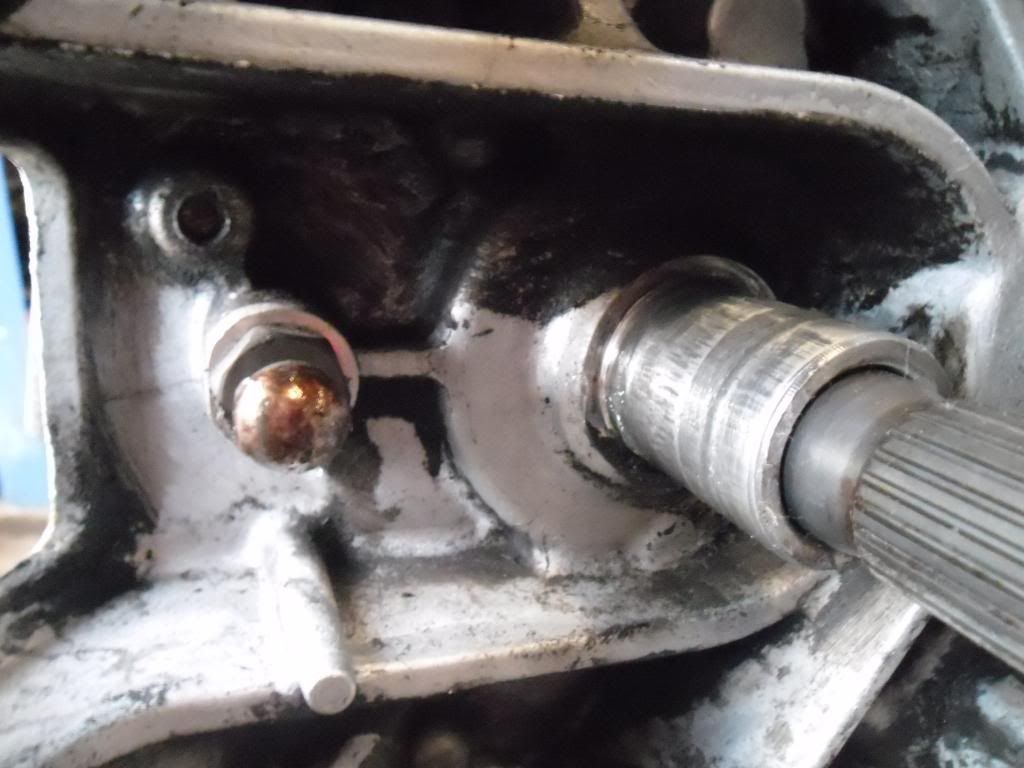
Install your clutch release bearing like so.
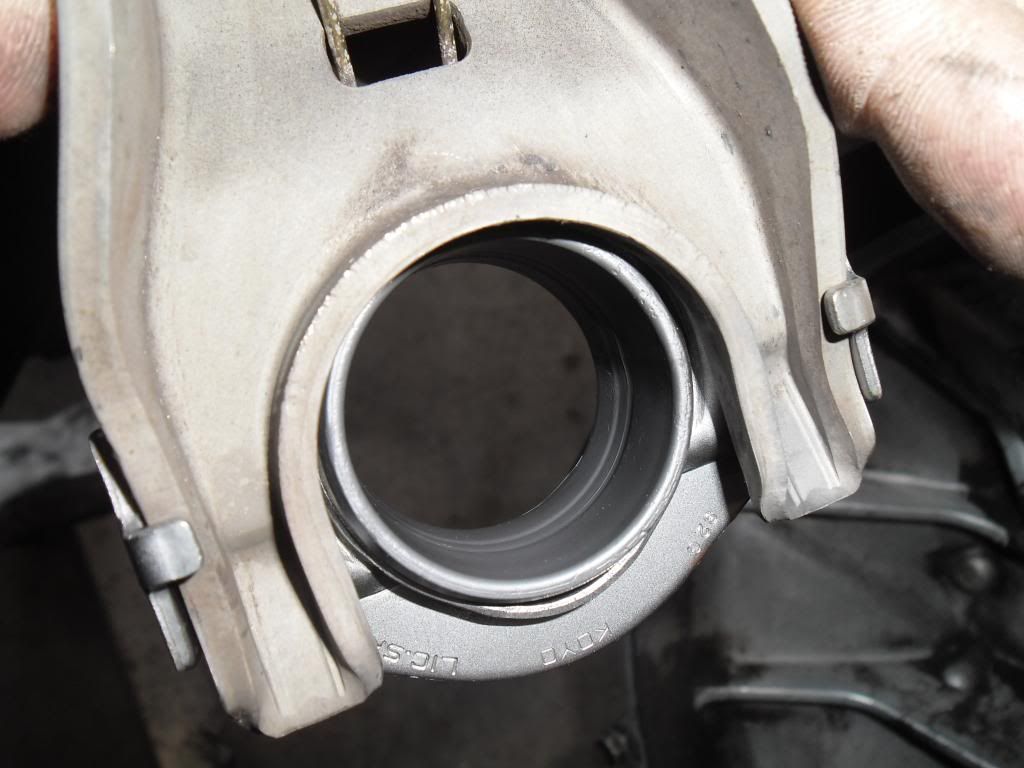
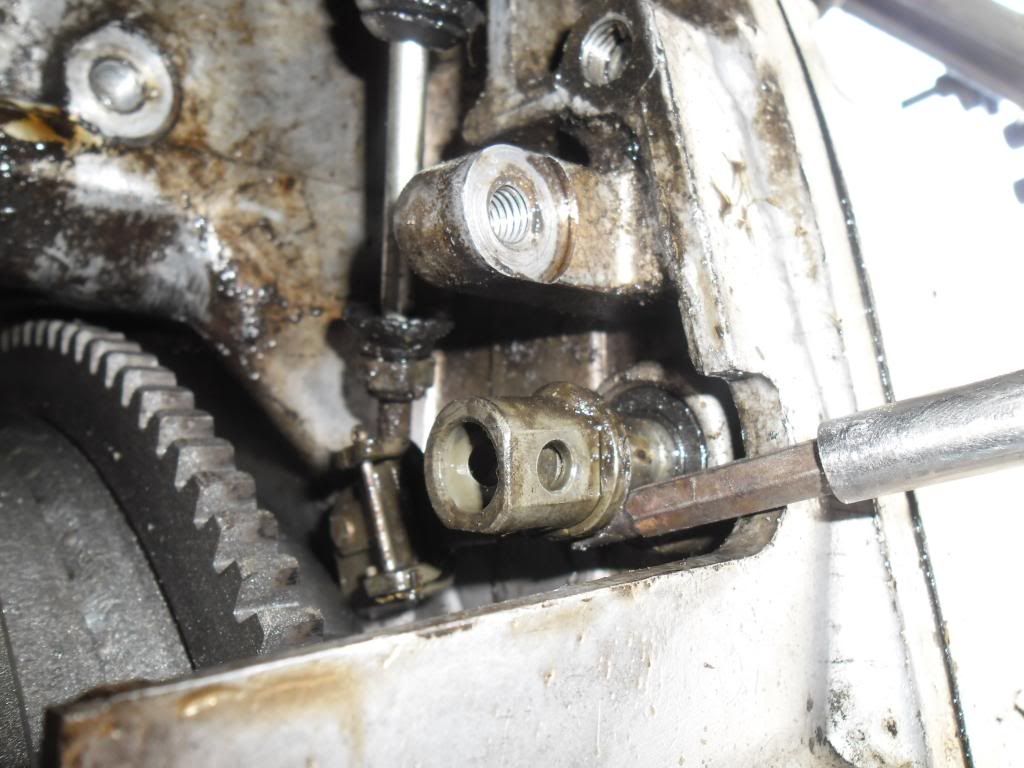
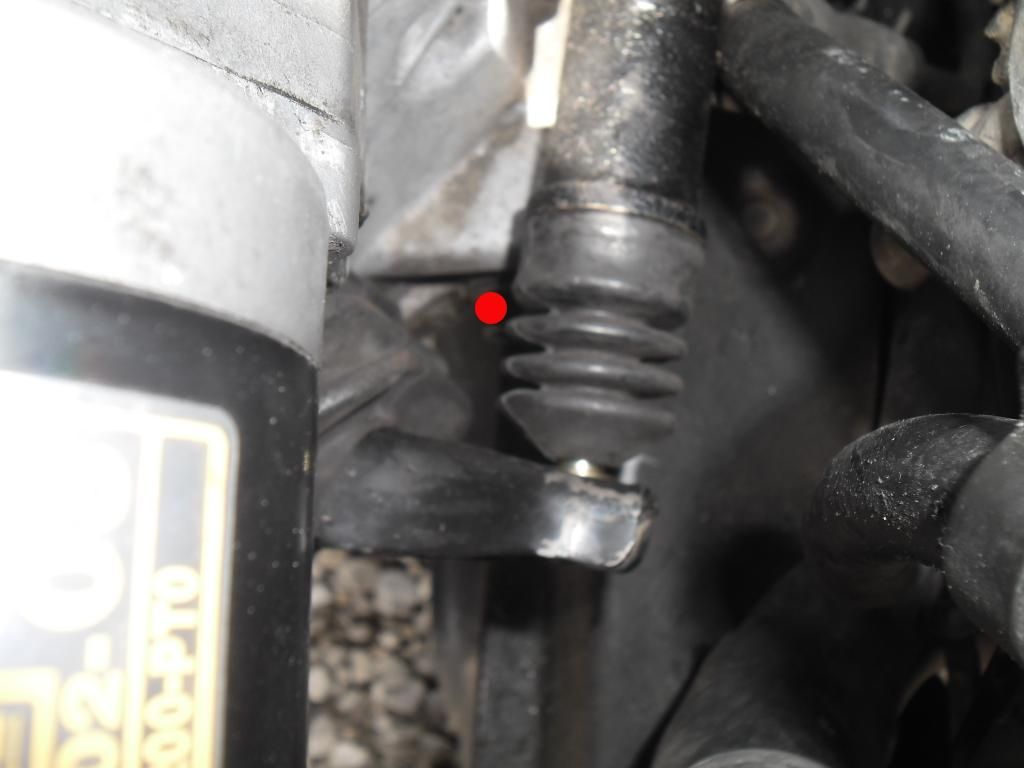
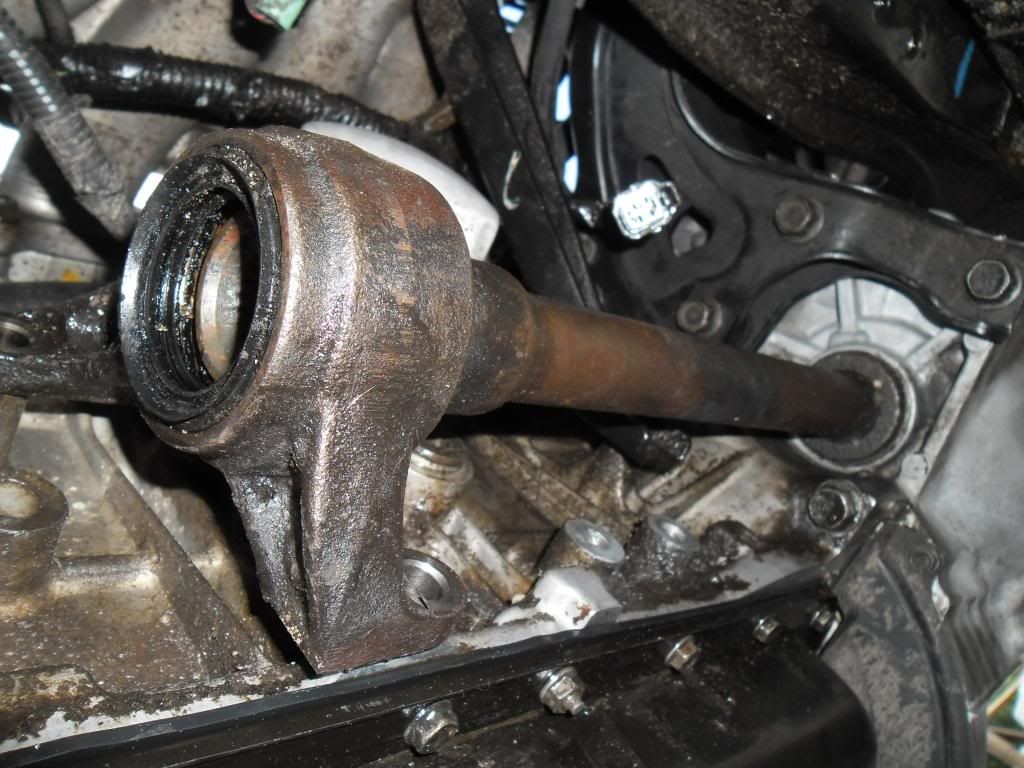
Below is how the clutch fork assembly is installed. It all pretty much goes on in one action then you put the boot on. The pictures are self explanatory.
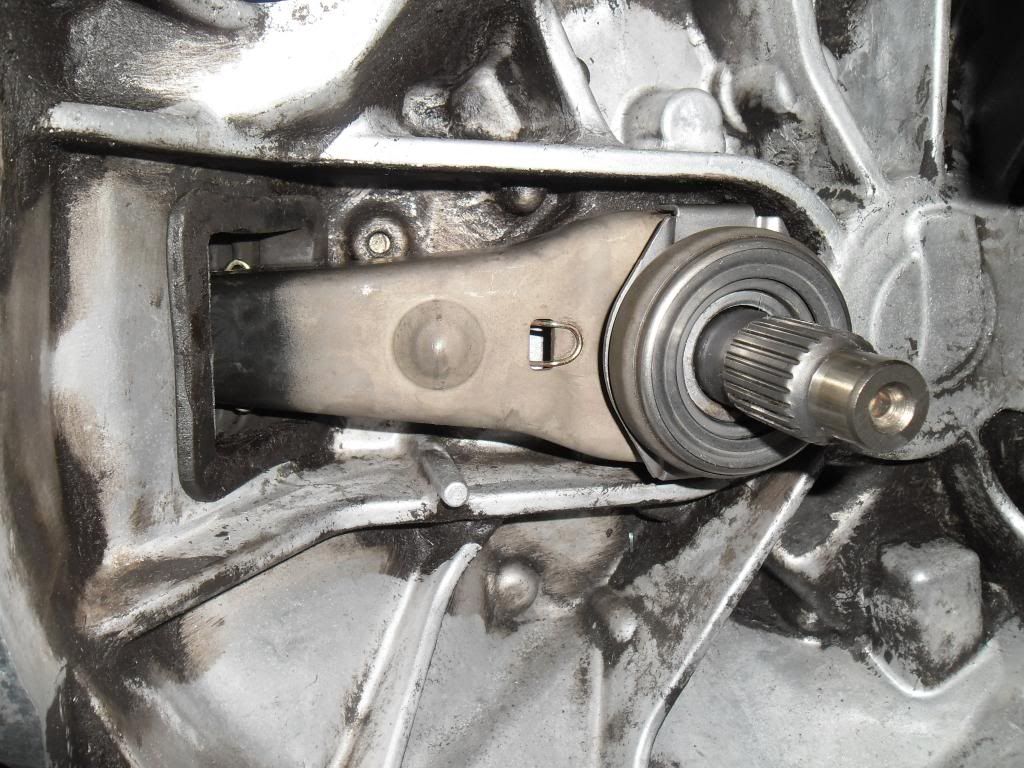
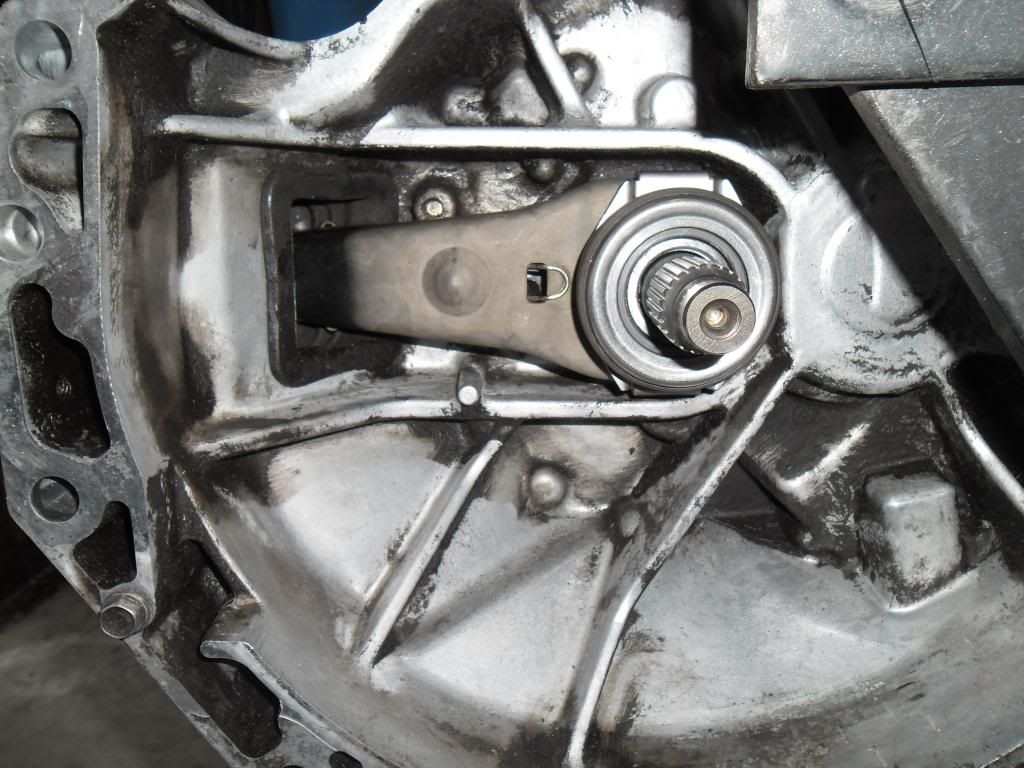
Your transmission is ready to install!
This DIY is from start to finish. There are other DIYs on CB7tuner however the information is not all in one place and are lacking pictures. This is my reasoning behind making another DIY.
TOOLS:
-Metric socket set 8mm+
-Metric wrench set
-36mm impact socket
-Breaker bar
-Ratchet
-Extensions
-Needle nose pliers
-Pliers
-Prybar(s)
-Floor jack(s)
-Leather gloves (for dealing with heat shield).
-Welder (If not using ESP or Innovative passenger side mount).
-Drill
-Drill bits
-Grease
-Flat head screw driver.
-PB Blaster (Optional of course).
-Hammer (Rubber or claw).
-Objects to drive seals in.
-Hemostats
-Emery paper
-Torque wrench in ftlbs.
-Vise Grips
-Funnel
-Electrical tape
-Wire cutters
PARTS REQUIRED:
-5 Speed transmission (H2A5 or H2U5).
-Appropriate passenger side mount for the transmission you are using.
-Passenger side bracket. (Swap mount from Innovative or ESP.) I will be using a factory bracket in this swap).
-DX/LX 5 speed rear mount.
-DX/LX 5 speed rear T bracket.
-5 Speed starter.
-Lower 5 speed starter bolt. (Refereed to as the long transmission bolt).
-Shifter assembly.
-Shifter assembly bolts & rubber bushings.
-Shifter C clips, 4 total. They are all the same.
-Shifter cables.
-Shift knob.
-Shift boot.
-Shift boot retaining ring with two phillips screws.
-Four shifter C clips. (One for each cable at each end).
-Flywheel.
-Clutch kit. (Pressure plate, clutch disc).
-Clutch release bearing.
-Pressure plate bolts.
-5 speed flywheel bolts.
-Clutch line (Valexracing on ebay or a custom bent-it-yourself hard line).
-Clutch pedal assembly.
-5 Speed brake pedal arm.
-Clutch slave cylinder.
-Clutch master cylinder.
-5 speed driver side CV shaft.
-Intermediate shaft and 3 bolts.
-Clutch fork, spring and boot.
-Clutch hard line from slave cylinder to top of trans.
-Clutch rubber line from top of transmission. (End that attaches to top of trans has a banjo style fitting).
-5 speed inspection plate. (I have heard it called a bell housing.)
-Cotter pins.
REPLACEMENT PARTS:
-Clutch. You will want a good quality clutch and good quality parts. This is very important. Exedy, Daikin, LUK, Clutchmasters, Competition Clutches, even a Sachs. Use the appropriate stage or performance level for the power your making. Higher performance clutches are harder on the mating surface of the flywheel.
-Clutch release bearing. I have heard the bearing that comes with the Exedy clutch kits is a Nachi. I went with Koyo. $30 shipped.
-Flywheel. You can go OE weight or a lighter weight aftermarket. Again, you will want a good quality flywheel. When a LUK is $50 shipped there is no excuse. You can also get an aftermarket Fidanza for $160ish shipped. With flywheels you want to see if it has timing marks before you install it. Some do not but they can be modified to have them. I used a Duralast due to last minute bullshit with a F1 Racing flywheel. Works great!
-Clutch slave cylinder. You will want a new one. I have used Centric in the past. $15 IIRC. It worked but not what I recommend. I got a Daikin/Exedy for $30 shipped. Its painted unlike the Centric one I had so it wont rust.
-Clutch master cylinder. You will want a new one not used as this part sucks and you won't want to do it anytime in the near future. You can get a Exedy/Daikin clutch master cylinder and slave cylinder together from Gripforce on Ebay for $55 shipped. Thats what I recommend.
-Engine mounts. You can get good ones or cheap ones and urethane fill them. I had good OEM ones so I used them. I seen a set of DX/LX 5 speed engine mounts in a complete set on Ebay for $90 shipped. If I didn't have good mounts I would have bought those and a couple tubes of Betaseal U-428.
-Rear main/crankshaft seal. You want a damn good rear crankshaft seal. I used an ARS (Arai Seisakusho) rear main seal. OEM will also work great. I believe ARS is OEM, not positive but either will work. I paid $25 shipped for my ARS rear crankshaft seal.
-Transmission seals. There is a shift rod seal, and two output/drive axle seals that need to be replaced. I used an Ishino right and an ARS left. I got both for $25 shipped. I used a NOK shift rod seal. The input shaft seal is internal. No need to replace it unless its leaking. I do not cover that in this DIY and its not a real common problem that I am aware of.
OTHER:
-Blue thread locker.
-Hondabond HT sealant.
-2 Quarts of Genuine Honda MTF or Syncromesh. I used Honda MTF.
-Dot 3 brake fluid.
OPTIONAL:
-ESP or Innovative driver side mount. You will need to contact ESP or Innovative as for which mount you need. I did not go this route so this will not be covered in this DIY. However everything else is just the same. You use your mount while the rest of us remove, relocate and weld brackets.
-Rear main/crankshaft seal case gasket set. Part number: BS40430. I went this route as I had another issue with the end of the crankshaft. My rear main seal was so bad it wore a groove in the crankshaft. I used the gaskets that came in the Fel-Pro kit at Autozone and didn't use the seal. I did this to space the seal case out just a bit, therefore the seal as well to get the seal to ride on a slightly different spot of the crank. You can read more on this in the rear main part of this DIY.
-GETTING A TRANSMISSION AND PARTS-
The first thing you will want to do is acquire a transmission and the related parts. I'm up in the air about whether to start on automatic transmission removal first or prepping your parts for installation. Since it's more common for people to continue to drive their Accord while acquiring the funds and the parts required for this conversion I'm going to start with the prepping first.
You will want a 5 speed transmission. An H2U5 or H2A5 is probably what most of you will use. You want to try and get it from a good source as you don't want a bad one. Mine came from a car that I own that got totaled. More on that later but I knew it was good and that's my point.
Below is my H2A5 in the back of my pickup, all dirty and nasty.

-PLUG HOLES-
First go ahead and clean the transmission up. Most of the time they have 20 years of road grime and dirt on them. You want to get it pretty clean. You don't want a bunch of shit getting into the transmission when you open it up. Which you will be doing later. Remember to plug the holes where the CV shaft/intermediate shafts go in before you spray it. I used the rubber stoppers off the bottom of a chair and electrical tape. Also plug the hoses coming off the VSS. I used some bolts. Remove the clutch fork, spring and boot too. It's pictured later in this DIY so don't worry about which way it goes.
Below are some photos of the objects I used to plug the CV/intermediate shaft holes.


-CLEAN-
Below is my transmission after some Simple Green and the car wash. I clean it up further but this will do.

-CV SHAFT/INTERMEDIATE SHAFT SEALS-
Take your new CV shaft seals and find something to push on them with. Pictures are better at explaining this. I made my "object". You want to push on them to the outer side. The middle is fine but the middle towards the outside is best.

Now that you have something to drive your new seals in its time to pry your old seals out CAREFULLY. There are seal pullers you can use. If your careful you can use a flat head screwdriver as I did. Pry on one side a bit, then the other. This is refered to as "wallering" or "waller" it out where I live. That's the best way I can describe it. Walk it out? I don't know...
Below is the intermediate shaft side with the seal out.

The passenger side CV shaft seal with the seal out.

The seals are different sizes! They are close so you will have to size both up to which ever side you do first. You will know when you have the right one (if you have any sense). You can also look up part numbers or whatever you have to do to keep them straight. One will go, one won't.
Clean the holes out first! Below shows how this is done. Tap in a circle on the object while against the seal until the seal sits down in the recessed hole. You will hear the sound change to a more solid tap and the seal will not proceed to go any further once its reached the proper depth. Do not use excessive force.

And the seals are in. These pictures should give you a better idea of the proper depth for the seals.
Passenger side CV shaft seal.

Driver side intermediate shaft seal.

Now use some paint caps and paper tape (or anything else that serves this purpose) as I did to keep dirt and debris out of the trans while you do the rest.

-SHIFT ROD SEAL-
Now your ready for the shift rod seal. Get cleaned up, put some rubber gloves on if you have them and get comfortable. What your about to do can screw you around real good if you don't do exactly as I say and read this before you do it.
You need a 10mm and a 12mm socket. A 12mm 6 point is preferred. Also if you have your MTF already purchased grab a bottle of it too, crack the cap open and pour a bit in the cap and have it on hand. You also need your Hondabond HT sealant.
Remove the bolts with the red dots in the picture below.

Now you will need to pry this cover off. Below is how I did this with an extension.

The cover will come off. You will need to wiggle the fork selector on top of this cover when you go to pull it off.

Bend this tab back like so with your flat head screw driver.


Now you can access the 12mm bolt with your 12mm 6 point socket. PAY ATTENTION! Before you get the bolt all the way out you need to grab a hold of the metal piece which staked the bolt in place like so. If not it will fall in the trans and your screwed.


With this 12mm bolt and the lock out you can now pull the shift lever out. Twisting as you pull lightly straight out.

Pull the shift lever boot off and now you can access the seal. You can waller this seal out with a flat head screw driver as well. Once the seal is out clean the hole. Find an object to drive this seal in. A flat washer works great. Tap it in until it fits like so. Remember not too far! If you drive it in all the way flush you wont be able to put the boot back on as the boot installs on the lip of the seal between the transmission case and the seal.


Install the shift lever boot. Note the hole goes down.

Lube the shaft and the seal up with your MTF and install the shift lever. Carefully twisting and pushing gently. Making sure its lined up with the interlock properly. Remember the end on the shift lever that the shifter cable attaches to goes to the top!


Line the hole up in the shaft, put the bolt through the lock and then get the bolt started. Making sure not to drop the lock into the transmission.

Don't forget to bend the lock tab back over after torquing bolt down. I went to 45ftlbs as that's about what I felt it was when I went to remove it.

Use a rag and stuff in the hole to keep debris and the sealant out of the transmission.

Clean the surfaces where the cover meets the transmission. Both sides. I used some lacquer and a craft knife.

Clean your bolts up. I used a wire wheel.


Get out your Hondabond HT and put a THIN line of sealant like so. I spread mine out with my finger. Note the interlock bolt removed, you don't have to do that. Mine had 375K on it and was wore. Yours more than likely wont be.


Re-install. Torque down in a criss-cross pattern. If you put the proper amount of Hondabond HT on the mating surface it should look like this. As long as its not oozing a dripping everywhere your ok. Also note in the picture above I had not staked the bolt with the lock yet, don't forget!

-CLUTCH RELEASE BEARING-
Clean off the sleeve on the input shave where the clutch release bearing rides. If it feels rough or has any scaring from the previous clutch release bearing you can use some emery paper and LIGHTLY clean it up. Once this is done apply a very thin coat of grease all over this sleeve. Also apply a small amount of grease on the ball the clutch fork rides on.

Install your clutch release bearing like so.

Below is how the clutch fork assembly is installed. It all pretty much goes on in one action then you put the boot on. The pictures are self explanatory.


Your transmission is ready to install!



















Comment