Announcement

Collapse
No announcement yet.

ENG: DIY Port & Polish

Collapse
X
 
  • Filter
  • Time
  • Show
Clear All
new posts

    ENG: DIY Port & Polish

    Here's an old write-up I did a few years ago when I P&P my H23. I've also linked a thread from another forum I'm on that covers alot of this showing examples from myself and a few other members.


    This is my how to on removing the casting mark edges on the intake and exhaust ports. It'll help the flow some but a good valve job will help you feel the real benefits from this. N/E how this is how I do it. If n/e one has some additional info to add feel free to.

    Here's what you'll need to do this:

    Intake Manifold Gasket
    Magic Marker (any color that stands out)
    Dremel or similar tool for grinding
    Carbide Bit ( I just use the coarse sanding drums)


    Step 1: Clean off the intake and exhaust flange surface on the cylinder head.


    Step 2: Install gasket onto studs


    Step 3: Once the gasket is secured in place take the marker and trace where there is still metal showing within the ports.


    Step 4: Once you have marked the ports, it should look something like this.


    Step 5: Take your Dremel or whatever tool you are using and start removing the material inside the port until you have ground away the material that was marked.


    Here is what it should look like once you are done. I only had enough sanding drums for 3 ports so I'll post up the completed intake side once I am done. After my friend drops off the intake plenum I'll also add how to port match the IM to the head and the TB to the IM. It's basically the same as this but there are a few differences.

    I hope this helps. If ya'll have any questions or comments feel free to chime in. This covers most of it but to see the full gains, I recommend getting a valve job and oversized valves depending on the application. You also should not go too crazy w/ the porting otherwise the intake charge will lose velocity.

    The finished intake ports:


    Here's the thread I mentioned.

    http://d-series.org/forums/showthread.php?t=104314
    Last edited by boostdelinquent; 03-18-2009, 06:33 AM.

    #2
    very nice
    did u go into the actual runner or did u just PORTmatched and polished the outer runner
    Originally posted by deevergote
    Just do what PR CB7 said.

    "I'm Going For Wood" (Clickey Clickey)

    Comment


      #3
      I would suggest putting something down in each port to block any/all metal shavings that could possibly get where they aren't supposed to be.

      Comment


        #4
        Originally posted by PR CB7 View Post
        very nice
        did u go into the actual runner or did u just PORTmatched and polished the outer runner
        I don't have it pictured but I later removed all the valves and did a little extra work on the ports and bowls.

        Originally posted by npor View Post
        I would suggest putting something down in each port to block any/all metal shavings that could possibly get where they aren't supposed to be.
        Yeah, if you're not pulling the valves this is definately a good idea. You can look at my counter surface and see all the little shavings and debris that could possibly end up in places they're not wanted. I still have to get it hot tanked but am holding off on that until I check my cams for clearance since Crower stage 3's will find their new home in this head.

        Comment


          #5
          always wanted try something like this but to scared to try. nice write up thu

          Under Ground Society

          "SLUTS NEED LOVE TOO.....AND A LOT OF DICK!"

          Comment


            #6
            i hate to bash, but i think the intake manifold is smaller than the gasket...

            so now you have to port the intake manifold like whoa.
            I <3 G60.

            0.5mm Oversized Stainless valves and bronze guides available. Pm me please.

            Comment


              #7
              Originally posted by wed3k View Post
              i hate to bash, but i think the intake manifold is smaller than the gasket...

              so now you have to port the intake manifold like whoa.
              The IM ports need to be smaller than the ports of the cylinder so the air is taking a "step" down so to speak as it enters the ports. This helps prevent reversion of the intake charge by impeeding the backwards from of the air. Here's a shitty paint drawing to illustrate my point.

              Comment


                #8
                Originally posted by boostdeliquent View Post
                The IM ports need to be smaller than the ports of the cylinder so the air is taking a "step" down so to speak as it enters the ports. This helps prevent reversion of the intake charge by impeeding the backwards from of the air. Here's a shitty paint drawing to illustrate my point.

                you can fix port reversion with the correct header
                I <3 G60.

                0.5mm Oversized Stainless valves and bronze guides available. Pm me please.

                Comment


                  #9
                  Yes you can however the average header that has stepped primaries w/ anti-reversion chambers is normally pretty expensive, not to mention preventing reversion starts w/ the flow of the cylinder head itself.

                  Comment


                    #10
                    sorry im getting too far into theory and not practicality.
                    I <3 G60.

                    0.5mm Oversized Stainless valves and bronze guides available. Pm me please.

                    Comment


                      #11
                      Yay

                      This forum kicks more ass then Chuck Norris!

                      Keep up the good work guys If we get enough little DIY's like this we can someday compile them into an entire NA engine build DIY


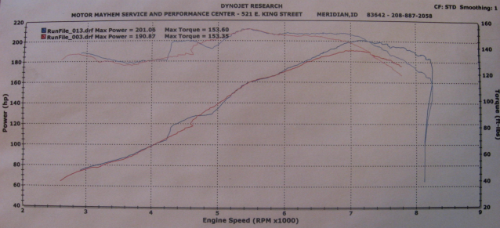
                      201 Whp H22a with bolt ons, see the progress from stock f22a to now HERE

                      Comment


                        #12
                        Originally posted by Ghetto_CB7 View Post
                        If we get enough little DIY's like this we can someday compile them into an entire NA engine build DIY
                        Patience grasshopper. I just so happen to have a full H23 w/ everything but springs and retainers waiting to be built. If it doesn't sell before I go back up to WI to pick it and all my other parts up, I'll be writing just such a thread.

                        Comment


                          #13
                          I'm really wanting to do this with an old head I have laying around in my storage building... I have all the time in the world to mess around with this head.

                          But I would like to go a bit further than just gasket matching.

                          Does anyone have any pointers or anything that might help me on this little venture?


                          Comment


                            #14
                            HF has a package of cartridge rolls (get a new mandrel from a real tool company, as theres break after a few hours of use) and an electric die grinder (unless you have air tools) I still had more then half of them left over. Start with the coarse ones and let the grit do the work alternating between the straight and tapered ones where needed. Also putting a drip of super glue on the backside of the rolls will help them last longer, if you dont youll get to a point where it unrolls when you wear through the layer that holds it all together. other than that. take your time and dont force the rolls into the metal. do NOT used a carbide bit things can get out of control real fast and that will hog out the aluminum if youre not careful..dont hit the valve seats either lol. dont change the shape of the knife edges in the runner, some people sharpen them out, i left mine stock just cleaned up


                            all youre trying to do is get rid of the casting flash and the texture in the runners, when you gasket match its called fish mouthing for these heads because your blending port into the runner, youll only need to open the ports .5 to .75mm max and take that in about .25" (youll see when you make your gasket lines) the exhaust if you feel inclined can be buffed afterwards to shiny goodness, the intake youll want to leave a "velvety" finish not smooth, the fine grit rolls accomplish this. when i was done i cut a little square of scotch bright pad and did a final sanding with that and my finger, it helped to "feel" if there were any inconsistencies and gave the final uniform texture i wanted.
                            Last edited by illinois_erik; 07-22-2014, 01:36 PM.

                            Comment


                              #15
                              Your awesome Illinois_erik.

                              Doesn't sound nearly as tedious as I had thought.

                              That's a nice looking head btw. I would be more than pleased for mine to turn out like that.


                              Comment

                              Working...
                              X