Announcement

Collapse
No announcement yet.

EXT: Complete JDM Sidemarker Install (56k Warning)

Collapse
X
 
  • Filter
  • Time
  • Show
Clear All
new posts

    EXT: Complete JDM Sidemarker Install (56k Warning)

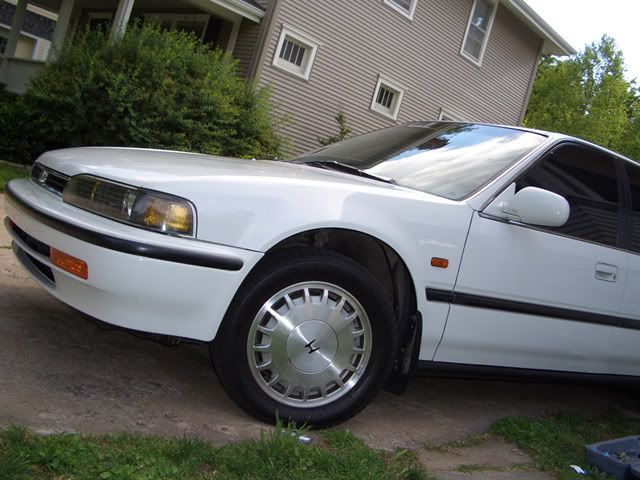
    I finally got around to installing my CB6 Sidemarkers and I took lots of pictures in hopes of finally making a DIY for this, since there doesn't seem to be an official one. Most of my research for this project was found here on CB7T. There are atleast 25 pictures @ 640x480 res for this DIY, so 56k proceed at your own risk!

    Complete JDM Sidemarker Install
    ==================================
    Disclaimer: I am not responsible if you injure yourself, others,
    or the parts you are working on. Proceed at your own risk.


    ** What this DIY will cover **
    This DIY is broken down into two parts. Part I will cover the cutting of the fender for the sidemarker. Part II will include wiring the sidemarkers and the final installation.

    ** Please Note **
    Understand this is meant to be a general guide for a sidemarker installation. There are many types of sidemarkers with different shapes and bulbs and so forth. In this DIY I used sidemarkers from a CB6 Accord in Japan. Your actual sidemarker template may differ from the one I made.

    Now lets get started.

    Part I: Cutting a hole for your sidemarkers

    Parts, Tools, and Safety Equipment used:
    * Writing Utensil (pen or sharpie)
    * Sissors/Razor Blade
    * Ruler
    * Card Board/Side of a plastic milk carton
    * Dremel
    * Dremel Heavy Duty Cut-off Wheels #420
    * Stoch Blue Painters Tape
    * Touch-up Paint
    * Eye Protection


    0001
    -----
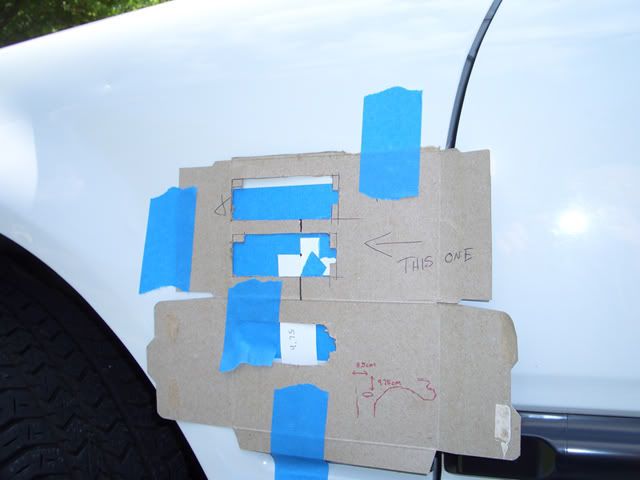
    Using a pen and a ruler, I started measureing and making templates. I think I ended up making four templates before I got a template that was usable. I took a empty poptart box and unfolded it and used it to make my drawings on. I then used a razor blade to cut out the template. I test fitted the sidemarker into the cardboard template to make sure it fit nice and snug.


    Proceed to the next post...
    Last edited by jsinger; 03-19-2010, 10:04 PM.
    RIP:
    1993 Honda Accord LX 5spd Sedan [2005-2007]
    1994 Honda Accord LX 5spd Sedan [2001-2004]
    Currently daily:
    1990 Honda Accord EX 5spd Sedan [2012-Present]

    #2
    0002

    0002
    -----
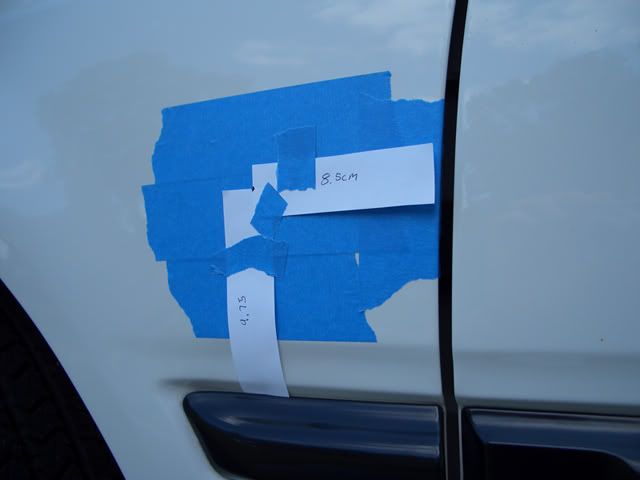
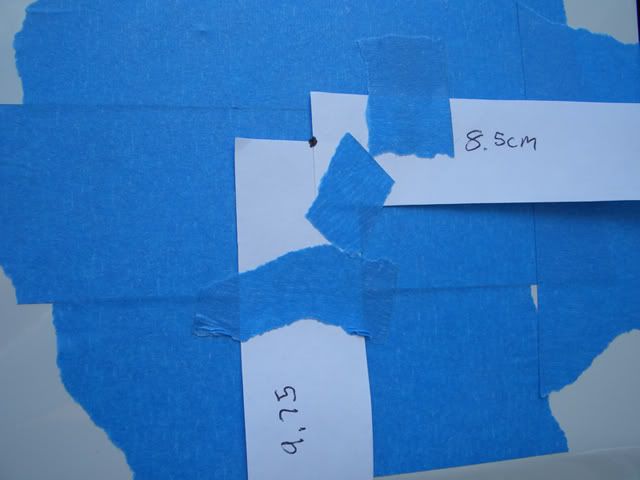
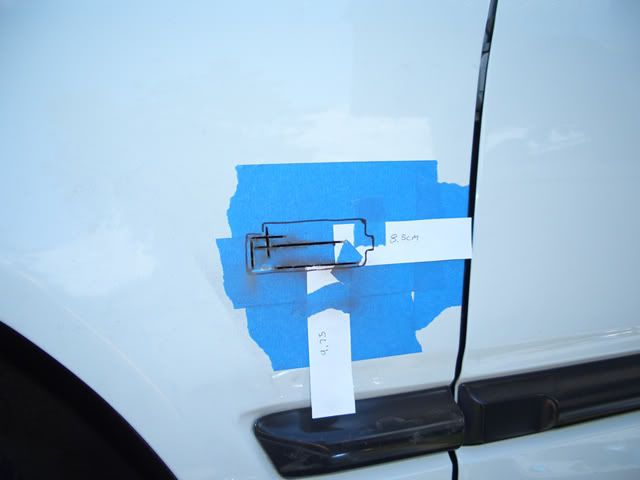
    Then using information I got from this thread I measured 9.75cm and 8.5cm twice on a piece of paper and cut them out. That way I have four pieces, two for each side.

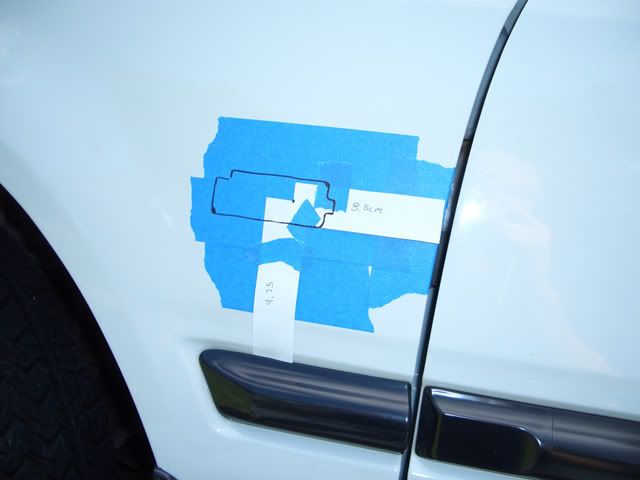
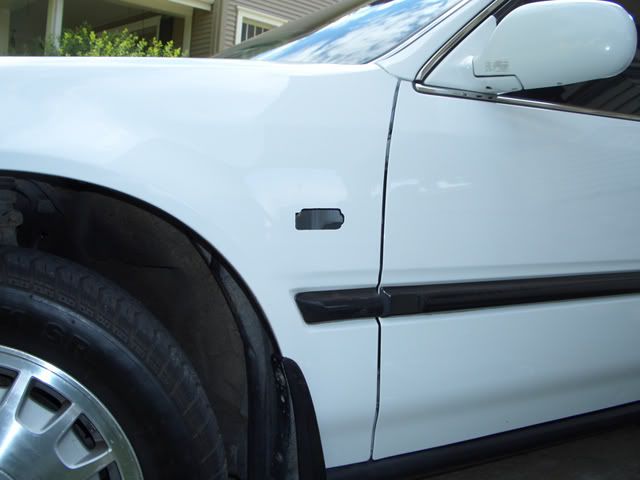
    I cleaned off the area on my fender to be cut and put a few strips of Blue Painters Tape from Stoch. I then lined up the 9.75cm and the 8.5 cm and put a dot in the center of where they met. I took the template I made and lined it up to where the center of the bulb inside would be in relation to the sidemarker since those measurements are where the center of the bulb is.

    I then took a sharpie and outlined where I was going to cut.

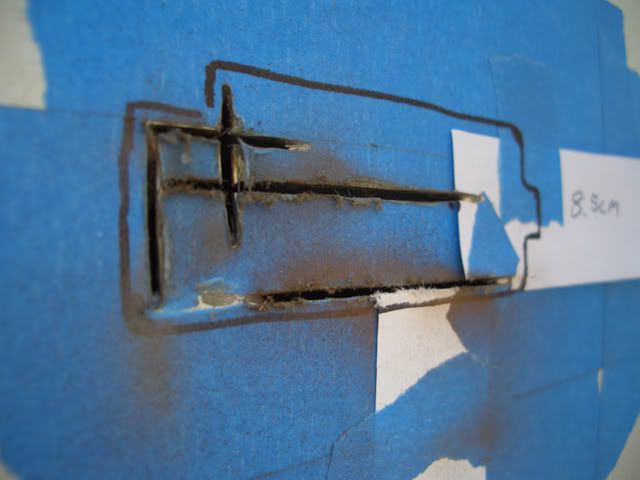
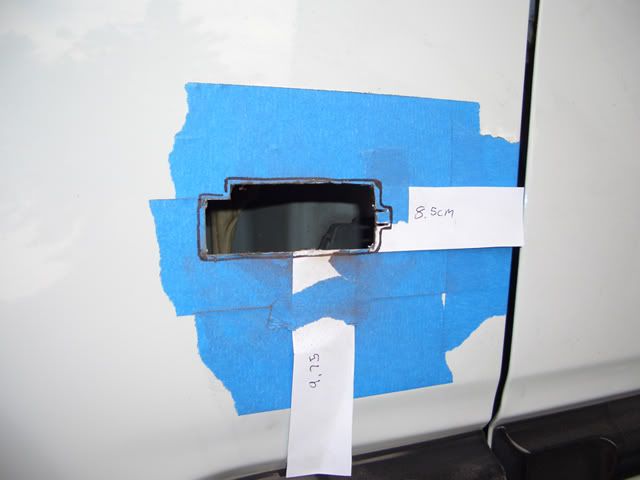
    Next it's time to cut. I got out the dremel and began cutting into my fender. I would recommend safety glasses for this because if you want a percise job, you have to look real close and if your eyes aren't protected, well I'm sure you know what could happen, heh. I used a paintball mask, lol.

    You ALWAYS want to cut smaller than your template. If you end up making the hole too big then your SOL cause you sidemarker probably wont fit in right.

    TAKE YOUR TIME! If you want it to fit right and look good then take as much time as you need. The first time I did it, it took me three hours. The second time only took me one hour.

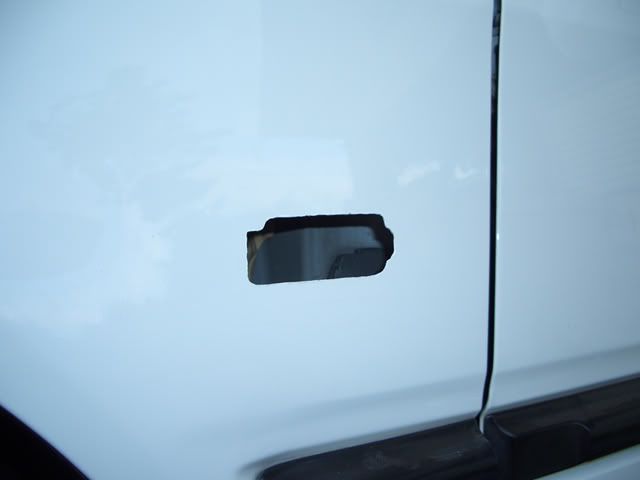
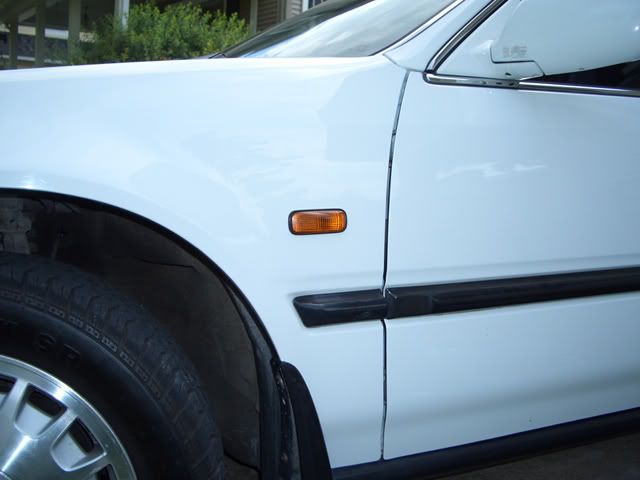
    Just make sure after you get the metal cut out and the hole is there you use the sidemarker to test fit the hole over and over. Taking away as little metal as possible each time until you finally get it to fit into your fender nice and snug.

    Since there is now bare metal where you cut out the hole, you need to protect it. I bought some touch-up paint from Honda and painted along the exposed part of metal.

    If my words didn't make sense, hopefully you can make sense of the photos.


    And that concludes Part I of this DIY.
    Last edited by jsinger; 03-19-2010, 10:11 PM.
    RIP:
    1993 Honda Accord LX 5spd Sedan [2005-2007]
    1994 Honda Accord LX 5spd Sedan [2001-2004]
    Currently daily:
    1990 Honda Accord EX 5spd Sedan [2012-Present]

    Comment


      #3
      Part II: Wiring the Sidemarkers

      Part II: Wiring the Sidemarkers

      Before I get started I just want to point out that there are many different ways to do this. I chose this method because I am using JDM one-piece headlights. As some of you may know it only has one bulb in the corner. USDM Accords have two bulbs in the corner light. Since I am only using one bulb, the other bulb is just hanging there unused.

      This unused bulb happens to be the bulb that stays on and also blinks. This is an OEM stock feature on USDM CB7's.

      Because I like to do things as clean and professional as possible and because I like to keep things plug and play, I choose to make a custom wiring harness for my sidemarkers that plugs right into the female end of the unused bulb. This is why I didn't just tap into the stock wires and electrical tape them on. I wanted something that didn't seem like a half-assed job.

      This is how I did it.

      Parts and Tools used:
      * Dremel
      * Dremel Heavy Duty Cut-Off Wheels #420
      * Soldering Iron
      * Solder
      * Electircal tape
      * Four strips of 14-16 gauge wire approx. 3.5 ft. in length
      * Two honda sockets (you can use the ones on the car or buy new ones)


      -----
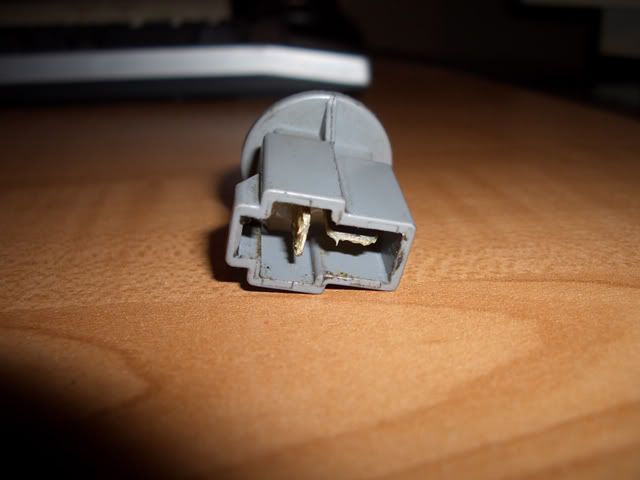
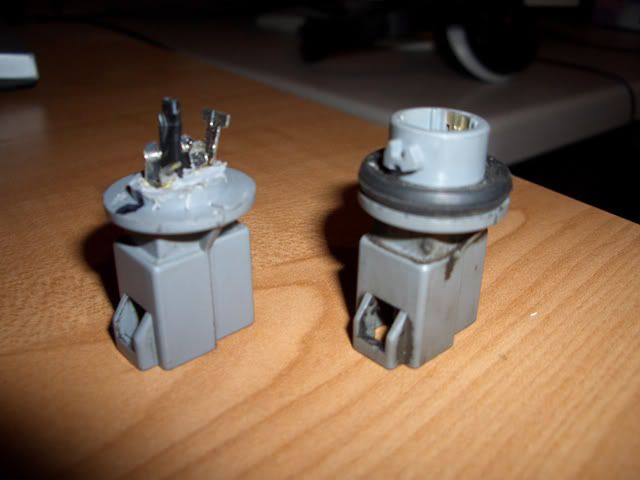
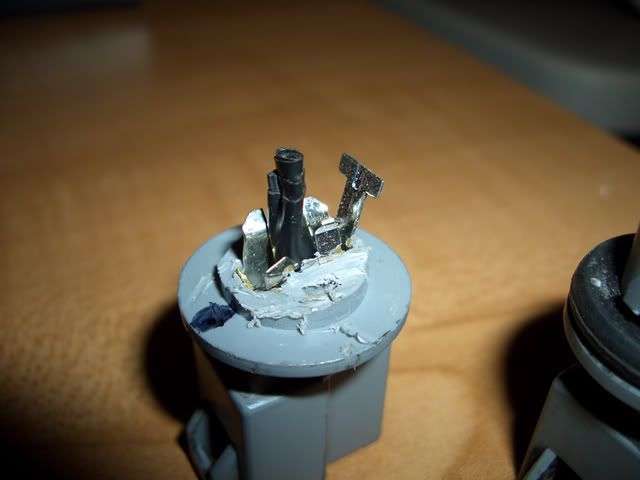
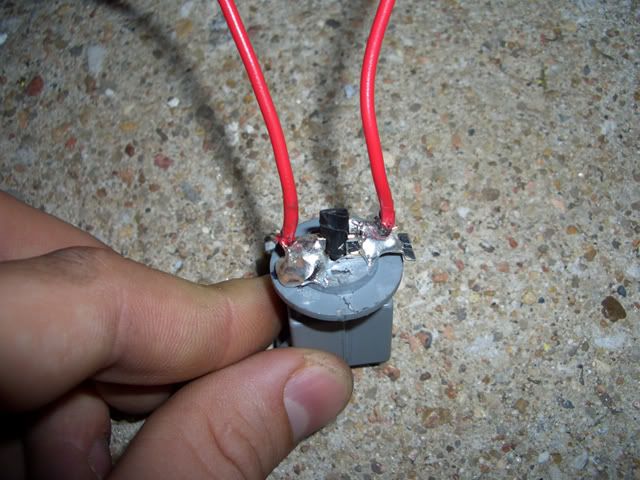
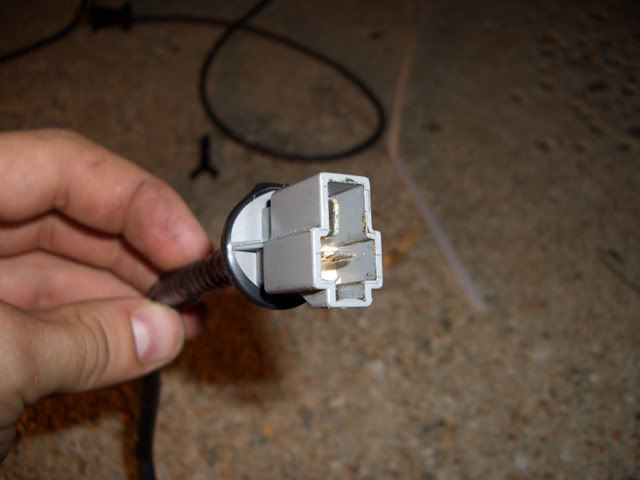
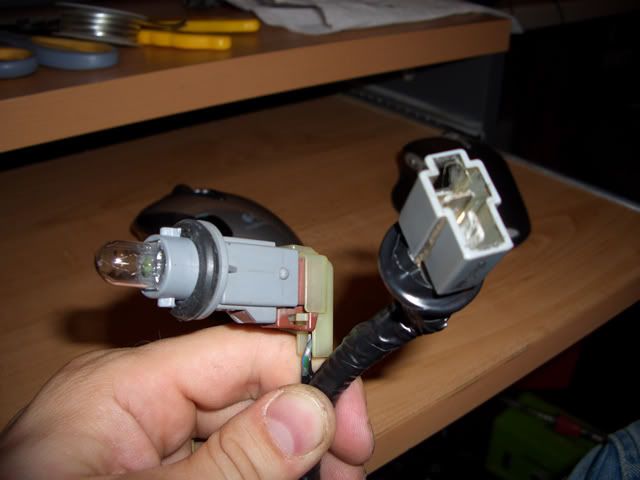
      I used the socket from the stock wiring. It just unplugs. I then used a dremel to cut off the cylinder-like portion of the socket. Becareful not to cut off the metal terminals inside.

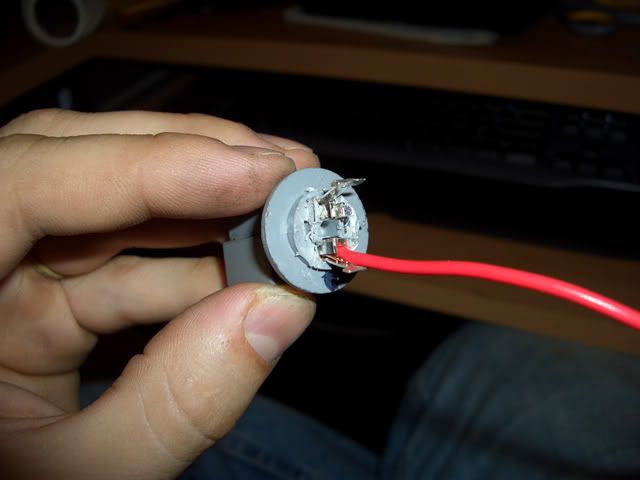
      I took two strands of wire and wrapped them around the terminals of the sockets and put a piece of wound up electrical tape in the middle between the two terminals to stop any shorts that could occur since they are so close together.

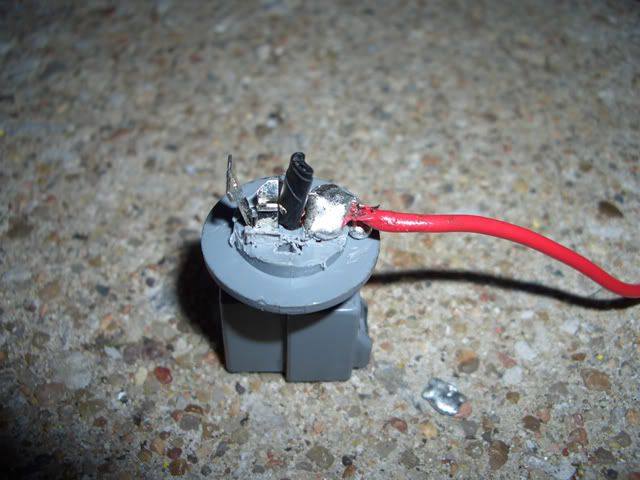
      Next I soldered the wires to the terminals and wraped each wire with electrical tape, covering anywhere solder was showing.

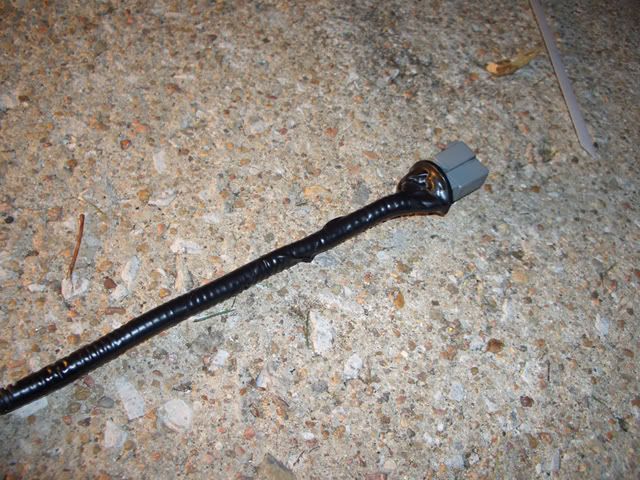
      To clean up the overall look I obtained some small flex tubing and put the wires inside. I topped it off by taping around the tubing with electrical tape. This left me with a very stock looking wiring harness. I got the plastic tubing from a stock engine harness I have. I was not able to find any tubing that size anywhere. I checked Advance Auto, Autozone, Lowe's, and Wal-mart. After talking with a guy in parts at Honda, he said I'd have to special order it.

      I'm sure just using eletrical tape will do just fine. No one is going to see it anyway.

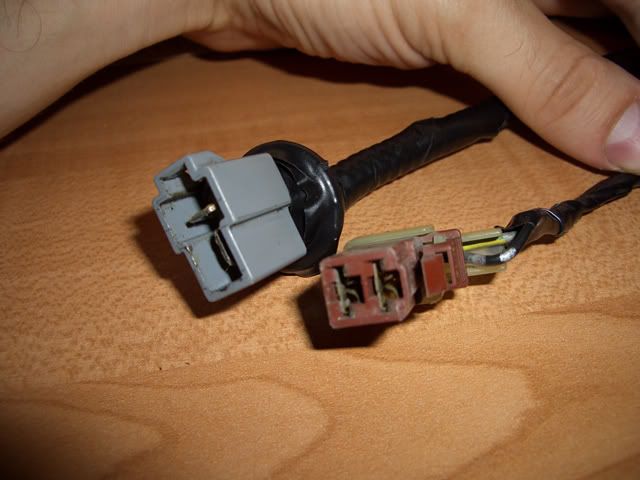
      At the opposite end of the wires you obviously have your sidemarker socket, bulb, and such. I twisted together and electrical taped the pig tails of the sidemarker socket to the opposite end of the 3.5ft wires.

      To install, I removed 4 plastic screw clips in the fender wheel-well area and fed the wires through the sidemarker hole, over the wheel-well and connected it to the stock wiring.

      If none of that made sense to you, hopefully the photos will help.


      I hope this helps someone out there.

      Thanks for looking and reading.

      Good Luck!
      Last edited by jsinger; 03-19-2010, 10:05 PM.
      RIP:
      1993 Honda Accord LX 5spd Sedan [2005-2007]
      1994 Honda Accord LX 5spd Sedan [2001-2004]
      Currently daily:
      1990 Honda Accord EX 5spd Sedan [2012-Present]

      Comment


        #4
        nice diy good write up

        Comment


          #5
          damn dude, did dylan help you?

          are you coming to the meet?

          Comment


            #6
            Originally posted by sublime
            damn dude, did dylan help you?

            are you coming to the meet?
            Nope, no help from anyone other than the research I did on the forums. Dylan offered to do them, but I told him I wanted to do it myself, lol.

            I'm not sure yet. My friend is getting married that weekend and someone else has that Sat off already. I still might could get it off though. I'll see what strings I can pull.
            RIP:
            1993 Honda Accord LX 5spd Sedan [2005-2007]
            1994 Honda Accord LX 5spd Sedan [2001-2004]
            Currently daily:
            1990 Honda Accord EX 5spd Sedan [2012-Present]

            Comment


              #7
              that is the best use of a pop tart box ever!
              WE MISS YOU JO(9-04-2008)

              Comment


                #8
                great write up man

                My Members Ride Thread

                Comment


                  #9
                  damn looking at the pictures i want some breakfast. hmmm me hungry!

                  oh yea great diy lol

                  Comment


                    #10
                    nice writeup

                    Comment


                      #11
                      awesome write up man, i hope you can come to the meet! hell, i hope i make it to the meet...hahaha
                      -RIP Eric Hall. Miss you brother-
                      newskoolhippy (10:53:37 PM): i want to see a pic of you with a hard-on to prove thats your cock
                      newskoolhippy (10:53:56 PM): i need to see your face in the pic
                      newskoolhippy (10:54:07 PM): with todays paper in the picture to prove your taking it now

                      Comment


                        #12
                        well hot damn i might have to pull out my demal and get my sidemarker put on tomarrow if its not to hot, what did you plug the side marker into?

                        1966 Chevy Nova
                        1974 Super Beetle
                        2012 Ford Super Cobra Jet
                        2004 Honda Element
                        2004 Honda Ruckus
                        2003 Honda Ruckus


                        www.weezoonline.com
                        www.facebook.com/weezoonline

                        Comment


                          #13
                          Originally posted by Weezo182
                          well hot damn i might have to pull out my demal and get my sidemarker put on tomarrow if its not to hot, what did you plug the side marker into?
                          Since I have JDM one-piece headlights, I only use one of the two bulbs that go into the corner light. I made that custom wiring harness so I could just hook my sidemarker into the unused stock wiring. In this illustration it is #28. That is the bulb that is not used when using JDM one-piece headlights. I removed the socket that's connected to the stock wiring and plugged in the custom wiring harness I made.


                          If this is still confusing, I'll try to get pictures of what I am talking about.
                          Last edited by jsinger; 03-19-2010, 10:19 PM.
                          RIP:
                          1993 Honda Accord LX 5spd Sedan [2005-2007]
                          1994 Honda Accord LX 5spd Sedan [2001-2004]
                          Currently daily:
                          1990 Honda Accord EX 5spd Sedan [2012-Present]

                          Comment


                            #14
                            Originally posted by jsinger
                            Nope, no help from anyone other than the research I did on the forums. Dylan offered to do them, but I told him I wanted to do it myself, lol.

                            I'm not sure yet. My friend is getting married that weekend and someone else has that Sat off already. I still might could get it off though. I'll see what strings I can pull.
                            lol you missed the last meet, request off asap. nah dude do what you have to do, seriously keep that job at honda!

                            Comment


                              #15
                              Very nice DIY!!
                              1992 Accord LX - SOLD

                              Comment

                              Working...
                              X