WARNING: I am not liable for any damages you yourself may cause when attempting this DIY.
First off this DIY if for those of you who dont want to spend the money to repaint your JDM mirrors the same color as your car but still wan tthem the car color, also this was performed on a coupe, it could work on sedans also or even if you wer sent the wrong version for example you have a coupe but recieved sedan mirrors, this is just the fix your looking for.

Step 1: Remove the Mirror from you vehicle, by removing the black plastic cover that covers the mirror electrical connector, and screws. Unclip the connector, then remove the 3 screws securing the mirror the the door of the vehicle.
Step 2: Remove the black rubber cover that covers the famale connector, and mirror base on the mirror.
Step 3: Remove the screws holding the connector in place, then remove the 3 screws on the bottom of the base, they are covered by clear tape, follow this up by removing the screws shown in the photo to follow
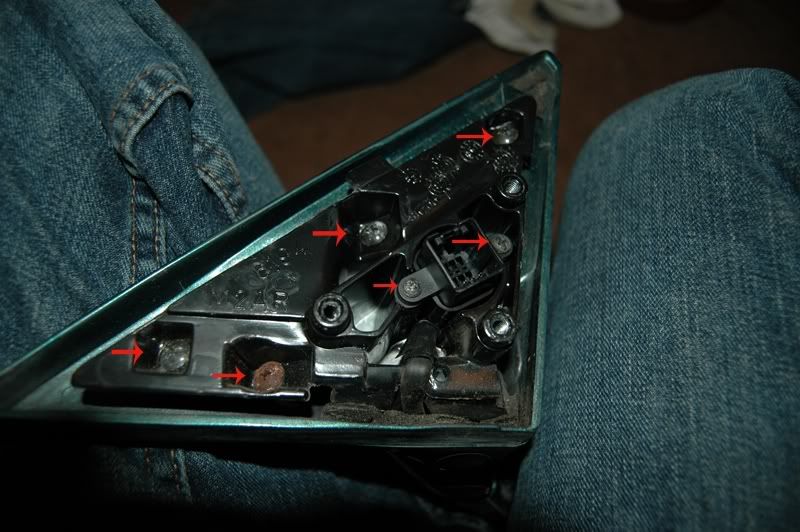
Step 4: Ok heres where the paper clip comes into play, use the paper clip to de-pin the pins in the black connector(I found it useful to use some wire cutters to cut the paper clip tip off creating a point)(REMEMBER WHICH PINS GO WHERE ON THE JDM MIRRORS!!!!)
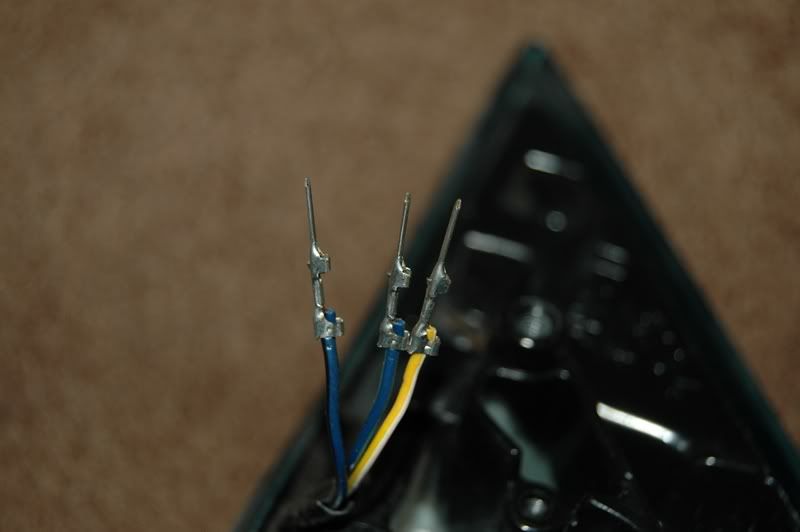
Step 5: Remove the mirror base and painted cover.

Step 6: Locate the hole on the bottom of the mirror housing and use a phillips screw driver the unscrew the screw thats located inside, this will free up the glass and adjusting motor.
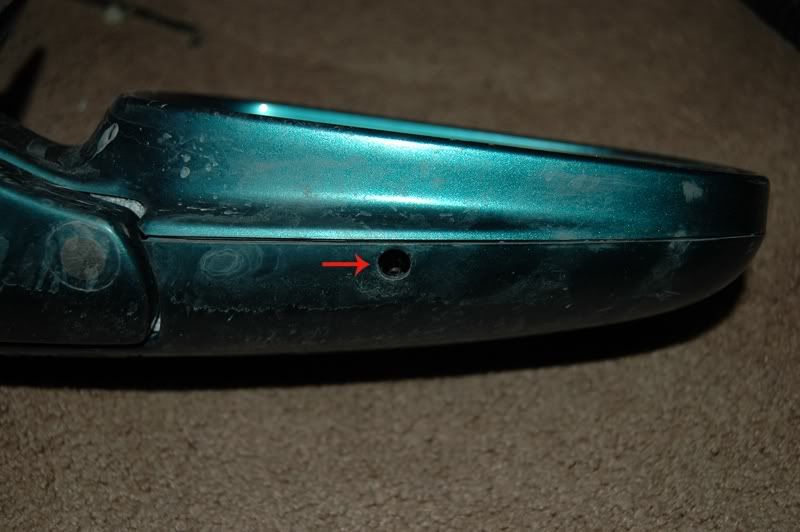
Step 7:Remove the 5 screws holding the 2 halves of the the mirror housing together (you can also remove the first 2 screws holding the adjustment motor base inplace)

Step 8: remove the loose half the housing( be careful not to snap the tab off holding the smaller piece of the half on)
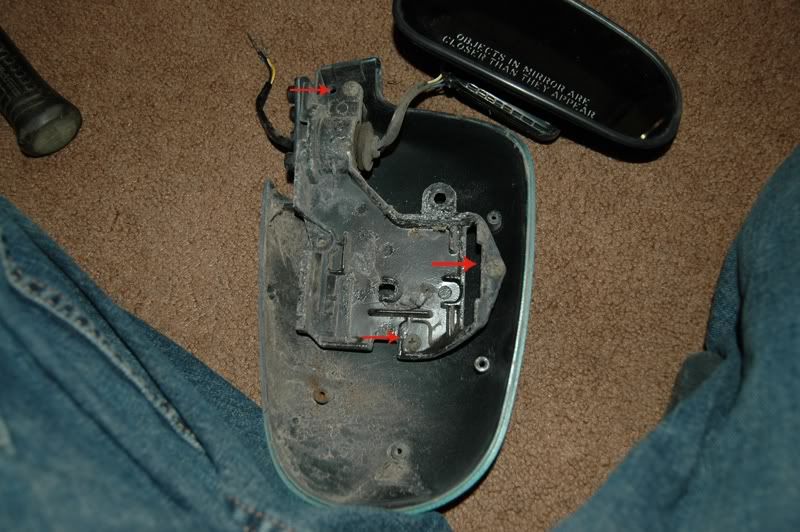
Step 9: now you can finish removing the last screw holding the motor base in
Step 10: remove the motor base, motor and glass from the housing, and set asside.
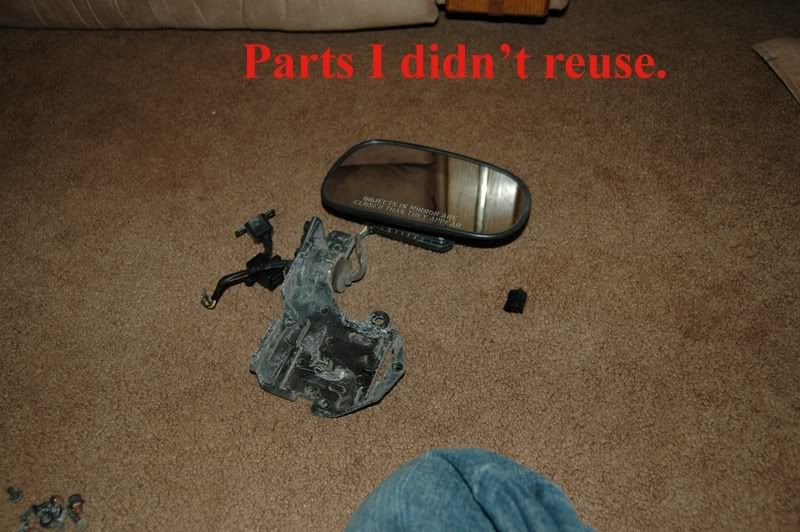

ok now we are done with the USDM mirror, now onto the JDM mirror
Step 11: Repeat steps 1-5
Step 12: ok heres where it get different. physically adjust the mirror so it is aimed as far up as possible, then remove the screw like instructed in Step 6 but once you remove it take a flat head screwdriver and pry off the little metal piece holding the adjustment motor tight, then move the adjustment motor out of the way.
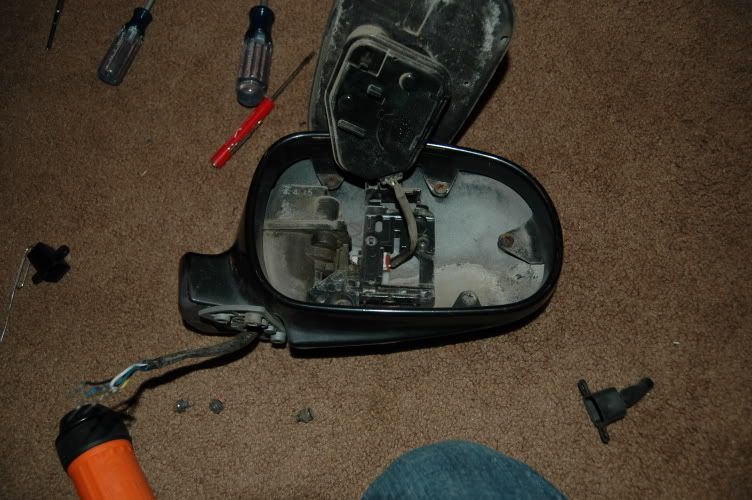
Step 13: Gently use a tiny flathead screw driver to unclip the adjustment motor from the folding motor.
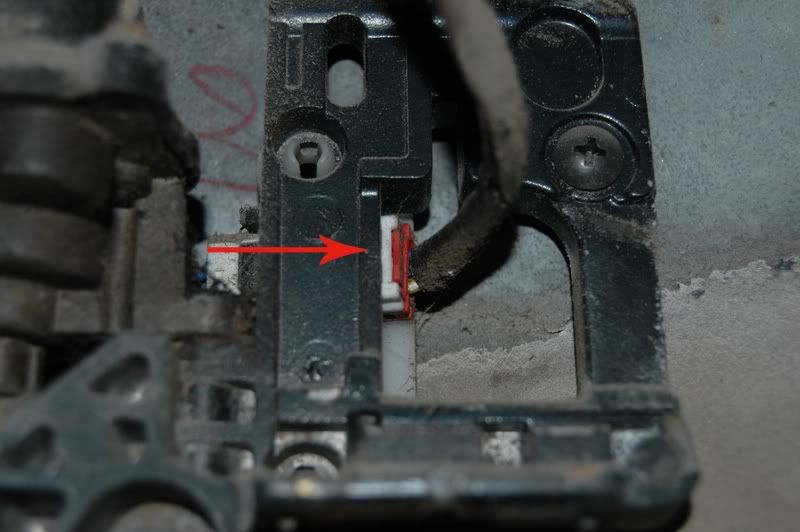

Step 14: Repeat steps 7-9
Reinstallation
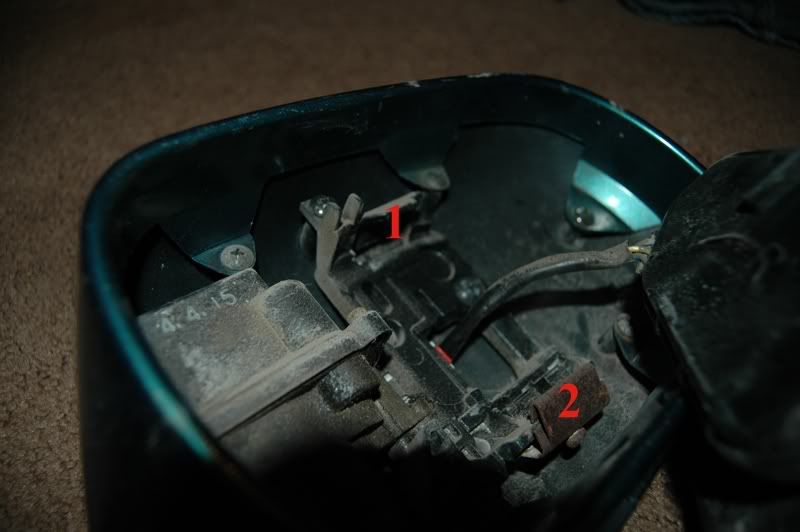
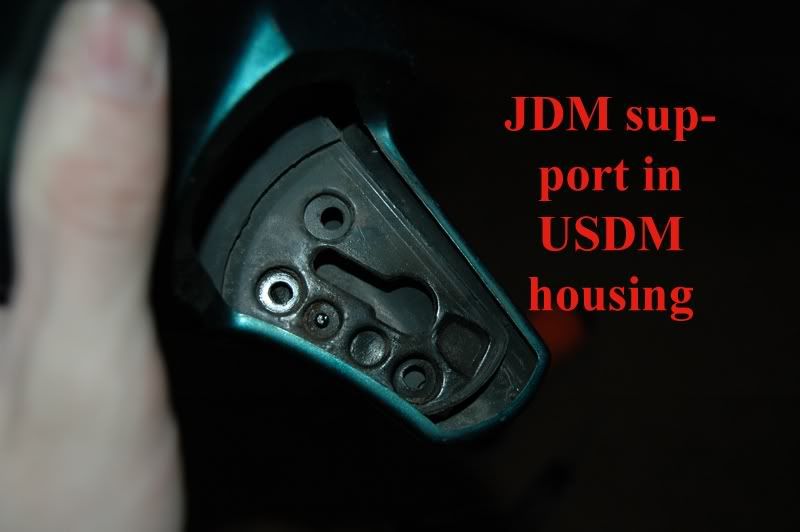
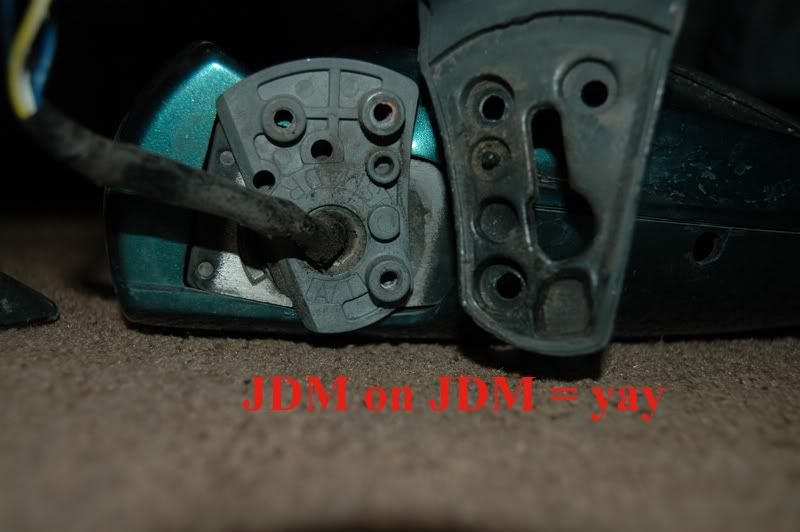
Step 15: place the JDM power folding motor and base in the USDM housing, and screw in place, but remember not to screw in the bottom screw just yet you have to put the other half of the housing on first before you screw that one in.
Step 16: once you have secured the 2 halves of the mirror housing inplace, take the little metap piece that holds the adjustment motor in place and screw it on( but only a few thread as you still need to put the motor back in)
Step 17: This is just a recommendation step but what i did was adjust then mirror as far inword as possible so i could make sure the motor was fully in place before tightining the holder screw
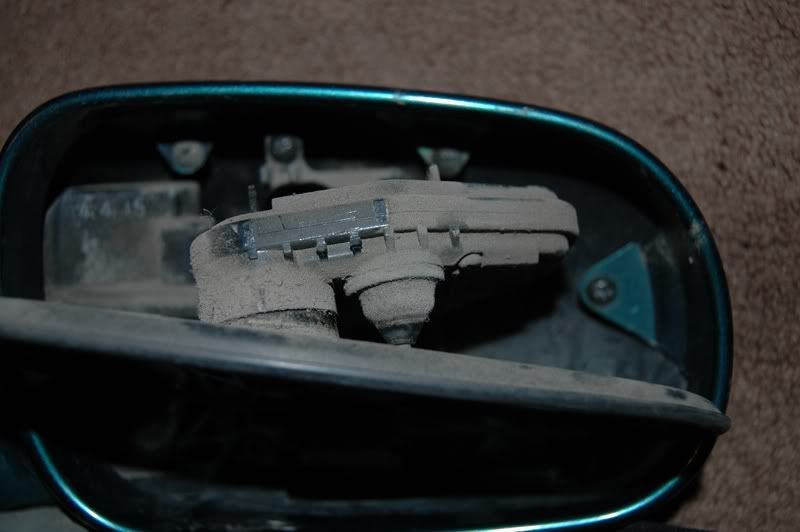
Step 18: on now reinstall the adjustment motor making sure it goes unter the tab on the top first, then the metal holder second
First off this DIY if for those of you who dont want to spend the money to repaint your JDM mirrors the same color as your car but still wan tthem the car color, also this was performed on a coupe, it could work on sedans also or even if you wer sent the wrong version for example you have a coupe but recieved sedan mirrors, this is just the fix your looking for.

Step 1: Remove the Mirror from you vehicle, by removing the black plastic cover that covers the mirror electrical connector, and screws. Unclip the connector, then remove the 3 screws securing the mirror the the door of the vehicle.
Step 2: Remove the black rubber cover that covers the famale connector, and mirror base on the mirror.
Step 3: Remove the screws holding the connector in place, then remove the 3 screws on the bottom of the base, they are covered by clear tape, follow this up by removing the screws shown in the photo to follow

Step 4: Ok heres where the paper clip comes into play, use the paper clip to de-pin the pins in the black connector(I found it useful to use some wire cutters to cut the paper clip tip off creating a point)(REMEMBER WHICH PINS GO WHERE ON THE JDM MIRRORS!!!!)

Step 5: Remove the mirror base and painted cover.

Step 6: Locate the hole on the bottom of the mirror housing and use a phillips screw driver the unscrew the screw thats located inside, this will free up the glass and adjusting motor.

Step 7:Remove the 5 screws holding the 2 halves of the the mirror housing together (you can also remove the first 2 screws holding the adjustment motor base inplace)

Step 8: remove the loose half the housing( be careful not to snap the tab off holding the smaller piece of the half on)

Step 9: now you can finish removing the last screw holding the motor base in
Step 10: remove the motor base, motor and glass from the housing, and set asside.


ok now we are done with the USDM mirror, now onto the JDM mirror
Step 11: Repeat steps 1-5
Step 12: ok heres where it get different. physically adjust the mirror so it is aimed as far up as possible, then remove the screw like instructed in Step 6 but once you remove it take a flat head screwdriver and pry off the little metal piece holding the adjustment motor tight, then move the adjustment motor out of the way.

Step 13: Gently use a tiny flathead screw driver to unclip the adjustment motor from the folding motor.


Step 14: Repeat steps 7-9
Reinstallation
Step 15: place the JDM power folding motor and base in the USDM housing, and screw in place, but remember not to screw in the bottom screw just yet you have to put the other half of the housing on first before you screw that one in.
Step 16: once you have secured the 2 halves of the mirror housing inplace, take the little metap piece that holds the adjustment motor in place and screw it on( but only a few thread as you still need to put the motor back in)
Step 17: This is just a recommendation step but what i did was adjust then mirror as far inword as possible so i could make sure the motor was fully in place before tightining the holder screw

Step 18: on now reinstall the adjustment motor making sure it goes unter the tab on the top first, then the metal holder second







 **
**
Comment