I’m making this post in response to the numerous questions I’ve received about the JDM Honda Vigor headlight conversion that I did on my car. Unfortunately, I didn’t take enough detailed photos to do a DIY write-up, but there are enough pics here that will show you how much work is entailed in doing this from start to finish. By looking at this I’m sure you could properly complete this swap with the right tools, and a bit of free time.
I hope this works because I’m typing it in Word to copy and paste it to this forum…
The headlights are JDM Honda Vigor CC2 Black Housing headlights. Always available on ebay.
Tools required:
Air Saw
Grinder
Cut off wheel
Drill and bits
Welder
Filler
Primer
Paint/Clearcoat
Here are the pics, roughly in order they were taken.
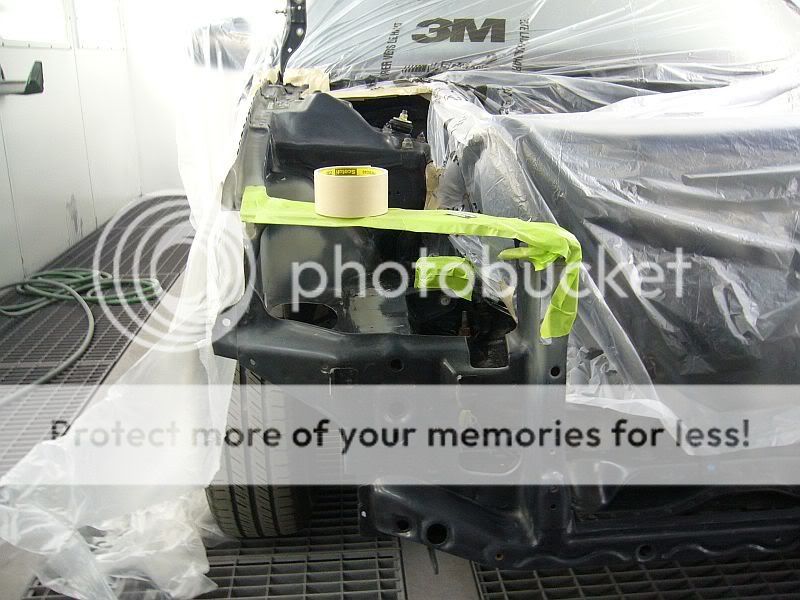
This photo shows what needs to be trimmed out of the headlight pocket to fit the Vigor light in. The same was done on each side until proper fitment was achieved. Remember, trim little by little till it fits, hacking away large pieces that aren’t necessary will lessen the structural rigidity. It’s the best picture I have to show this.
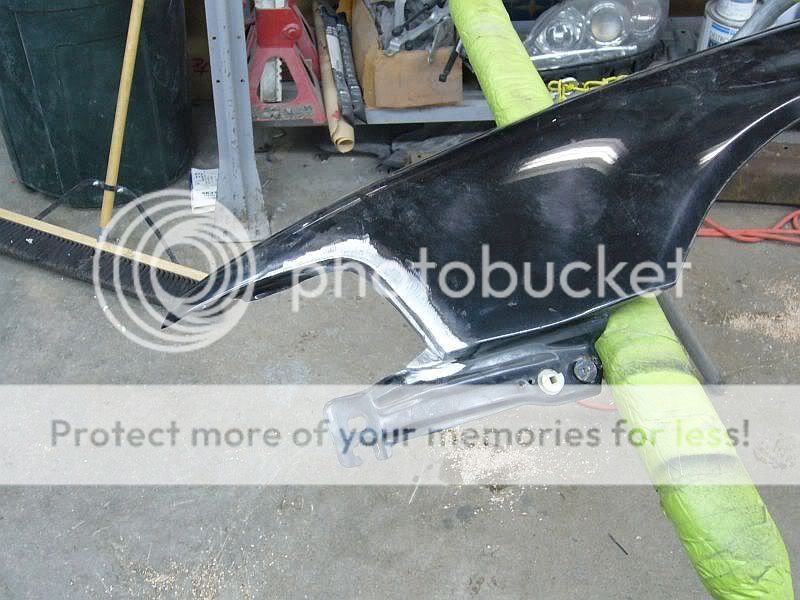
This photo shows the finished trimming that I did on the fender to allow the headlamp to mount further back for better alignment with the hood. I also wanted the fender to curve exactly like the corner lamp on the Vigor light. You don’t have to do this, I’m just anal. This step can be skipped to save time, money, and materials. On the other hand, if you do not do this, the headlamps will stick out a little further from the hood, but only noticeable when you look down at the front edge of the hood. Also, you will have a gap in the upper corner since the Vigor corner lights have more of a slant downward where as the accord corner lights cut almost straight down from the curve.
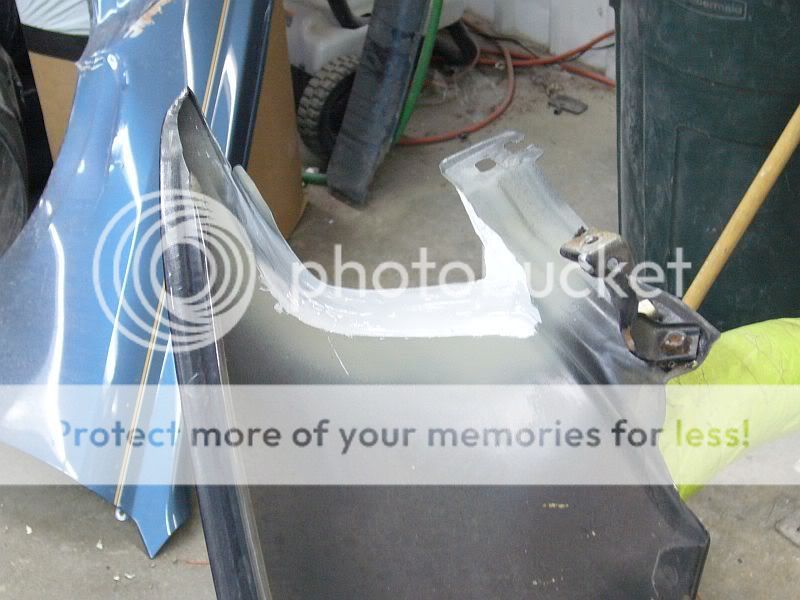
This pic shows the backside of the fender primed first with a self etching primer, then coated with automotive seam sealer from 3M. This is to protect the back side of the welds from corrosion. Once again, this only needs to be done if you want your lights to fit like mine.
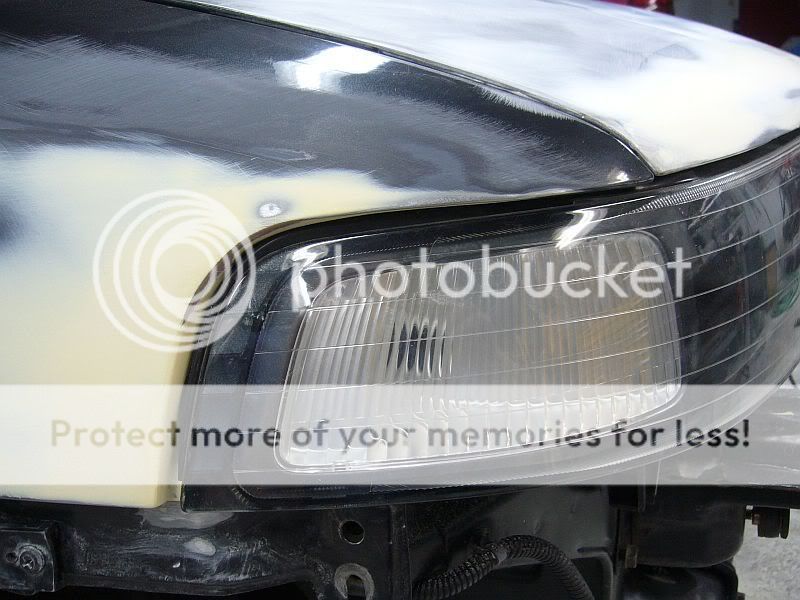
This shows the finished headlight fitment once the filler was applied to smooth out the area and tighten the gap even more.
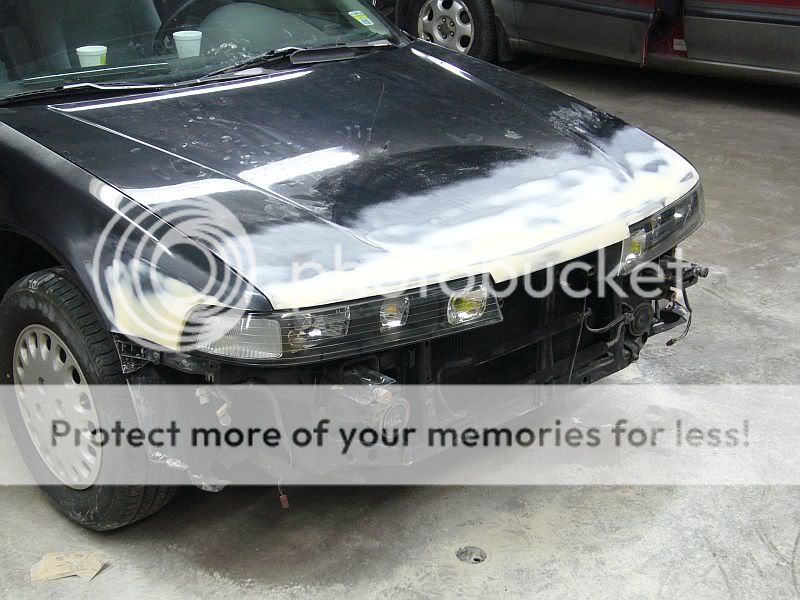
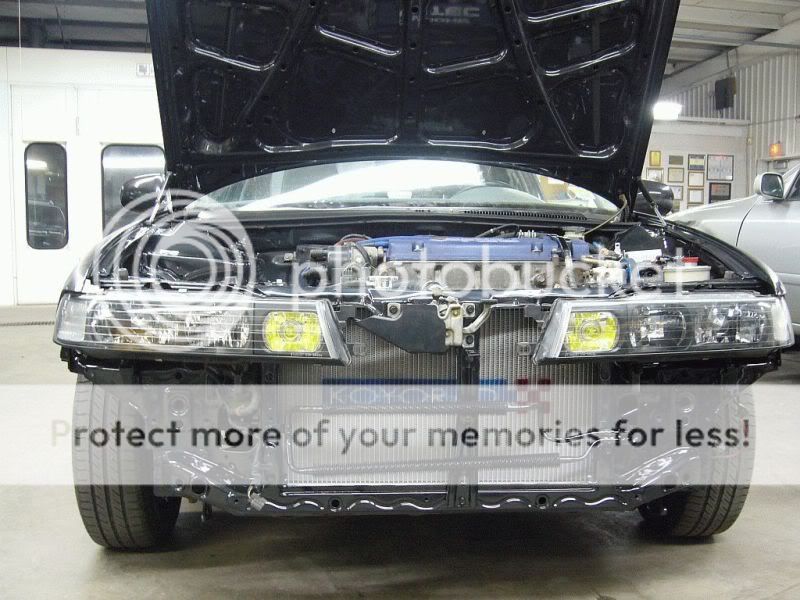
This is the hardest part of the conversion, it’s also a required part since the headlights are quite a bit wider than the accords’. Once the headlight pocket is trimmed out you will need to drill new, or enlarge the existing, headlamp mounting holes in the upper tie bar. You can get away with two mounts on top, but for added stability you’ll want to fab up a bracket to mount one or both lower mounting tabes. They do not line up with the accord mounts at all. Once this is done, and the fender is done if you choose to do the fender, you need to trim the hood. This is the last step and most important for a nice fitting conversion. With the headlight in place, lower the hood onto it. Obviously it won’t close all the way yet, so try to envision where the upper edge and corner of the headlight will be on the hood, and using 1” masking tape, mark your cut lines. Remember to cut short, you can always cut/grind more if you haven’t done enough. You can’t put the metal back once it’s gone without a lot of extra work. Trim a little at a time on both sides till you like the result. It’s best to remove the hood latch from the upper tie bar so you’re not popping the hood all the time. I set a chunk of 4”x4” where the hood latch mounts to rest the hood on for trimming. Then just remove the wood to set the hood down and check your progress. Heres a shot of both lights mounted in place:
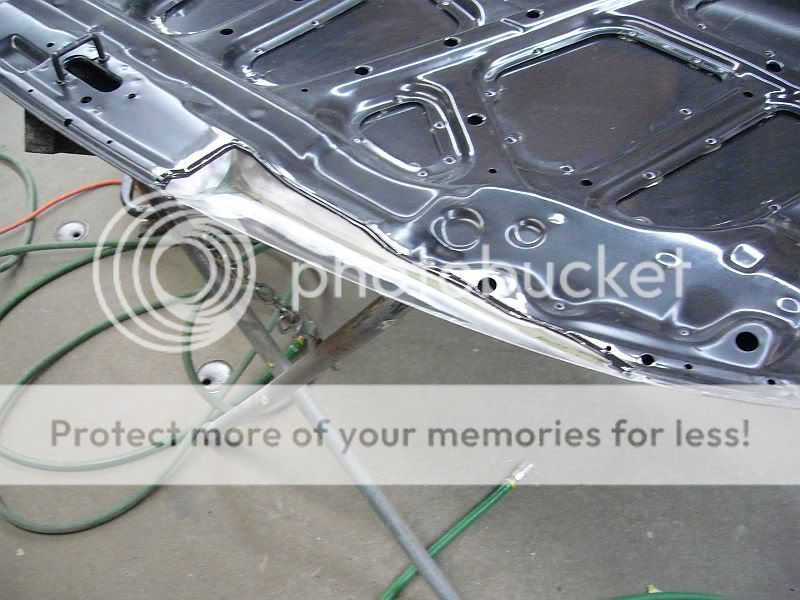
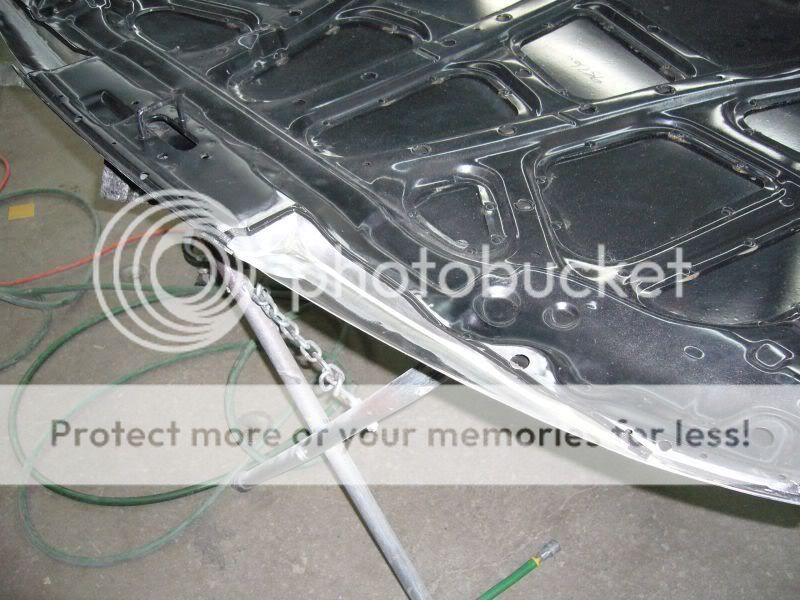
You will notice in the pic that there is some understructure that needs to be trimmed back as well. The hood may not rest all the way down until some of that is also trimmed away. I used two part panel bonding adhesive from Lord Fusor to glue the filler pieces into place where they meet the hood skin, and tack welded the edge where the filler piece meets the understructure. Welding the entire part could result in warping of the outer hood skin. After grinding down the welds, I applied a bead of 3M panel bonding adhesive along the top edge to cover the joint. It’s stronger than seam sealer, and seals the joint at the same time. Again, welding the entire joint instead of just tacking it could warp the sheet metal. Here are more pics of the underside:
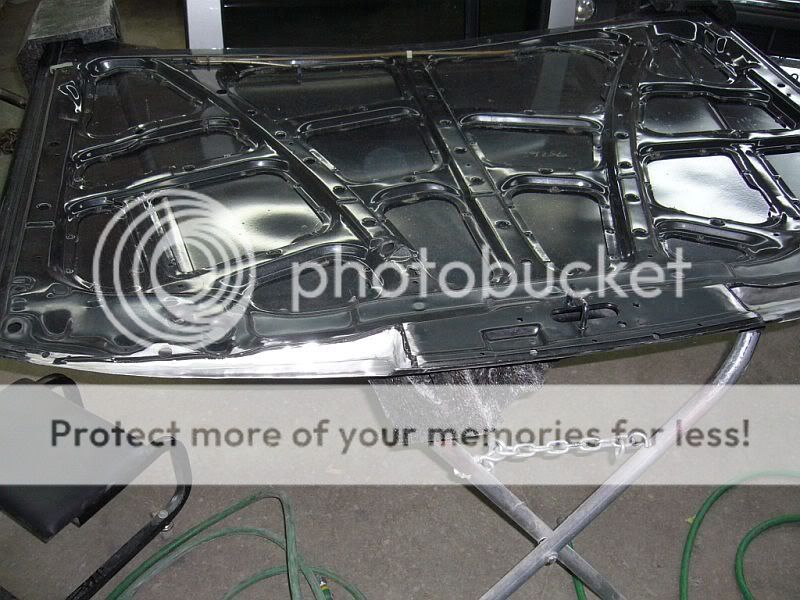
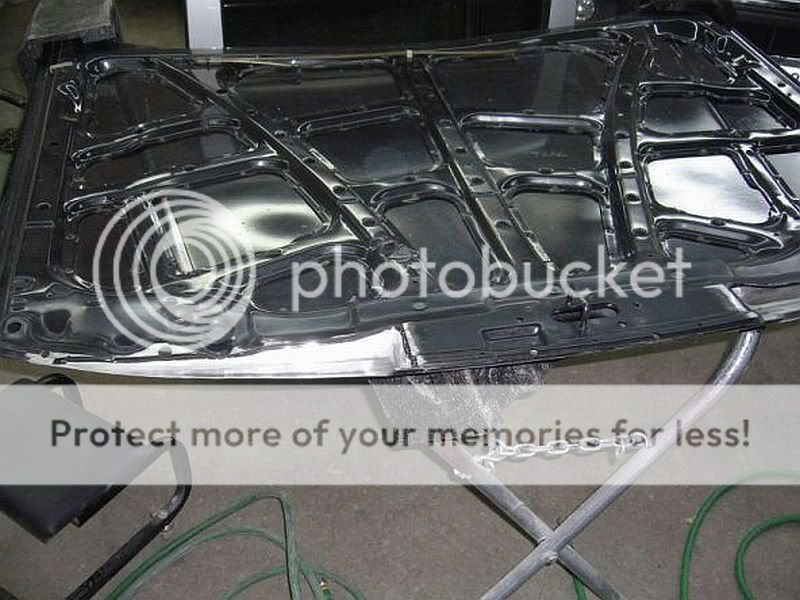
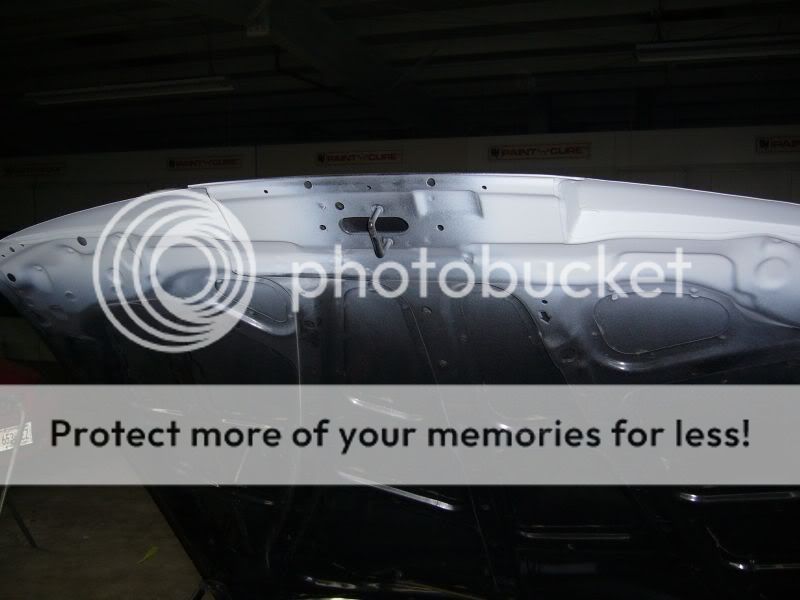
This pic shows the underside after it was primed with PPG K-38 High Build Primer. Here are a couple more:
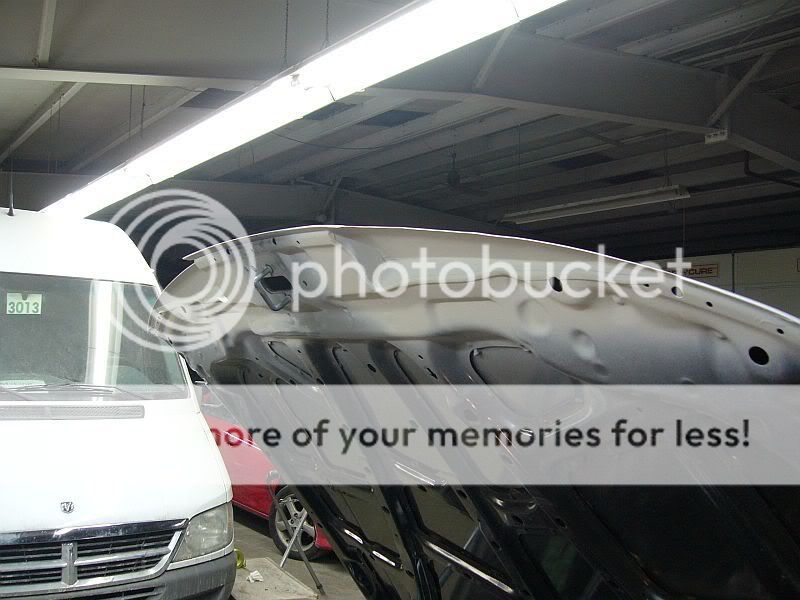
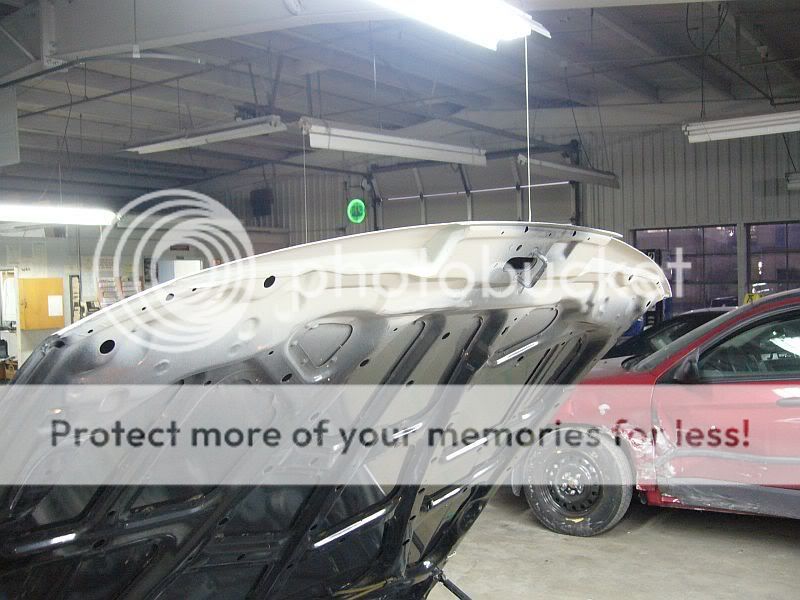
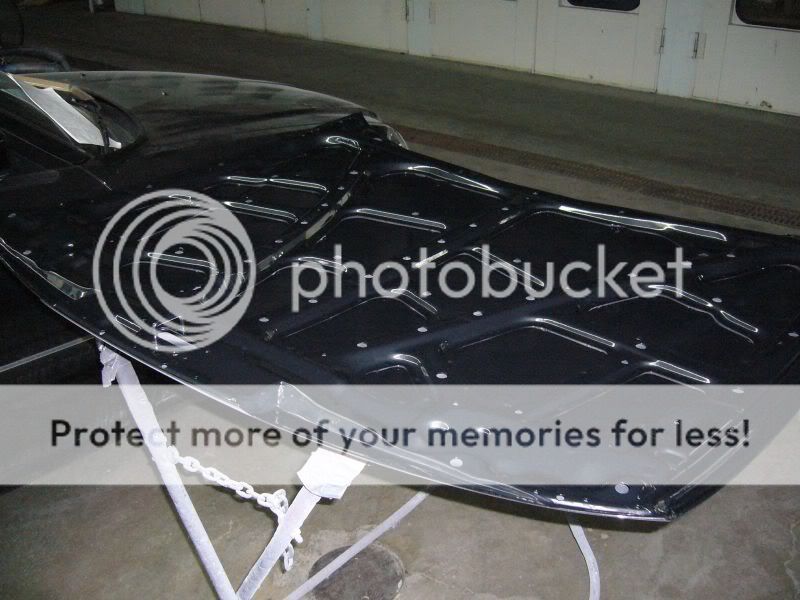
This is the underside after repainting it.
I hope this works because I’m typing it in Word to copy and paste it to this forum…
The headlights are JDM Honda Vigor CC2 Black Housing headlights. Always available on ebay.
Tools required:
Air Saw
Grinder
Cut off wheel
Drill and bits
Welder
Filler
Primer
Paint/Clearcoat
Here are the pics, roughly in order they were taken.

This photo shows what needs to be trimmed out of the headlight pocket to fit the Vigor light in. The same was done on each side until proper fitment was achieved. Remember, trim little by little till it fits, hacking away large pieces that aren’t necessary will lessen the structural rigidity. It’s the best picture I have to show this.

This photo shows the finished trimming that I did on the fender to allow the headlamp to mount further back for better alignment with the hood. I also wanted the fender to curve exactly like the corner lamp on the Vigor light. You don’t have to do this, I’m just anal. This step can be skipped to save time, money, and materials. On the other hand, if you do not do this, the headlamps will stick out a little further from the hood, but only noticeable when you look down at the front edge of the hood. Also, you will have a gap in the upper corner since the Vigor corner lights have more of a slant downward where as the accord corner lights cut almost straight down from the curve.

This pic shows the backside of the fender primed first with a self etching primer, then coated with automotive seam sealer from 3M. This is to protect the back side of the welds from corrosion. Once again, this only needs to be done if you want your lights to fit like mine.

This shows the finished headlight fitment once the filler was applied to smooth out the area and tighten the gap even more.

This is the hardest part of the conversion, it’s also a required part since the headlights are quite a bit wider than the accords’. Once the headlight pocket is trimmed out you will need to drill new, or enlarge the existing, headlamp mounting holes in the upper tie bar. You can get away with two mounts on top, but for added stability you’ll want to fab up a bracket to mount one or both lower mounting tabes. They do not line up with the accord mounts at all. Once this is done, and the fender is done if you choose to do the fender, you need to trim the hood. This is the last step and most important for a nice fitting conversion. With the headlight in place, lower the hood onto it. Obviously it won’t close all the way yet, so try to envision where the upper edge and corner of the headlight will be on the hood, and using 1” masking tape, mark your cut lines. Remember to cut short, you can always cut/grind more if you haven’t done enough. You can’t put the metal back once it’s gone without a lot of extra work. Trim a little at a time on both sides till you like the result. It’s best to remove the hood latch from the upper tie bar so you’re not popping the hood all the time. I set a chunk of 4”x4” where the hood latch mounts to rest the hood on for trimming. Then just remove the wood to set the hood down and check your progress. Heres a shot of both lights mounted in place:


You will notice in the pic that there is some understructure that needs to be trimmed back as well. The hood may not rest all the way down until some of that is also trimmed away. I used two part panel bonding adhesive from Lord Fusor to glue the filler pieces into place where they meet the hood skin, and tack welded the edge where the filler piece meets the understructure. Welding the entire part could result in warping of the outer hood skin. After grinding down the welds, I applied a bead of 3M panel bonding adhesive along the top edge to cover the joint. It’s stronger than seam sealer, and seals the joint at the same time. Again, welding the entire joint instead of just tacking it could warp the sheet metal. Here are more pics of the underside:


This pic shows the underside after it was primed with PPG K-38 High Build Primer. Here are a couple more:


This is the underside after repainting it.


 That is seXxy!

 Did you ever get the part of the hood where it latches to sit flush with the headlights or does it still stick out? Great job though





Comment