Announcement

Collapse
1 of 2 < >

ANY BUYING/SELLING IN THIS FORUM WILL RESULT IN AN INSTANT BAN!

Read the rules: http://www.cb7tuner.com/vbb/showthread.php?t=43956

Myself, and the other mods have been very nice and lenient with the rules. We have been deleting threads, and giving out warnings. Some members didn't get the clue and re-posted over and over... Now ANY member buying or selling in this section will be banned... No IF's AND's or BUT's.
2 of 2 < >

Beginner Forum Rules - EVERYBODY read! (old and new members alike!)

Beginners start here. Once you have 30 worthwhile posts (off topic doesn't count) you may post outside of the Beginner forums. Any "whoring" (posting simply to raise your post count) will return your count to 0, or result in a ban.

These are the rules. Read them. Live by them.

1) Absolutely NO flaming! "Flaming" is an outright attack on a member. ALL questions are encouraged to be asked here, no matter how basic. Members with over 30 posts will be subject to a ONE WEEK ban if caught flaming in this forum (and yes, moderators can read deleted posts). Members with under 30 posts will be subject to a ONE DAY ban.

2) Use appropriate language. Racial or sexual slurs will not be tolerated. A ban will be issued at the discretion of the cb7tuner.com staff.

3) No items may be sold in the Beginner forums. Any "for sale" threads will be deleted.

4) Temporarily banned members will be PERMANTLY banned if they are found posting on another account.

The rules can and will be added to. Any updates will be marked in the title.

The rules for the overall forum can be found here:
http://www.cb7tuner.com/vbb/forumdisplay.php?f=144
Read them. You will be expected to follow them.
See more
See less

coolant flush - is this block's drain bolt? (picture inside)

Collapse
X
 
  • Filter
  • Time
  • Show
Clear All
new posts

    coolant flush - is this block's drain bolt? (picture inside)

    okay, i'm doing a coolant flush and i want to get as much of this nasty old coolant out as possible. i've drained the radiator, but is THIS the block's drain bolt? or is it somewhere else?


    the haynes book isn't very specific because it's just a generic diagram. i've searched threads here and everyone just says to drain the radiator and flush it that way... i want to drain the block before i flush!

    THANKS!
    My pictures/photos will return soon...

    #2
    it's bigger than that bolt. it's hard to tell in the pic, but i think that's it under the yellow filter.

    use caution when taking the bolt out because some people have cracked the block breaking the bolt loose. later.
    Avoiding dirt at all costs

    Comment


      #3
      Originally posted by TypeG View Post
      it's bigger than that bolt. it's hard to tell in the pic, but i think that's it under the yellow filter.

      use caution when taking the bolt out because some people have cracked the block breaking the bolt loose. later.
      yikes, thanks for the tip. now i'm a little worried about doing this.

      actually, the "bolt" underneath the oil filter isn't even a bolt at all.

      anyone else know exactly where it is?
      My pictures/photos will return soon...

      Comment


        #4
        From memory, The coolant drain bolt is big, like 17 or 19 or even maybe 21mm, and it's to the left of the oil filter and lower than the oil filter, I believe just above this horizontal rounded 'bump" or channel on the back of the block. It's at about the level of the intermediate driveshaft I think. It can be very difficult to remove, in fact I didn't even remove mine when I did my waterpump, I just let the coolant drain by removing the waterpump. Which is way too much work if you're just doing a flush.

        You' can try using a a *long* extension, like maybe a foot long or more, and put a jackhead or other support under the extension to support it at the level of the bolt, and use a breaker bar with a pipe on it to give you more leverage to break the bolt free. My impact wrench wouldn't touch that bolt (I was doing it with the engine cold though)


        BTW, does anyone know whether to do this job with a hot engine or a cold engine, given the greater thermal expansion rate of aluminum as compared to steel? My inclination is that since the steel bolt is stronger than the aluminum, the aluminum threads are being "bent" or deformed more by the steel bolt than the threads on the bolt are being deformed by the aluminum. In fact, the bolt itself might not be deformed or stretched at all, with all the deformation being in the aluminum alloy of the block. (not sure about this). So when the block heats the aluminum will (a) expand more than the steel bolt on the horizontal axis of the bolt, thus releasing tension on the threads and making it easier to turn out and (b) expand more in circumference around the bolt, also releasing tension on the threads as the aluminum threads retreat up "away" from the valleys on the bolt's threads and towards the peaks of the threads.

        In which case you could break the bolt free and turn it a couple turns out with the engine hot, then wait a couple hours to back it out the rest of the way (to be sure to avoid being burned by a stream of hot coolant).

        but I'm not sure if this is the right analysis.

        In terms of tools you can use, you could probably also get a manual impact tool (the kind that costs $15 bucks and you hammer on and it turns the bolt) and use that on the end of your extensions. Not sure if that would work, but if you have one or if nothing else works, give it a try. But the hot engine trick will be the key here *if* my analysis is correct.
        Last edited by batever; 06-17-2009, 06:58 PM.

        Comment


          #5
          drain the radiator...then run the car for like 2-3min, with radiator drain plug removed.
          that will remove as much as possible and enough to get a good flush.
          don't run it long enough for the temp to get hot tho.

          if you run it while cold you will be a-ok!

          also: I believe that is the drain bolt, not 100 percent sure, wish I was at home, I
          could run outside and tell yah!
          Last edited by drummersteve7; 06-17-2009, 06:47 PM.
          MadLab Racing
          Southern Maryland


          Comment


            #6
            drain everything from the rad. close it up and fill with water, run it for a few mins. Then refill with coolant
            Hold On Not Done Accelerating
            Had One Never Did Again

            Comment


              #7
              Originally posted by jas_r34 View Post
              drain everything from the rad. close it up and fill with water, run it for a few mins. Then refill with coolant
              still gunna leave residual coolant in the block. no saying it is a 100% chance of complete flush, this way.
              But it will work!
              MadLab Racing
              Southern Maryland


              Comment


                #8
                what happens if you just drain the the radiator by the plug down below, then just shoved a water hose into the radiator with the heater core opened alll the way with the water running? will that force water to circulate?

                Comment


                  #9
                  There are a few vids on yt where the splice the heater hose and put a t fitting where you just hookup the garden hose.

                  http://www.youtube.com/watch?v=tVWznOl-WZw&feature=fvw

                  Is this the right way to do it?

                  Comment


                    #10
                    The guy in the video speaks to us as if we are ESL students.
                    I <3 G60.

                    0.5mm Oversized Stainless valves and bronze guides available. Pm me please.

                    Comment


                      #11
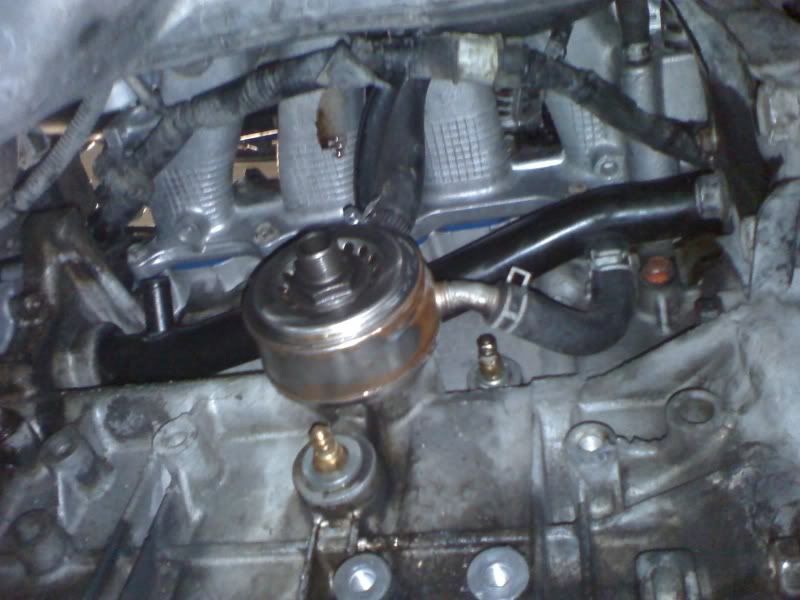
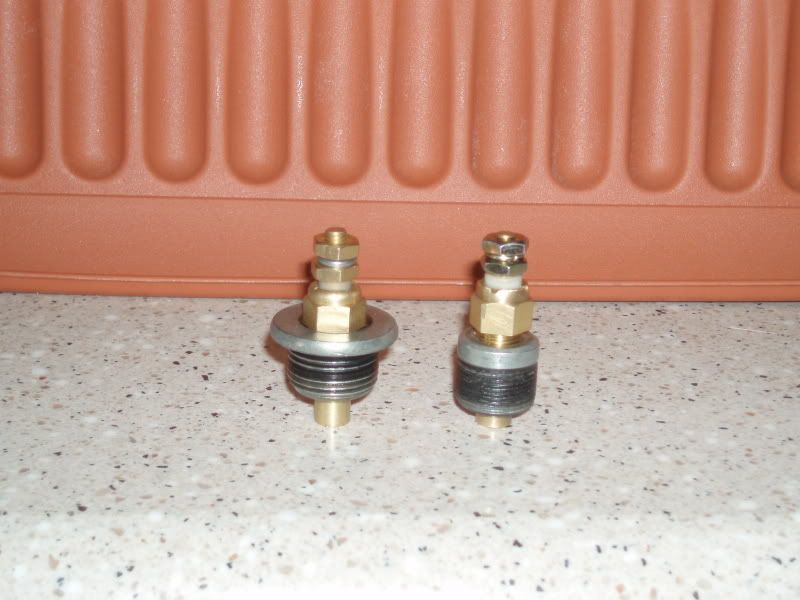
                      On a USDM 91 F22A1, it should be to the right of the oil filter (or a6 oil cooler in picture), heres a pic:


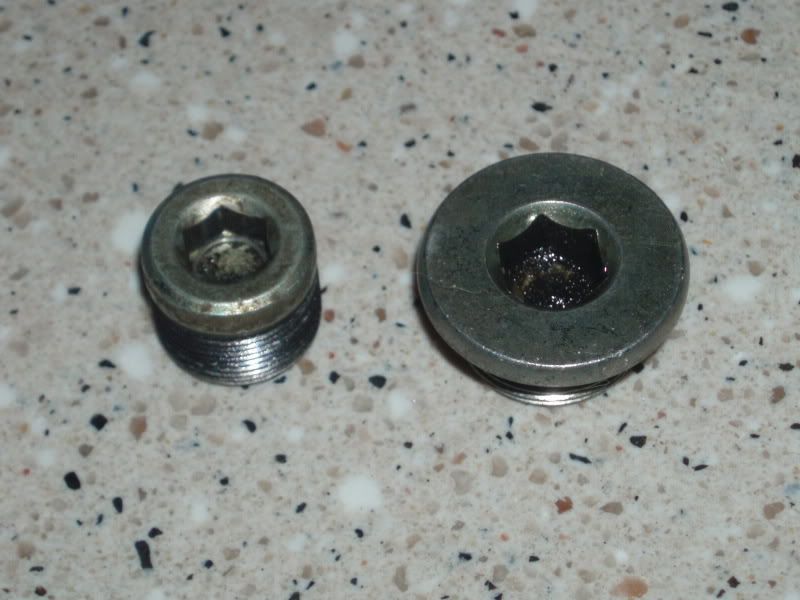
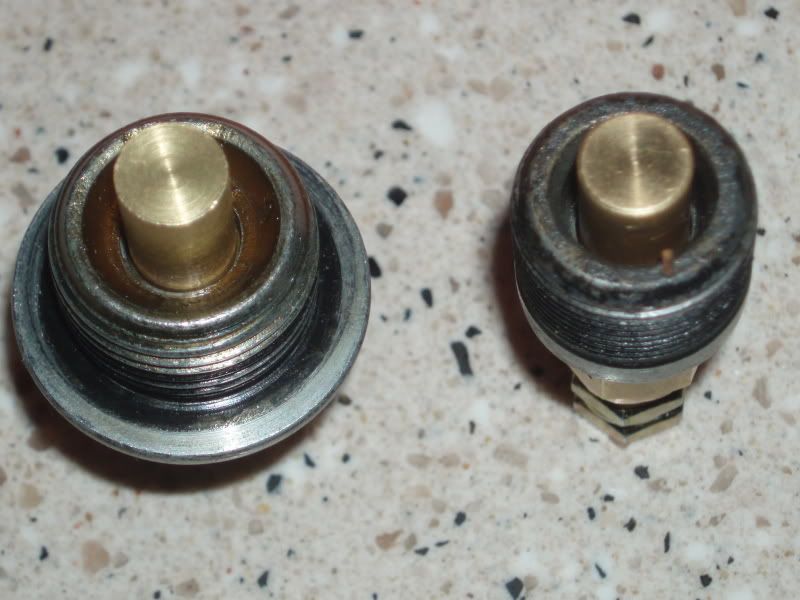
                      Here is a picture of the plug, its the one on the left:


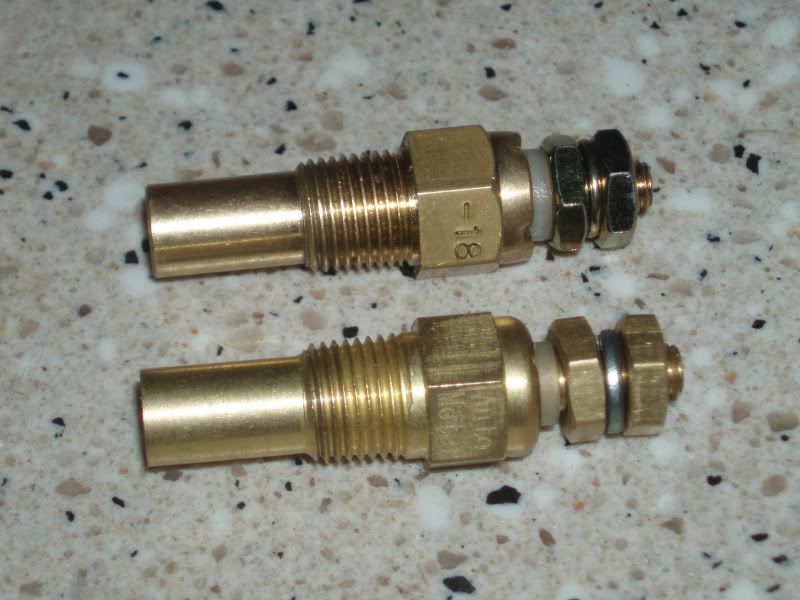
                      I tapped them for block electrical oil & coolant temperature senders:


                      Hope these help!
                      Last edited by cloudasc; 06-17-2009, 11:20 PM.
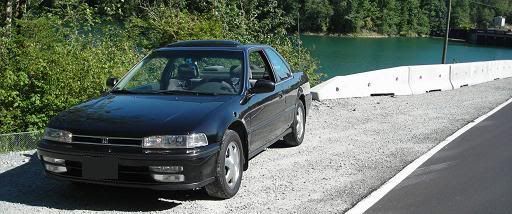
                      PT3/6 Development Thread | My 1991 LX Coupe | DIY: 90-93 Tcu Fix

                      Comment


                        #12
                        After readin' the post...

                        Uh, just curious but.......

                        Originally posted by cloudasc View Post
                        On a USDM 91 F22A1, it should be to the right of the oil filter (or a6 oil cooler in picture), heres a pic:


                        The bolt that is considered the "Coolant Drain" or where the Block Heater Fitting goes is the one UNDER the fliter, not the one to the right. The one to the right of the filter is the oil pressure sender fitting.

                        ( OEM Block Heater fitting info here: http://www.hondaautomotiveparts.com/.../16646_03.html )


                        Here is a picture of the plug, its the one on the left:

                        Sub the word left for right...lol

                        Here is a picture of the plug, its the one on the right:

                        The oil pressure sender is on the left.


                        I tapped them for block electrical oil & coolant temperature senders:


                        Hope these help!
                        Those fittings you tapped look sweet. I wanted to run a oil pressure sensor too but thought its gonna be easy to just put a oil filter spacer on with 3 areas for fittings. ( Temp and pressure say. )

                        Like these:

                        http://cgi.ebay.com/OIL-FILTER-SANDW...0603175005r216

                        I just thought I'd add this and clear it up a bit.
                        ( not trying to be rain cloud...lol )

                        Comment


                          #13
                          you do not need to remove those to drain and fill your coolant...it is such overkill.

                          just remove the rad cap, and then remove the lower hose

                          BUT IF you want to get EVERYTHING out and not risk cracking the block (and it's easier to get to this)

                          then remove your thermostat
                          turn heat knob to hottest settting
                          install one of those flush kit fittings from wal mart
                          remove rad cap
                          flush using that fitting

                          re-install therm, close off waly flush port with cap, fill with water, bleed air with bleeder on top of therm...good to go
                          ____

                          Comment


                            #14
                            Originally posted by bcjammerx View Post
                            you do not need to remove those to drain and fill your coolant...it is such overkill.

                            just remove the rad cap, and then remove the lower hose

                            BUT IF you want to get EVERYTHING out and not risk cracking the block (and it's easier to get to this)

                            then remove your thermostat
                            turn heat knob to hottest settting
                            install one of those flush kit fittings from wal mart
                            remove rad cap
                            flush using that fitting

                            re-install therm, close off waly flush port with cap, fill with water, bleed air with bleeder on top of therm...good to go
                            That's a great idea--that makes sense to me.

                            Comment


                              #15
                              Originally posted by Taurians' Ryde View Post
                              Uh, just curious but.......
                              Do you have any idea how much of a pain in the ass it was to do those temperature senders? M20x1.5 (oil plug), M18x1.0 (coolant plug). The plug below the oil filter, that is an oil drain plug, the one to the right, is a coolant drain plug, or its where the oil cooler feeds into the block for coolant (I t-fitting mine elsewhere)

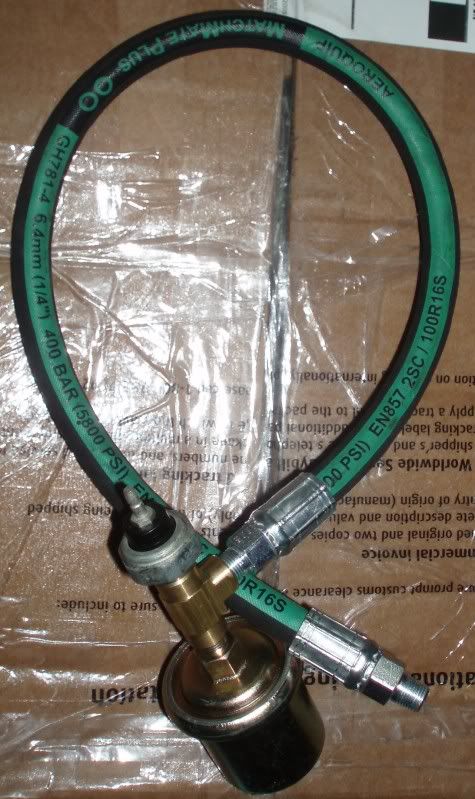
                              The plug your referring to for the oil pressure sender, is actually higher then both thos plugs on the block, right below the intake, wanna know how I know? Because I got this attached to where the oem oil pressure sender would be, heres the picture:


                              400bar Hydrolic Hose


                              I still stand by my original post as being accurate. Go ahead and pull the plug below the filter, you'll get plenty of oil, the one to the right, pull that one, and out comes coolant from the water jacket. (I know which one the coolant plug is because I watched my coolant w/purple ice (expensive but worth it) drain out. (its $$$ tag attached to the purple-ice that makes me remember)
                              Last edited by cloudasc; 06-18-2009, 12:35 PM.
                              PT3/6 Development Thread | My 1991 LX Coupe | DIY: 90-93 Tcu Fix

                              Comment

                              Working...
                              X