Announcement

Collapse
1 of 2 < >

ANY BUYING/SELLING IN THIS FORUM WILL RESULT IN AN INSTANT BAN!

Read the rules: http://www.cb7tuner.com/vbb/showthread.php?t=43956

Myself, and the other mods have been very nice and lenient with the rules. We have been deleting threads, and giving out warnings. Some members didn't get the clue and re-posted over and over... Now ANY member buying or selling in this section will be banned... No IF's AND's or BUT's.
2 of 2 < >

Beginner Forum Rules - EVERYBODY read! (old and new members alike!)

Beginners start here. Once you have 30 worthwhile posts (off topic doesn't count) you may post outside of the Beginner forums. Any "whoring" (posting simply to raise your post count) will return your count to 0, or result in a ban.

These are the rules. Read them. Live by them.

1) Absolutely NO flaming! "Flaming" is an outright attack on a member. ALL questions are encouraged to be asked here, no matter how basic. Members with over 30 posts will be subject to a ONE WEEK ban if caught flaming in this forum (and yes, moderators can read deleted posts). Members with under 30 posts will be subject to a ONE DAY ban.

2) Use appropriate language. Racial or sexual slurs will not be tolerated. A ban will be issued at the discretion of the cb7tuner.com staff.

3) No items may be sold in the Beginner forums. Any "for sale" threads will be deleted.

4) Temporarily banned members will be PERMANTLY banned if they are found posting on another account.

The rules can and will be added to. Any updates will be marked in the title.

The rules for the overall forum can be found here:
http://www.cb7tuner.com/vbb/forumdisplay.php?f=144
Read them. You will be expected to follow them.
See more
See less

Headlight tint ?

Collapse
X
 
  • Filter
  • Time
  • Show
Clear All
new posts

    Headlight tint ?

    does anyone know how to tint headlight housing without tinting the glass? Ive googled it but it shows me how to tint the outer glass.

    #2
    They paint is with translucent paint

    Comment


      #3
      OHH tnx man!! kinda feel stupid now that i see the answer lol. I would assume that i can buy this paint at home depot or lowes right?

      Comment


        #4
        you should beable to view the black house DIY even though you may not beable to post there.
        frostwhite225@gmail.com =VENMO


        http://www.youtube.com/watch?v=NOB38zJu66o

        [COLOR="Magenta"]

        Comment


          #5
          You're more likely to find the paint at either an autoparts store, or a craft store like Michael's or AC Moore.


          Comment


            #6
            I know that VHT Night shades is transparent paint, but I'm not sure if it can withstand the heat.

            Has anyone ever used this product in any situation like this?


            Purchased From: busak87, GunRunner, Bruce Banner, Itstatcb7kid707, tJoods, DannyD


            The Caravan 2015
            MRT:http://www.cb7tuner.com/vbb/showthread.php?t=180919

            Comment


              #7
              Here you go, just in case you're not allowed to go in the DIY section...

              Originally posted by djcaz_aom View Post
              90-93 Accord USDM Black Housing Headlight DIY

              Materials Needed:
              Flat Black spray paint (High-temp, BBQ paint or automotive engine enamel works best)
              Stained Glass Yellow spray paint (Krylon)
              Name Brand Masking Tape (Preferably Blue)
              Silicone Sealant (Clear works fine)
              Towel
              Oven Mitts (Optional)
              WD-40

              Tools Needed:
              Metric socket set
              Phillips Screwdriver
              Flat Head Screwdriver
              Assorted Open-end Wrenches (Metric)
              Clamps
              Pliers
              Razor Blade, or Utility Knife, like an Exacto
              Oven

              ***If you find this thread helpful, please rate it.***

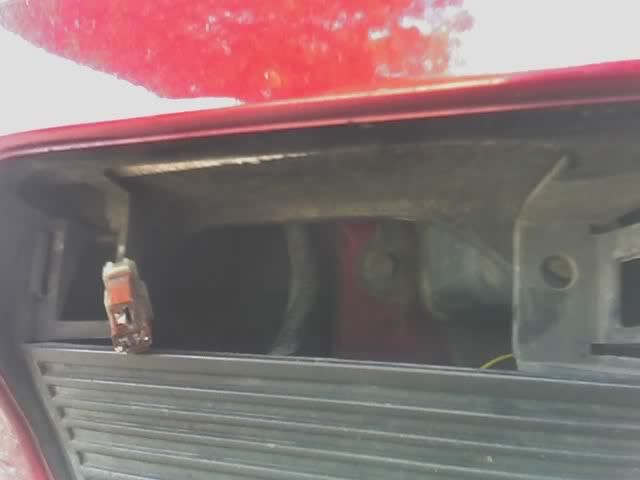
              1. Remove the side marker retaining screw. Pull out the marker and unplug the bulb connector.


              2. Remove the grill. It is held in place by five screws along the top.


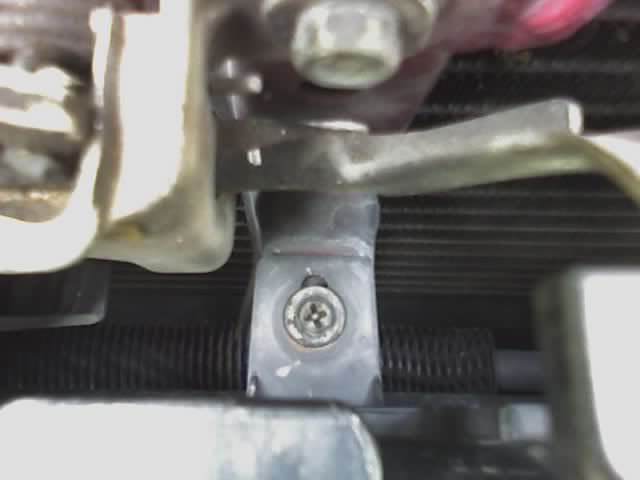
              3. One is hidden in front of the latch


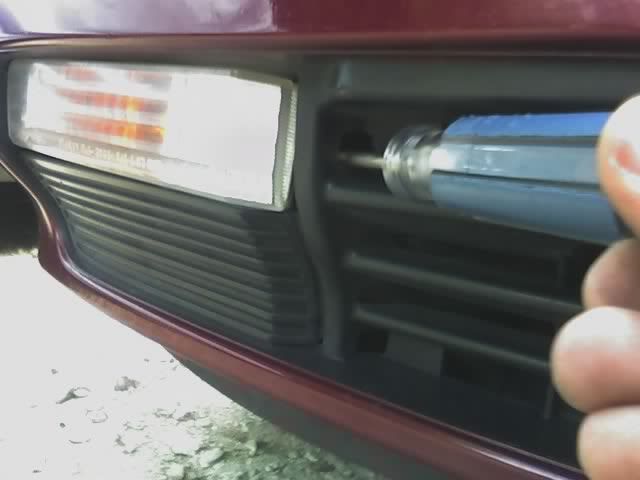
              4. Use a flat-head screwdriver to push down on the retaining clips that attach the grill to the bumper (one on each end, looking from the front), and remove the grill.


              5. Remove the two bumper retaining nuts (one on the left, one on the right) located behind the headlights, on top of the frame.


              6. Remove the two plastic retaining clips from the underside of the bumper.


              7. Remove the left and right bumper turn signals.


              8. Remove the four bumper retaining bolts (two on each side) located just behind the turn signal recesses. Lift the bumper, then slide it forward, and remove it. Set it down some place soft, as not to scratch it up.


              9. Remove the five headlight mounting bolts. Two are on the radiator support;


              10. One on the side;


              11. And two below the headlight.

              1990 Accord EX

              Comment


                #8
                .................................................. .................................................. ....

                Originally posted by djcaz_aom View Post
                12. Separate the headlights from the headlight brackets. Remove the two screws for the horizontal adjuster.


                13. Apply lots of WD-40 to these two screws, as they are actually bolts and are on there tight. You don’t want to strip them.


                14. Remove the two screws for the vertical adjuster.


                15. Remove the three screws for the pivot point.


                16. Remove this water drain;


                17. And this one as well. This one has one screw holding it in place.


                18. Pre-heat the oven to 225 degrees F. Remove the 5 metal retaining clips. Place one headlight assembly in the oven for 12-15 minutes.


                19. Using a towel and/ or oven mitts, remove the headlight assembly from the oven and place the other one in. Use extreme caution as the headlights will be very hot. Slowly pry the front of the assembly off with a flat-head screwdriver. If the adhesive gets too difficult to handle, stick the assembly back in the oven, to soften it up. You may find that you won't even need the screwdriver at all.


                20. Just like magic, it’s off. Do the same for the other headlight. Allow to cool, before moving on.


                21. After the housings have cooled, you will be ready to paint. You will be painting every thing except the two half-moon reflectors to the rear of the housing. Remove the lo-beam cap. (one screw secures it. You may choose to paint it as well.) Mask off the half-moon reflective surfaces. Be sure to take your time. The more time you take on this step. The better end result you will get. Note: Be sure to press down on the edges of the masking tape to prevent the paint from seeping through. You may choose to sand the area to be painted with 400-Grit sand paper.


                22. Apply 5-6 thin coats of paint to the housings. Resist the urge to do this part quickly, by applying heavy coats. You run the risk of the paint running.


                23. The painted reflector housing, after being placed in the oven for 10 minutes (At 225 degrees) to allow the paint to cure.


                24. A side by side comparison.

                1990 Accord EX

                Comment


                  #9
                  .................................................. .................................................. ....

                  Originally posted by djcaz_aom View Post
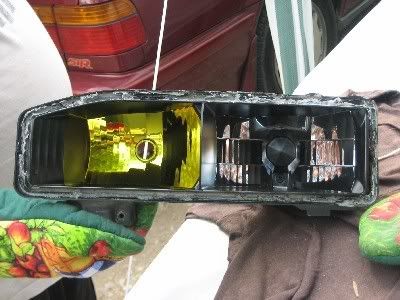
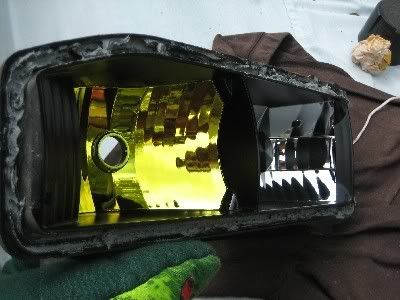
                  25. *Optional; If you want the JDM Yellow High Beam Look, then apply two light coats of The yellow stained glass paint to the high beam side only. Place in the oven @ 225 degrees for 5-8 minutes so the stained glass paint will cure properly. (Funny I learned how to stained glass in elementary school in arts and crafts; never thought I would use this trick ever again.)


                  26. Apply a small amount of silicone to the outer edges of the housing and put the two halves back together. Put the metal clips in place, and insert the headlight assembly in the oven for 10 minutes at 225 degrees. Allow to cool. Remount them to the car in reverse order.


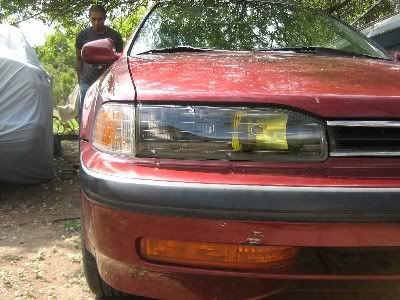
                  27. Nice.


                  With yellow High Beam.


                  28. Low-Beam.


                  29. High-Beam.

                  Thanks to djcaz_aom for the DIY write up.
                  1990 Accord EX

                  Comment


                    #10
                    They can go in the DIY...

                    They just can't post

                    Comment


                      #11
                      Clean4thgen thanks for the refresher. I'm going to be doing the same thing except adding the morimoto mini projectors to my USDM headlamps.


                      Purchased From: busak87, GunRunner, Bruce Banner, Itstatcb7kid707, tJoods, DannyD


                      The Caravan 2015
                      MRT:http://www.cb7tuner.com/vbb/showthread.php?t=180919

                      Comment


                        #12
                        oh snap!! thanks man! thats gonna help so much! didnt know there was a diy section till now that i looked fo it lol.

                        Comment


                          #13
                          Originally posted by SanJoCaF22DrAcc View Post
                          I know that VHT Night shades is transparent paint, but I'm not sure if it can withstand the heat.

                          Has anyone ever used this product in any situation like this?
                          yes i have!
                          do not use it,it is crap.it will only look good for about three days and using your lights accelerates the process. a thin hazey coat of stickyness will develope inside the light on the crystal and it looks awful. currently have it done on mine and have opened my headlights 3 times just cleaning it this month.my friends civic i did with the bbq stuff and its flawless.
                          HOPE THIS HELPED!!

                          Comment


                            #14
                            Originally posted by CB7_REESE View Post
                            yes i have!
                            do not use it,it is crap.it will only look good for about three days and using your lights accelerates the process. a thin hazey coat of stickyness will develope inside the light on the crystal and it looks awful. currently have it done on mine and have opened my headlights 3 times just cleaning it this month.my friends civic i did with the bbq stuff and its flawless.
                            HOPE THIS HELPED!!
                            do you know if there's a transparent paint that can the heat tho?

                            Comment


                              #15
                              Originally posted by namiata90 View Post
                              do you know if there's a transparent paint that can the heat tho?
                              i dont man sorry.

                              Comment

                              Working...
                              X