
please rate this diy i put alot of work into it
Disclaimer: This is the way that I changed my rotors .... if you choose to follow in my foot steps then i am not responsible for any broken parts, tools, appendages ....
attempt at your own risk!
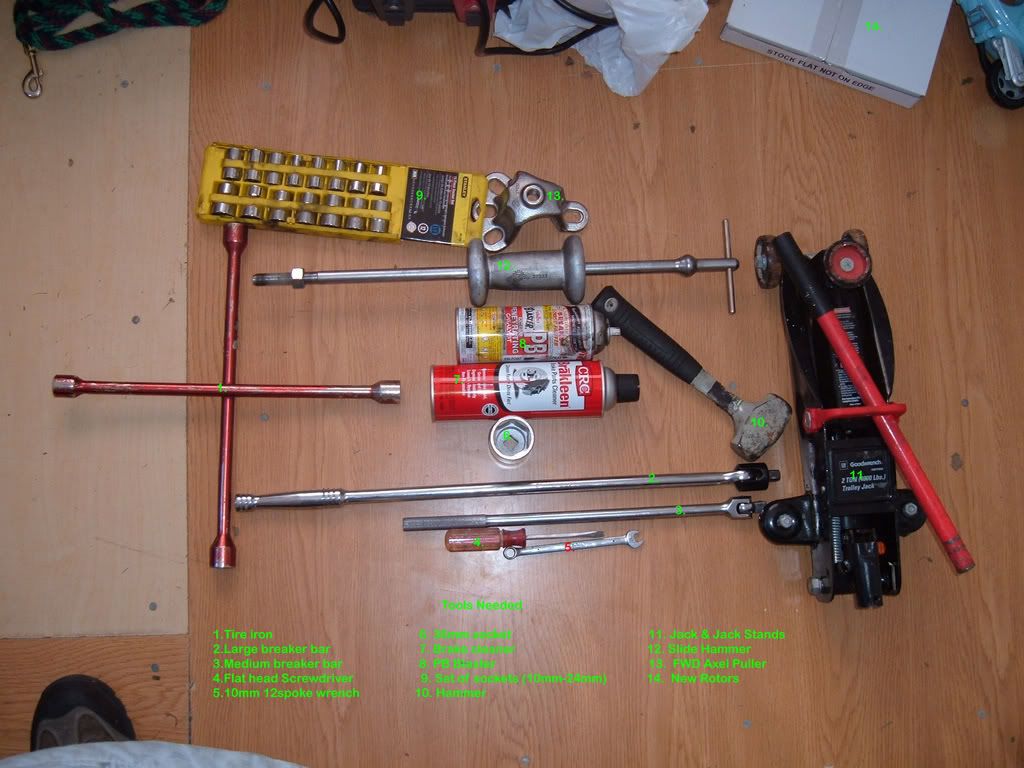
Tools Needed :
1.Tire iron
2.large breaker bar
3.medium breaker bar
4. flathead screw driver
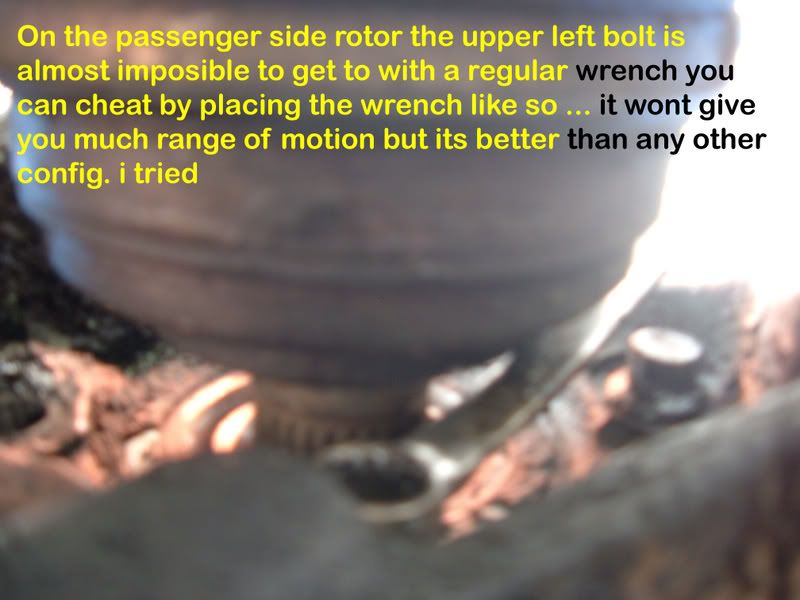
5. 10mm 12spoke wrench(preferably offset)
6. 36mm socket(same size drive as large breaker bar)
7. Brake Cleaner
8. PB Blaster
9. Set of sockets (10mm-24mm) (6&12 spoke)
10. Hammer
11. Jack & Jack Stand
12 Slide hammer
13. FWD Axle puller
14. New Rotors
Items: 6,12, and 13 may be rented at autozone
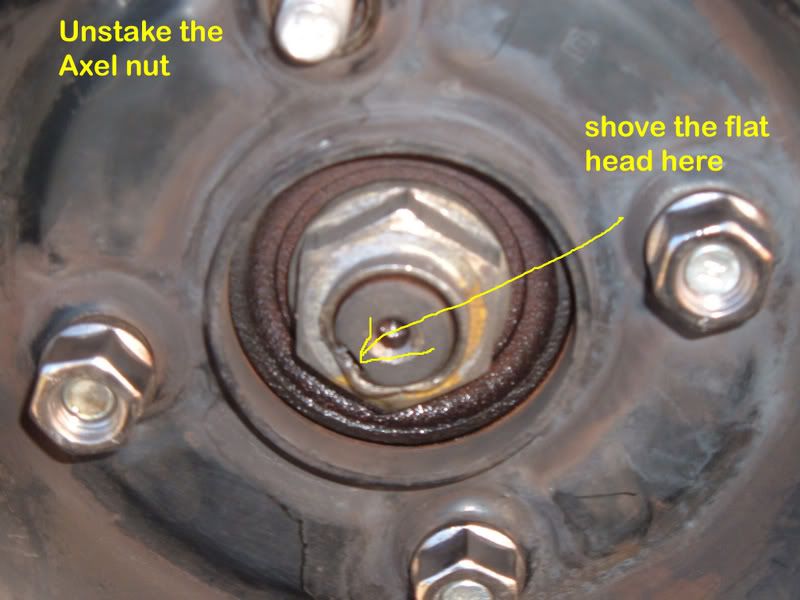
Step one:
With car on the ground unstake the axle nut
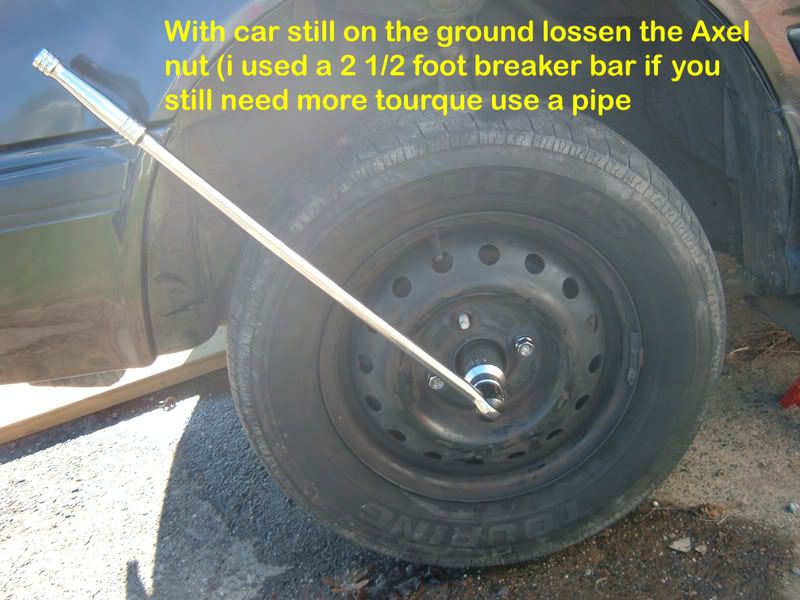
Step Two
Using the large breaker bar and the 36mm socket loosen the axle nut� it will take a lot of torque so if you cant take it off with the breaker bar try sliding a large pipe over the breaker bar to add length to it (I managed it with a 2-1/2ft breakerbar)�.. I had a friend hold the brake pedal down so that I didn�t put to much strain on the tranny
Step Three:
Jack up the car and support it with stand(s) then remove the wheel
Step Four:
Now that the car is up in the air completely remove axle nut and loosen the four (14mm) bolts on the front of the rotor but do not remove them(like a 1/4 turn) �.. I had a friend hold the brake pedal down (for the same reason as step two)

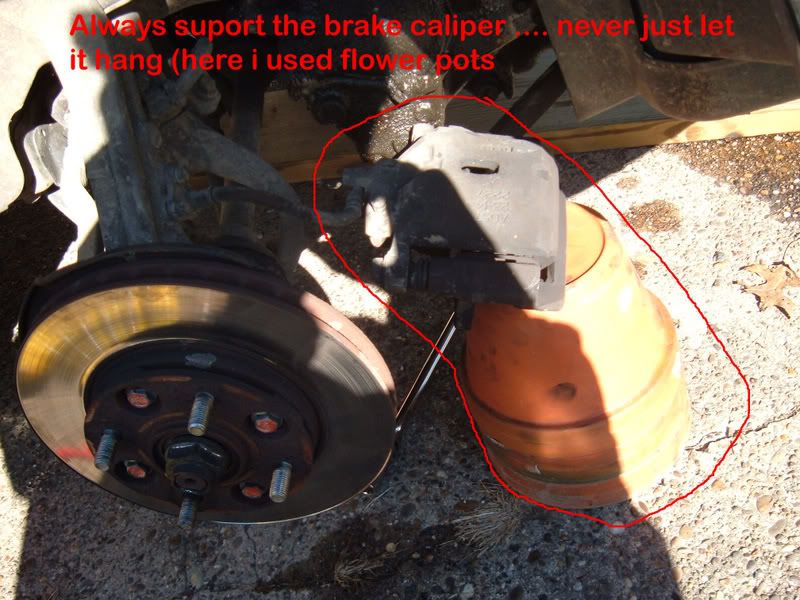
Step Five:
Remove the Brake Caliper �. There are two 17mm bolts behind the rotor that hold it on (depending on how bad your rotor is worn you may have to remove the bottom pin on the caliper to free it from the rotor (just like if you were going to change pads �which you should)�..after it has been removed DO NOT LET IT HANG support it (see pic)
Step Six:
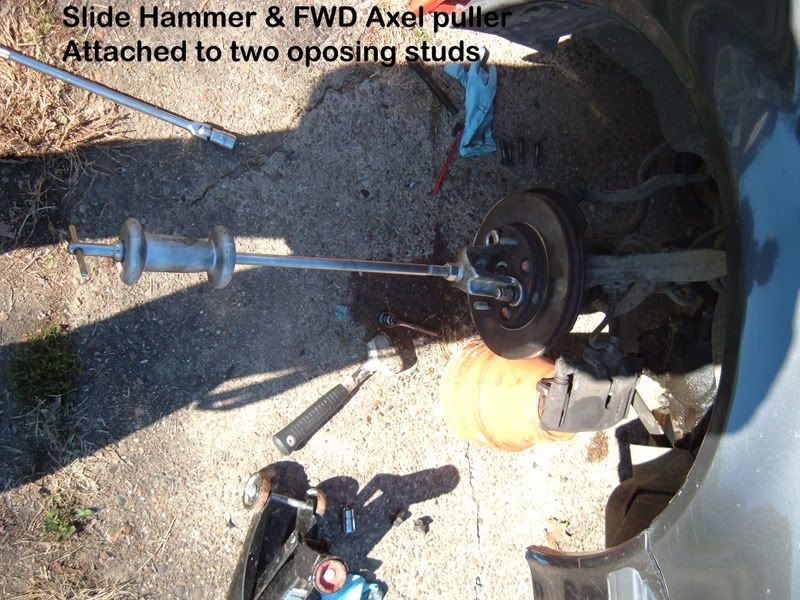
attach the FWD axle puller two 2 opposing studs and thread the long bolt that it comes with through the hole so that the axle is flush with the rotor
This will help with the next step


Step Seven:
On the Back of the rotor assembly you will find four 10mm 12spoke bolts I recommend using a toothbrush to clean them off then spraying them with the pb blaster �.when the pb blaster sets in(wich it will�.there on there tight) remove them
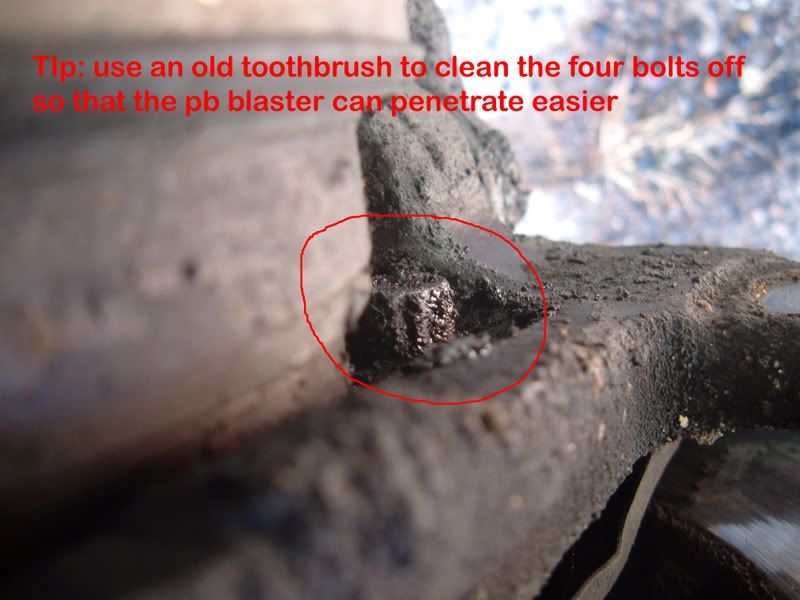
(opposite on driver side but still same idea)
Step Eight:
Now that you have removed the four bolts on the back of the assembly �.remove the big bolt from the axle puller and replace it with the slide hammer
Step Nine:
Using the slide hammer remove the rotor and the wheel bearing�.sounds complicated but its not..... basically start pounding on the slide hammer that you just attached to pull the rotor out �the bearing will come along with the rotor
Step Ten:
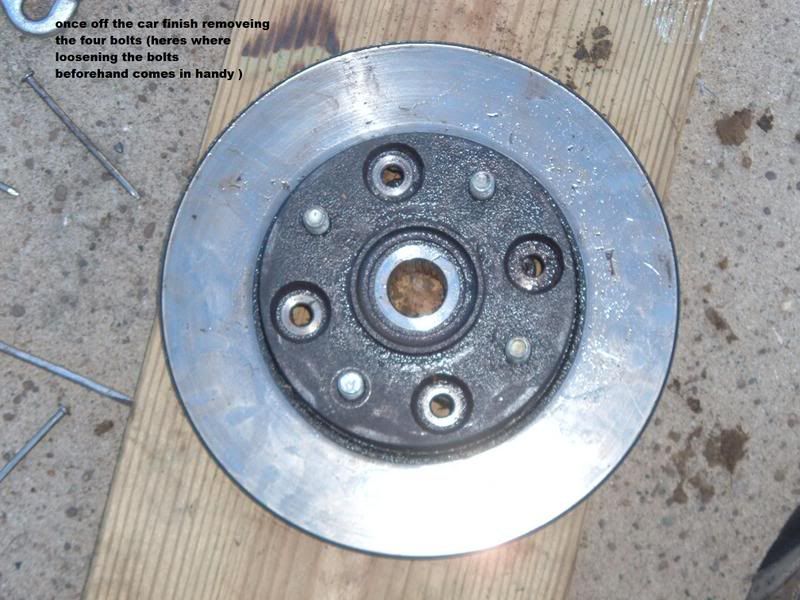
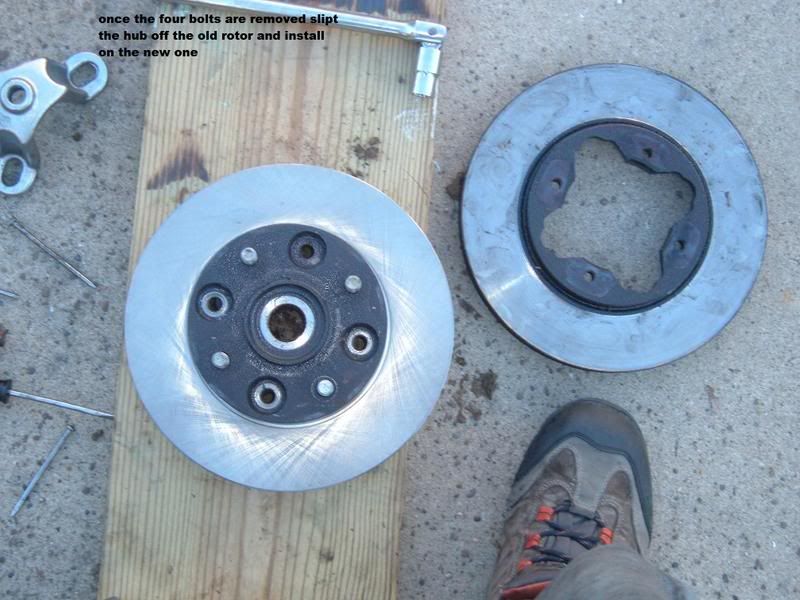
Completely remove the four bolts
Step Eleven:
Now that the bolts are gone slip the rotor off the hub/bearing and install the new rotor
Step Twelve(installation):
Put everything back on � its exactly opposite of removal (don�t forget to torque every thing to specifications) if you run into any problems installing or removeing any thing pm me and i'll be happy to help you out
-xavier
Special thanks go out to alb_accord b/c it was his diy I used to change my rotors�which led me to write this diy
Disclaimer: This is the way that I changed my rotors .... if you choose to follow in my foot steps then i am not responsible for any broken parts, tools, appendages ....
attempt at your own risk!
Tools Needed :
1.Tire iron
2.large breaker bar
3.medium breaker bar
4. flathead screw driver
5. 10mm 12spoke wrench(preferably offset)
6. 36mm socket(same size drive as large breaker bar)
7. Brake Cleaner
8. PB Blaster
9. Set of sockets (10mm-24mm) (6&12 spoke)
10. Hammer
11. Jack & Jack Stand
12 Slide hammer
13. FWD Axle puller
14. New Rotors
Items: 6,12, and 13 may be rented at autozone
Step one:
With car on the ground unstake the axle nut
Step Two
Using the large breaker bar and the 36mm socket loosen the axle nut� it will take a lot of torque so if you cant take it off with the breaker bar try sliding a large pipe over the breaker bar to add length to it (I managed it with a 2-1/2ft breakerbar)�.. I had a friend hold the brake pedal down so that I didn�t put to much strain on the tranny
Step Three:
Jack up the car and support it with stand(s) then remove the wheel
Step Four:
Now that the car is up in the air completely remove axle nut and loosen the four (14mm) bolts on the front of the rotor but do not remove them(like a 1/4 turn) �.. I had a friend hold the brake pedal down (for the same reason as step two)
Step Five:
Remove the Brake Caliper �. There are two 17mm bolts behind the rotor that hold it on (depending on how bad your rotor is worn you may have to remove the bottom pin on the caliper to free it from the rotor (just like if you were going to change pads �which you should)�..after it has been removed DO NOT LET IT HANG support it (see pic)
Step Six:
attach the FWD axle puller two 2 opposing studs and thread the long bolt that it comes with through the hole so that the axle is flush with the rotor
This will help with the next step
Step Seven:
On the Back of the rotor assembly you will find four 10mm 12spoke bolts I recommend using a toothbrush to clean them off then spraying them with the pb blaster �.when the pb blaster sets in(wich it will�.there on there tight) remove them
(opposite on driver side but still same idea)
Step Eight:
Now that you have removed the four bolts on the back of the assembly �.remove the big bolt from the axle puller and replace it with the slide hammer
Step Nine:
Using the slide hammer remove the rotor and the wheel bearing�.sounds complicated but its not..... basically start pounding on the slide hammer that you just attached to pull the rotor out �the bearing will come along with the rotor
Step Ten:
Completely remove the four bolts
Step Eleven:
Now that the bolts are gone slip the rotor off the hub/bearing and install the new rotor
Step Twelve(installation):
Put everything back on � its exactly opposite of removal (don�t forget to torque every thing to specifications) if you run into any problems installing or removeing any thing pm me and i'll be happy to help you out
-xavier
Special thanks go out to alb_accord b/c it was his diy I used to change my rotors�which led me to write this diy


 <<<<<<<<<<<<<<<<<<<<<<<<<<<<<<


Comment