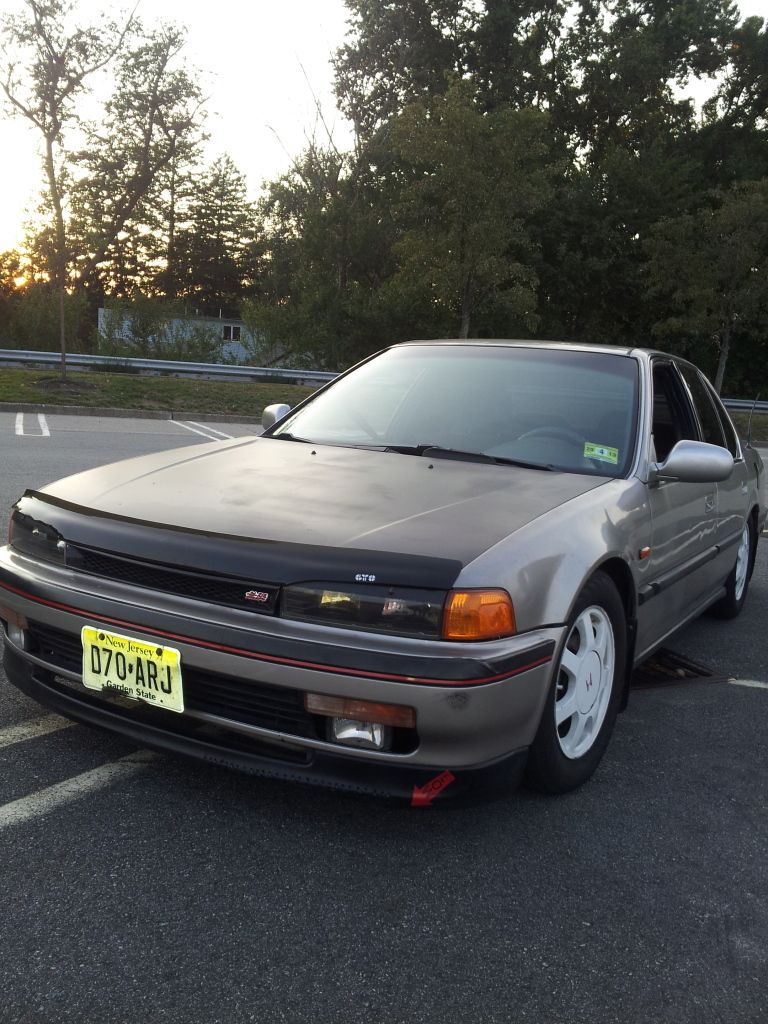
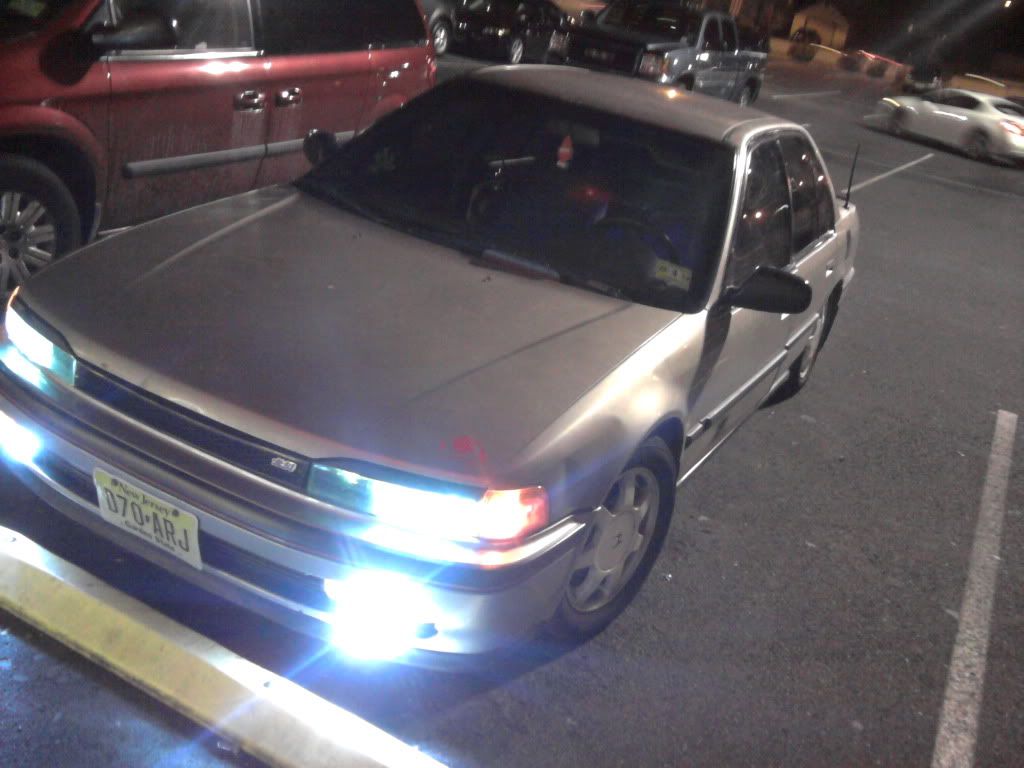
Okay well first let me say that i know a diy is worthless without pics and i sadly didn't think to take any. However, tomorrow after school i will post a link to a youtube video ill make so you can more easily understand what i did. So, you may be saying, "hondakid, what is this awesome mod you speak of?" Well it is simply turning your bumper lights into fogs that come on with your parking lights. It may also fool someone who only takes a quick glance that you have some super rare JDM fog lights  Also, this is my first diy, so please go easy on me! Oh! and one more thing, i will probably be interchanging the words signal and blinker as well as driving lights and parking lights. Just know that signals and blinkers are the same and driving lights and parking lights are the same. OH!! one last thing, if you break your shit, it's on you! not me!
Step 1: Remove Your bumper lights and unhook them. Set them somewhere safe.
Step 2: Remove your bumper and set it too somewhere safe.
Step 3: Unhook your headlight and unbolt it.
Step 4: You can now get to the wires for the corners and unhook them. Now set the entire light assembly to the side.
Step 6: Take your current corner signal plug and put a 4 ohm resistor in its place. This is so you don't get any hyper blinking by fooling the system into thinking there is a light there. Yes, the resistor will be over powered but since in is not on for long periods of time it should be okay.
Step 6: Take your bumper light harness and zip tie it up to the area where the corner signal used to be. Don't worry, the plug is the same.
Step 7: This isn't necessarily a step, but to explain why you use the bumper light wires for the corner signal is because when the parking lights are off, all the signals flash in time. When the lights are on though, the bumper and corner flash opposite. Since you wont have a bumper signal anymore, the corner will be your only one. This being said, when the parking lights are off, the corner and the rear will flash in time, but when the parking lights are on, the rear and corner flash out of time. Basically, this will ensure the corner signal and the rear signal will always flash in time no matter what.
Step 8: Now that your signals are taken care of, you can move on to the fogs. What you want to do is grab the plug for your corner parking light. There should be 3 wires connected to it. 2 will be the same color and one will differ. Pick your favorite of the 2 same color wires and put a wire tap on it with a foot and a half long piece of wire too. Do the same to the other color. The two wires you added will now be your new bumper light wires. Crimp on a male plug connector to each of the new wires you added. The lights are not polarity sensitive so you can plug the wires into the bumper lights either way.
As of now, both sides of the car should have the same work done. You should have 4 new wires, 2 per side. As i stated, these wires will be for your fogs. If you want the amber look, you can hook everything up, plug it in, put everything back together and admire your work. However if you're like me, and you don't want an amber light and you want an actual fog, you'll have to open up your lights.
Step 9: Preheat your oven to 265*. Set your lights on a cookie sheet and throw them in for no more than 7 minutes.
Step 10: When it beeps, carefully remove the lights and gently tap the lens/housing seam with something semi hard. If your like me, the lens will pretty much pop off. One of them took a bit of pulling but just be careful and it will come apart.
Step 11: once they cool, grab the housing and gently spread the top and bottom apart so the amber lens will come out. Simply pull on it and it will pop out.
Step 12: Run a bead of clear silicone around the housing and push the lens on. Let it cure over night.
Step 13: Now its time for lights. I chose some 1156 sylvania silver stars and they fit perfect. I didn't choose them for output, which isn't any better, but because it gives the fogs a cool blue look when they are turned off. If you want led's then go for it. They would probably look pretty cool. I think any 1156 base will work just fine.
Well now you're done! They are actually pretty bright and provide a good bit of extra visibility. Like i said, ill post a vid of everything tomorrow so you can see what they look like. Good luck and feel free to ask questions. If this has been done before... then oops haha. I searched the diy's and didn't find anything so i figured its a first. Heres the videos i made today. Sorry about the bad quality, my phone does the lights no justice. They are way less yellow and a bit brighter in person. Also, sorry about my bad video skills. I hate being on camera. Without further delay, here are the vids:
http://www.youtube.com/watch?v=KKjnZ...45AUAAAAAAAAAA
Of course the other one doesn't want to upload right but hopefully ill get it fixes and uploaded soon.
 Also, this is my first diy, so please go easy on me! Oh! and one more thing, i will probably be interchanging the words signal and blinker as well as driving lights and parking lights. Just know that signals and blinkers are the same and driving lights and parking lights are the same. OH!! one last thing, if you break your shit, it's on you! not me!
Step 1: Remove Your bumper lights and unhook them. Set them somewhere safe.
Step 2: Remove your bumper and set it too somewhere safe.
Step 3: Unhook your headlight and unbolt it.
Step 4: You can now get to the wires for the corners and unhook them. Now set the entire light assembly to the side.
Step 6: Take your current corner signal plug and put a 4 ohm resistor in its place. This is so you don't get any hyper blinking by fooling the system into thinking there is a light there. Yes, the resistor will be over powered but since in is not on for long periods of time it should be okay.
Step 6: Take your bumper light harness and zip tie it up to the area where the corner signal used to be. Don't worry, the plug is the same.
Step 7: This isn't necessarily a step, but to explain why you use the bumper light wires for the corner signal is because when the parking lights are off, all the signals flash in time. When the lights are on though, the bumper and corner flash opposite. Since you wont have a bumper signal anymore, the corner will be your only one. This being said, when the parking lights are off, the corner and the rear will flash in time, but when the parking lights are on, the rear and corner flash out of time. Basically, this will ensure the corner signal and the rear signal will always flash in time no matter what.
Step 8: Now that your signals are taken care of, you can move on to the fogs. What you want to do is grab the plug for your corner parking light. There should be 3 wires connected to it. 2 will be the same color and one will differ. Pick your favorite of the 2 same color wires and put a wire tap on it with a foot and a half long piece of wire too. Do the same to the other color. The two wires you added will now be your new bumper light wires. Crimp on a male plug connector to each of the new wires you added. The lights are not polarity sensitive so you can plug the wires into the bumper lights either way.
As of now, both sides of the car should have the same work done. You should have 4 new wires, 2 per side. As i stated, these wires will be for your fogs. If you want the amber look, you can hook everything up, plug it in, put everything back together and admire your work. However if you're like me, and you don't want an amber light and you want an actual fog, you'll have to open up your lights.
Step 9: Preheat your oven to 265*. Set your lights on a cookie sheet and throw them in for no more than 7 minutes.
Step 10: When it beeps, carefully remove the lights and gently tap the lens/housing seam with something semi hard. If your like me, the lens will pretty much pop off. One of them took a bit of pulling but just be careful and it will come apart.
Step 11: once they cool, grab the housing and gently spread the top and bottom apart so the amber lens will come out. Simply pull on it and it will pop out.
Step 12: Run a bead of clear silicone around the housing and push the lens on. Let it cure over night.
Step 13: Now its time for lights. I chose some 1156 sylvania silver stars and they fit perfect. I didn't choose them for output, which isn't any better, but because it gives the fogs a cool blue look when they are turned off. If you want led's then go for it. They would probably look pretty cool. I think any 1156 base will work just fine.
Well now you're done! They are actually pretty bright and provide a good bit of extra visibility. Like i said, ill post a vid of everything tomorrow so you can see what they look like. Good luck and feel free to ask questions. If this has been done before... then oops haha. I searched the diy's and didn't find anything so i figured its a first. Heres the videos i made today. Sorry about the bad quality, my phone does the lights no justice. They are way less yellow and a bit brighter in person. Also, sorry about my bad video skills. I hate being on camera. Without further delay, here are the vids:
http://www.youtube.com/watch?v=KKjnZ...45AUAAAAAAAAAA
Of course the other one doesn't want to upload right but hopefully ill get it fixes and uploaded soon.


 )Mine light up the road pretty nicely and doesnt blind people because they are aimed down.


Comment