Before i begin id like to say that all credits go to excaliur02 aka Maury.
This diy is for Acura RSX seats only, will not take responsibilities if you hack your seats up, this diy is pretty
easy if you have the tools and basic knowledge.
Lets begin...assuming you already know how to remove your stock seats and rug
TOOLS:
screw drivers
hammer
chisel
air chisel (optional)
sockets 12, 14
grinder + cutting wheel and grinding wheel
welder (i used a lincoln 125)
dremel (optional but huge help)
First step: Start taking the cushions off the rsx seat (sorry but no pictures of this process, fairly straight
foward, take plenty pictures to refresh your memory later) start with plastics on the side and seat belt buckle and
go from there. Once done you should be left with this...
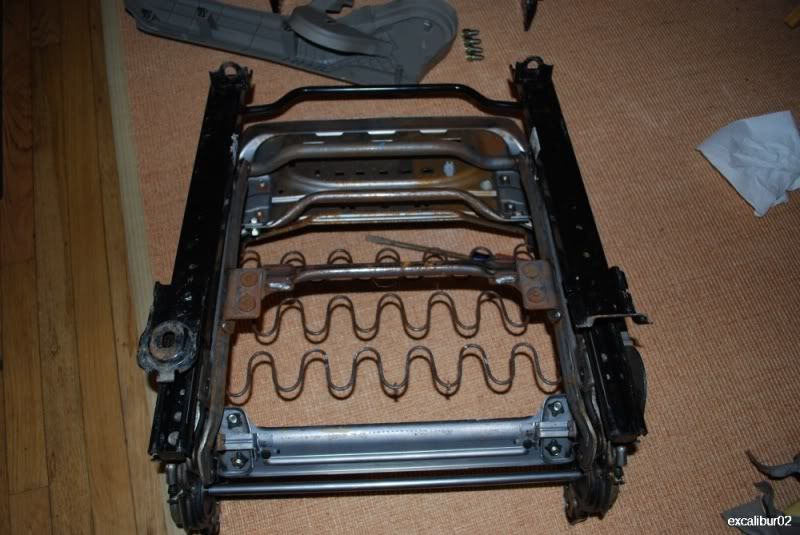
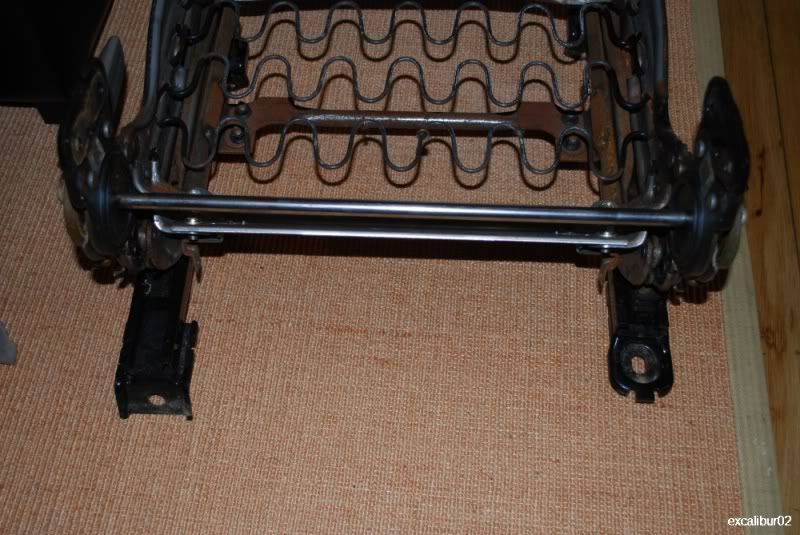
*SIDENOTE* keep you stock cb seat belt buckle, you will need to exchange it with the rsx one
Step two: Removing the mounting points of the bracket, start by using the cutting wheel on the grinder to cut 2 rivets and a spot weld on EACH of the mounting points. This is where the dremel comes in handy, the grinder is a
little too big and you may do more damage on the mounts like that... So, a dremel with its one inch cutting wheel will make work easier BUT you will go through a few discs pretty fast. After rivets are cut off you have a spot weld that can be cut or grinded off from the side
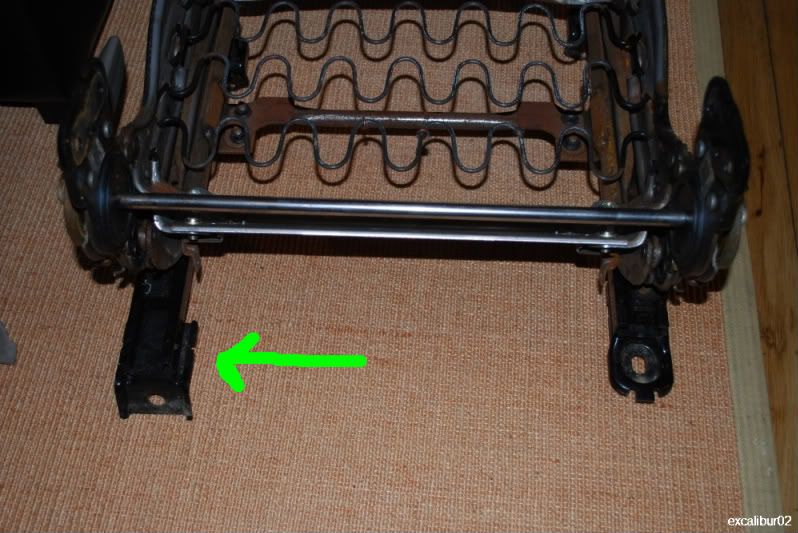
Once rivets and weld are cut off simply grab your chisel or large flat head and hammer it between the mount and rail to seperate them like so...
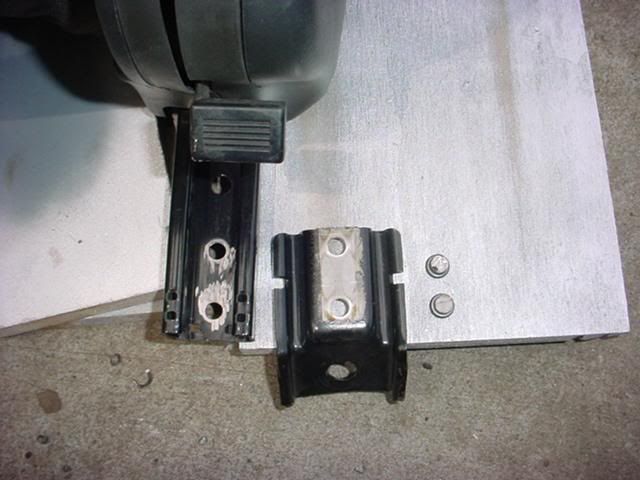
Step three: fiting rails and mounting points, once all 4 mounting points are removed from the rails bolt them on to the car (make sure you have them lined upright and as straight and possible) next you get your rails and make sure that both sides of each rail is lined up with the other...
EXAMPLE, the green dots represent even rails and the red line represents uneven rails
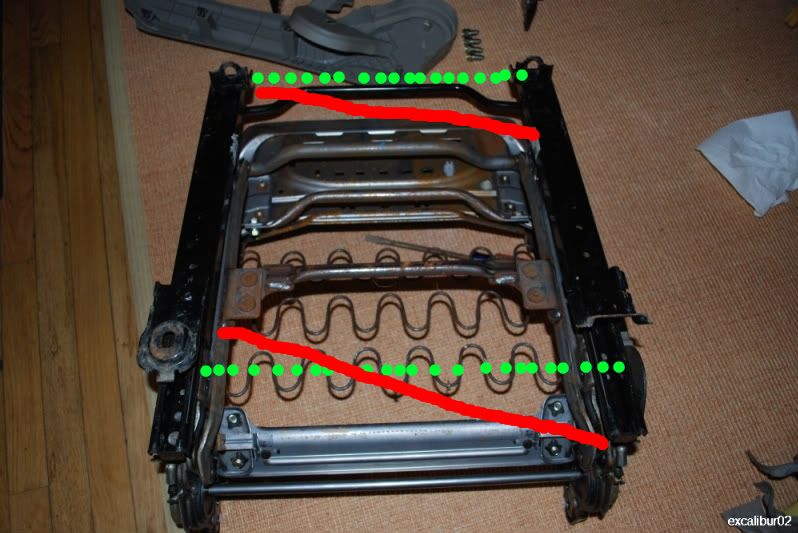
If your tall you may want to mount them as far back as you can so that you may be able to stretch and what not, once desired position is aquired simply tac weld them, then take them out and properly weld them all the way around (or witchever weld method you choose)
OPTIONAL, after the welds cool off you may want to clean up yours welds with grinder and touch it up with some paint....any paint should be fine, this is just so that it looks cleaner
Step four: Put everything back the way you got it and your done....
congratulation
This should be your end result
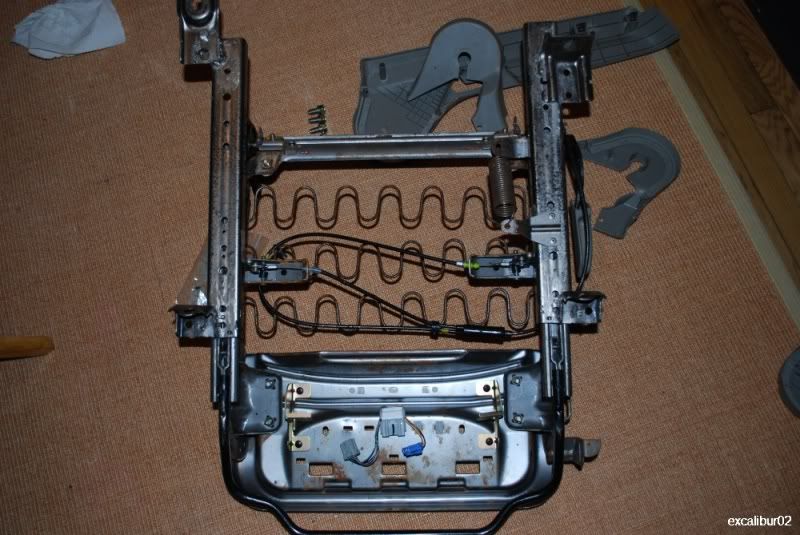
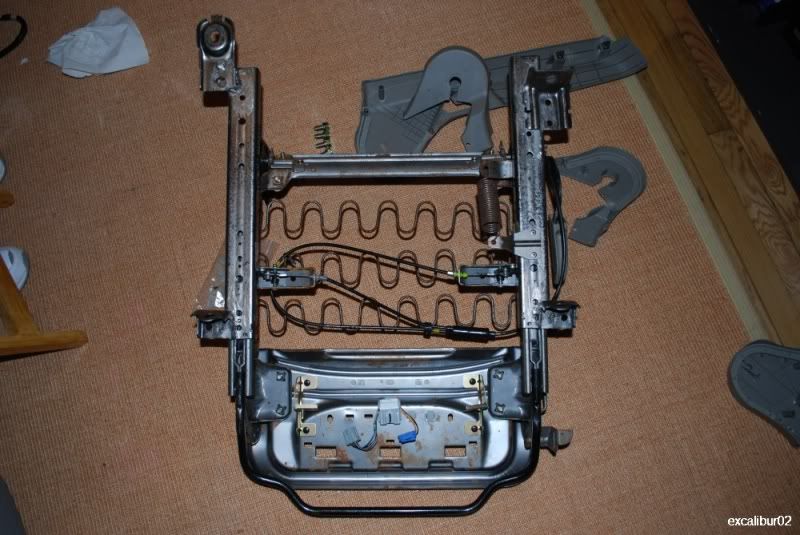
Here is a little comparison
STOCK

modified
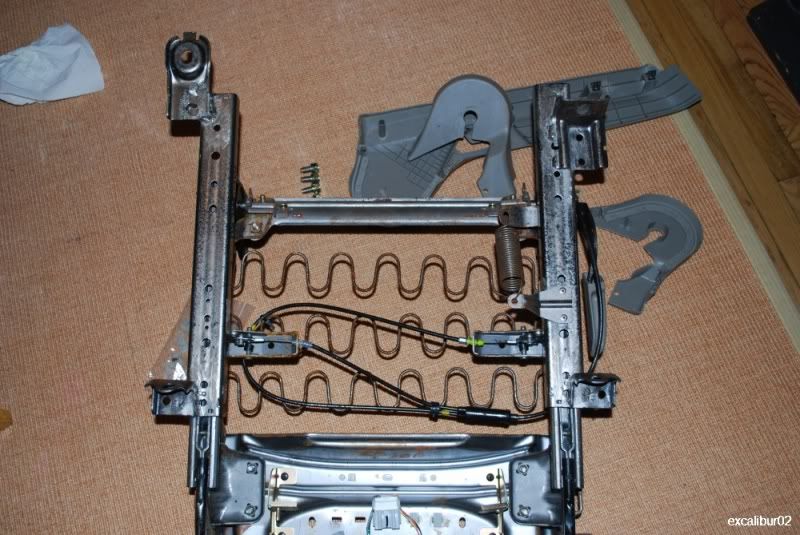
...and how mine came out, fully adjustable, moves front and back, reclines and i can even adjust the height


Thanxs for stopping by, hope this help you guys. If you have any questions just ask....now if you dont mind im going to bed
This diy is for Acura RSX seats only, will not take responsibilities if you hack your seats up, this diy is pretty
easy if you have the tools and basic knowledge.
Lets begin...assuming you already know how to remove your stock seats and rug
TOOLS:
screw drivers
hammer
chisel
air chisel (optional)
sockets 12, 14
grinder + cutting wheel and grinding wheel
welder (i used a lincoln 125)
dremel (optional but huge help)
First step: Start taking the cushions off the rsx seat (sorry but no pictures of this process, fairly straight
foward, take plenty pictures to refresh your memory later) start with plastics on the side and seat belt buckle and
go from there. Once done you should be left with this...


*SIDENOTE* keep you stock cb seat belt buckle, you will need to exchange it with the rsx one
Step two: Removing the mounting points of the bracket, start by using the cutting wheel on the grinder to cut 2 rivets and a spot weld on EACH of the mounting points. This is where the dremel comes in handy, the grinder is a
little too big and you may do more damage on the mounts like that... So, a dremel with its one inch cutting wheel will make work easier BUT you will go through a few discs pretty fast. After rivets are cut off you have a spot weld that can be cut or grinded off from the side

Once rivets and weld are cut off simply grab your chisel or large flat head and hammer it between the mount and rail to seperate them like so...

Step three: fiting rails and mounting points, once all 4 mounting points are removed from the rails bolt them on to the car (make sure you have them lined upright and as straight and possible) next you get your rails and make sure that both sides of each rail is lined up with the other...
EXAMPLE, the green dots represent even rails and the red line represents uneven rails

If your tall you may want to mount them as far back as you can so that you may be able to stretch and what not, once desired position is aquired simply tac weld them, then take them out and properly weld them all the way around (or witchever weld method you choose)
OPTIONAL, after the welds cool off you may want to clean up yours welds with grinder and touch it up with some paint....any paint should be fine, this is just so that it looks cleaner
Step four: Put everything back the way you got it and your done....
congratulation
This should be your end result


Here is a little comparison
STOCK

modified

...and how mine came out, fully adjustable, moves front and back, reclines and i can even adjust the height


Thanxs for stopping by, hope this help you guys. If you have any questions just ask....now if you dont mind im going to bed


 at first i was clueless about the whole process but the second time u explained it i got the idea and i must say its WAY better than cutting ur stock cb rails to weld them on the rsx rails


Comment