
Its about time I add a contribution to CB7Tuner .. I've been wanting to do this for quite awhile now.
I wanted to weld a piece in from underneath originally, but my painter has been nuts busy ...
+ they lost a worker via firing .. Its being resprayed later. I'll be doing the trunk swap to coupe soon ..
anyway .. I did it today, and thought I'd share it with everyone ...
Pull back the panel that allows you to get to the antenna. Disconnect the antenna cable,
along with the antenna harness.
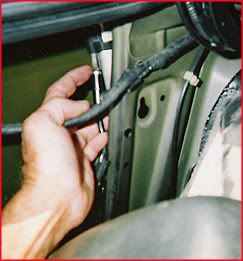

They both *pull-out* .. the antenna cable from the dash pulls down, and a small clip on the harness,
release's the harness connection.
Grab a 10mm socket, ratchet, no need for ext .. (no room neway) and unbolt the bottom bolt .. thats it ..
Well .. it was for me anyhow .. or ummm, was I missing the one ontop? heheh
Ok ok .. I had to *cut* the cable that pushes the antenna up, and recoils when it's let down..
owell .. it was fawked anyhow .. and I'm never puttin another one in.
Besides .. I could'nt figure out how to release, or uhhh .. un-clip the damn thing .. so if anyone knows ..
feel free to *add* that part in for me lol .. But if you're doin this, chances are ..
your antenna motor is fawked like mine, or you're never installing an oem antenna again either ..
So just cut the biotch ..
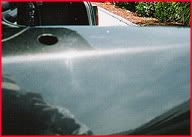
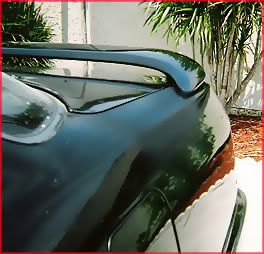
Ok .. the antenna is out .. and everything is disconnected .. yay ..
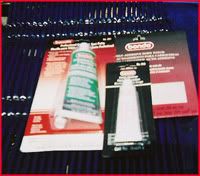
The basic tube of bondo and another of hardner .. couple of nice applicators, I used paper plates for a pallete ..
a few towels, a sanding block, some wet and dry sand paper .. I used anything from 60-220 dry,
and 320-600 wet .. some (and this blew me away) self adhesive mesh/screen.
This *screen* is easily cut by a pair of scissors .. and actually has a nice *tacky* backside, that stuck well
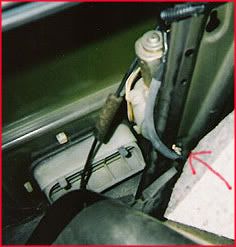
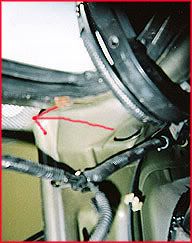
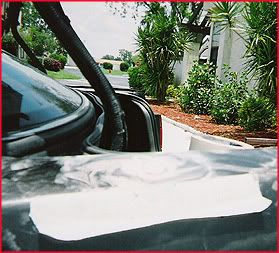
to the underside of the wheel-well. The image below is looking up, from inside of the trunk ..
the antenna hole is shown by the arrow, lightly coated with filler the first time.
I roughed it up a bit with some 60 grit, to make things bond better. I also ran the sandpaper
around the inside of the *lip*. Rough it up as best you can ..
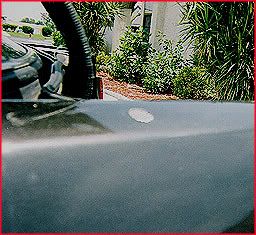
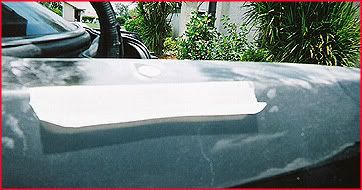
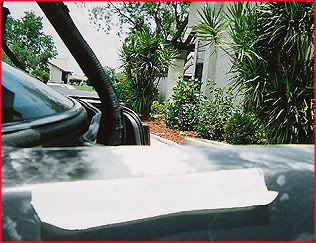
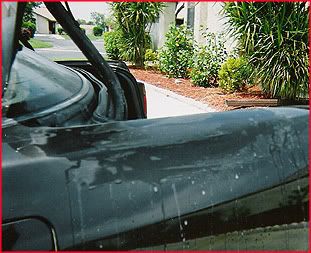
This allowed me to apply a nice even coat of filler over it while working in such a cramped space ..
The self adhesive properties of the screen, along with the two thin coats of filler.. worked out great ..
I also *concaved* the screen *upwards* from underneath .. Just so I could have less filler in *one* place ..
To Be Cont...
Hana Hou ...
Tomi
I wanted to weld a piece in from underneath originally, but my painter has been nuts busy ...
+ they lost a worker via firing .. Its being resprayed later. I'll be doing the trunk swap to coupe soon ..
anyway .. I did it today, and thought I'd share it with everyone ...
Pull back the panel that allows you to get to the antenna. Disconnect the antenna cable,
along with the antenna harness.
They both *pull-out* .. the antenna cable from the dash pulls down, and a small clip on the harness,
release's the harness connection.
Grab a 10mm socket, ratchet, no need for ext .. (no room neway) and unbolt the bottom bolt .. thats it ..
Well .. it was for me anyhow .. or ummm, was I missing the one ontop? heheh
Ok ok .. I had to *cut* the cable that pushes the antenna up, and recoils when it's let down..
owell .. it was fawked anyhow .. and I'm never puttin another one in.
Besides .. I could'nt figure out how to release, or uhhh .. un-clip the damn thing .. so if anyone knows ..
feel free to *add* that part in for me lol ..
But if you're doin this, chances are .. your antenna motor is fawked like mine, or you're never installing an oem antenna again either ..
So just cut the biotch ..
Ok .. the antenna is out .. and everything is disconnected .. yay ..
The basic tube of bondo and another of hardner .. couple of nice applicators, I used paper plates for a pallete ..
a few towels, a sanding block, some wet and dry sand paper .. I used anything from 60-220 dry,
and 320-600 wet .. some (and this blew me away) self adhesive mesh/screen.
This *screen* is easily cut by a pair of scissors .. and actually has a nice *tacky* backside, that stuck well
to the underside of the wheel-well. The image below is looking up, from inside of the trunk ..
the antenna hole is shown by the arrow, lightly coated with filler the first time.
I roughed it up a bit with some 60 grit, to make things bond better. I also ran the sandpaper
around the inside of the *lip*. Rough it up as best you can ..
This allowed me to apply a nice even coat of filler over it while working in such a cramped space ..
The self adhesive properties of the screen, along with the two thin coats of filler.. worked out great ..
I also *concaved* the screen *upwards* from underneath .. Just so I could have less filler in *one* place ..
To Be Cont...
Hana Hou ...
Tomi


 .. lol I just got tired of waiting ..+ I've been wanting to do a DIY

Comment